
The essential steps in the overall process of creating the project are as follows:
1. Choosing a suitable drone platform which can also be referred to as a UAV platform for carrying out the necessary payload. The platforms we aim to use are the Raspberry Pi Camera Module and other advanced sensor models.
2. Programming the Raspberry Pi Camera Module so that it becomes suitable to work with the UAV, ensuring proper connectivity and power supply.
3. Choosing a suitable Mission Planner is a vital part. We are making use of ArduPilot Mission Planner for setting up the flight plan and pattern using the software. All sorts of elements are to be considered like coverage area, altitude, and overlap percentage.
4. It is very important to do a complete coverage of the target area and it is accomplished by the UAV with proper flight mission and capture capacity.
5. With the help of GCP (Ground Control Capacity) we mark certain markers in the target area which makes it useful for capturing the area as per the requirement and using the method of RTK (Real-Time Kinematics) we can achieve the precise coordinates for the referencing.
6. The captured images need to undergo preprocessing, which involves georeferencing, orthorectification, and colour correction.
7. Using the ArduPilot software the photogrammetric process is carried out with the assistance of Structure from Mission (SfM) and Multi-View Stereo (MVS) algorithms. The implementation of these algorithms in the proper manner would help us in obtaining the desired photogrammetric results.
8. From the processed image by the photogrammetry process, creating a 3D point cloud for the image is the first step. The second step is using the Digital Elevation Models (DEMs) for elevating the processed image and the third is the creation of the orthomosaic maps.
9. We must conduct a quality control procedure, including visual inspection and validation against ground truth data.
10. Combining 3D models and maps with geographic information systems (GIS) for spatial analysis, transformation, volume measurement, and other applications.
11. We have completed all the essential steps, however, an optional step that makes the process more advanced is conducting the Building Information Modelling (BIM) integration based on the requirements.
12. The drone can be used for medical aid purposes as well. Its ability to 3D map a certain area would make it more efficient in providing the first aid required during any medical emergency before the concerned authorities arrive.
- Schematic Diagram:
- Video of the drone:
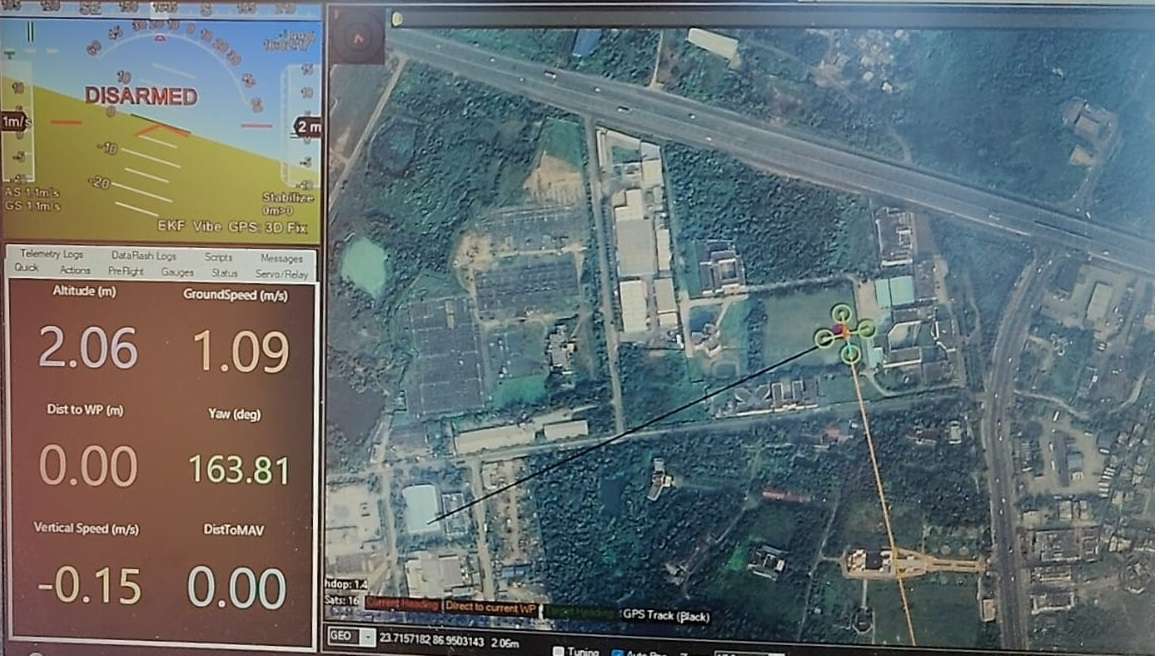
- 3D Mapping process screenshots:
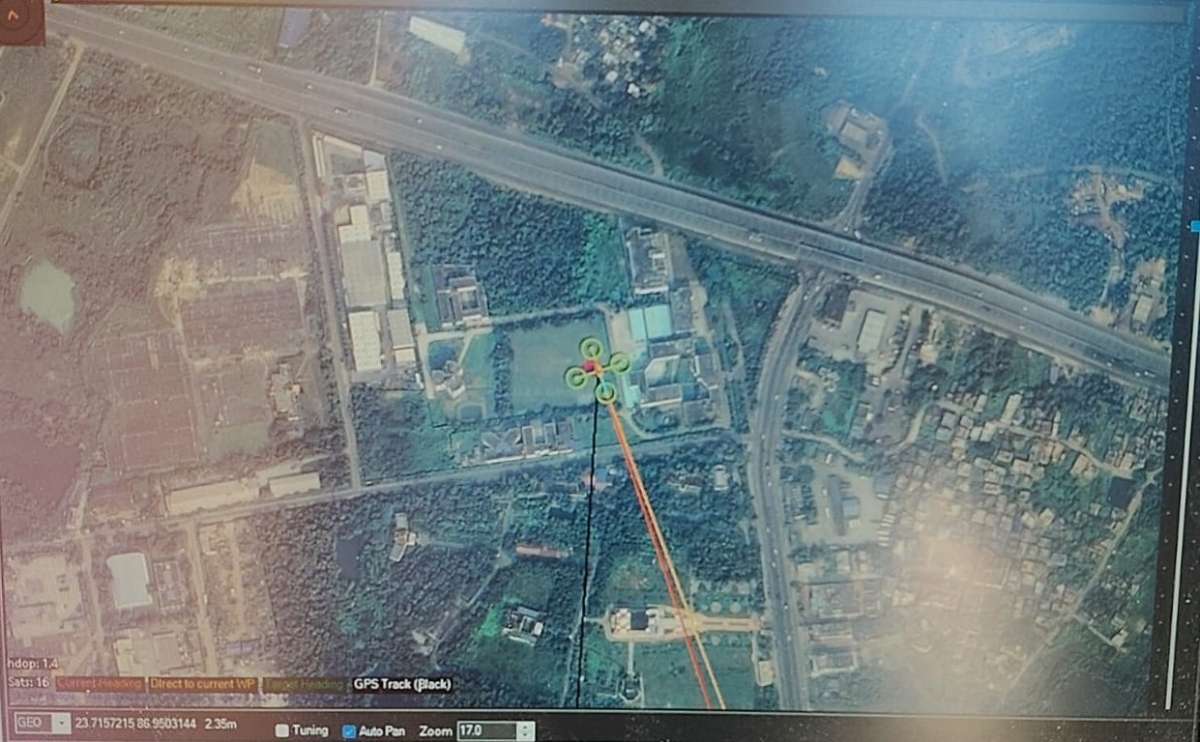
2.
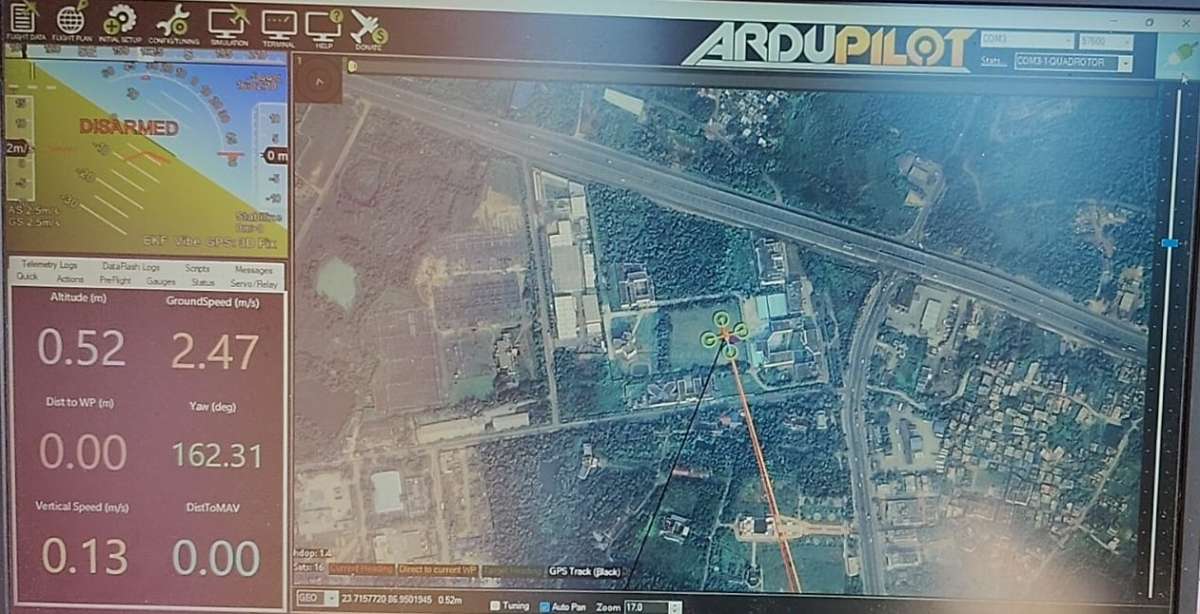
3.
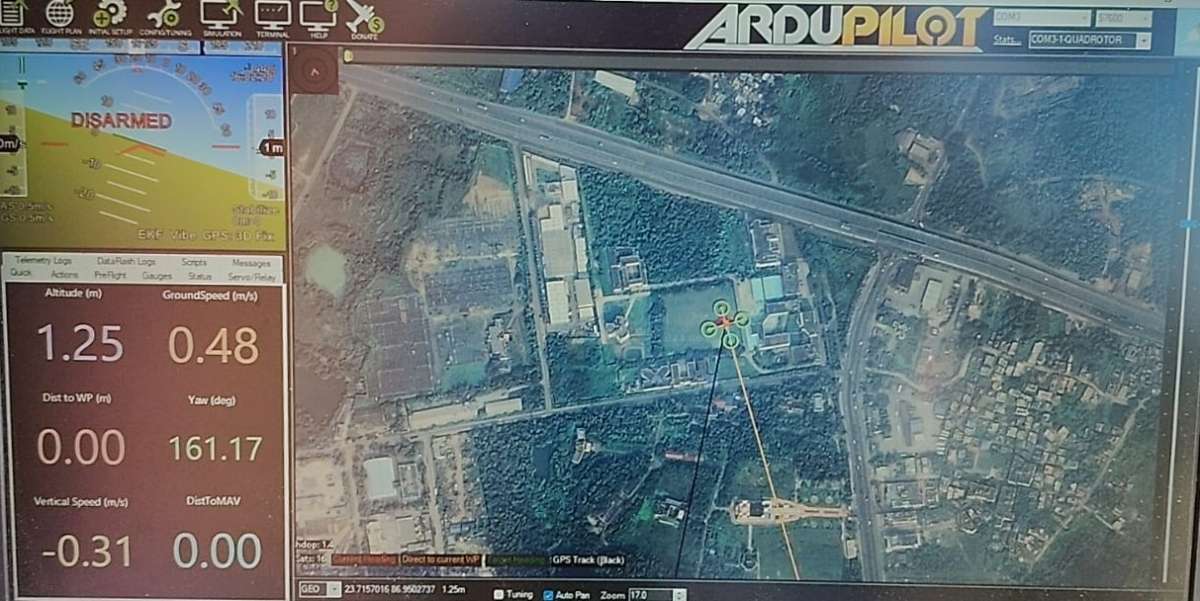
4.
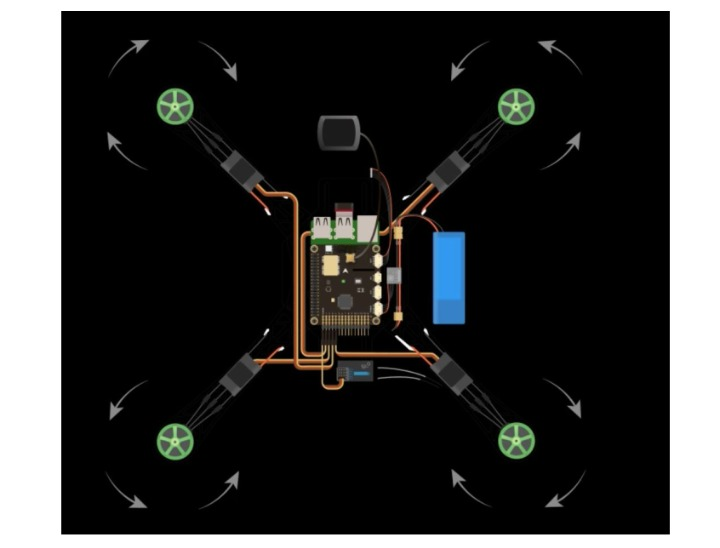
- Photos of drone (Circuitry) :
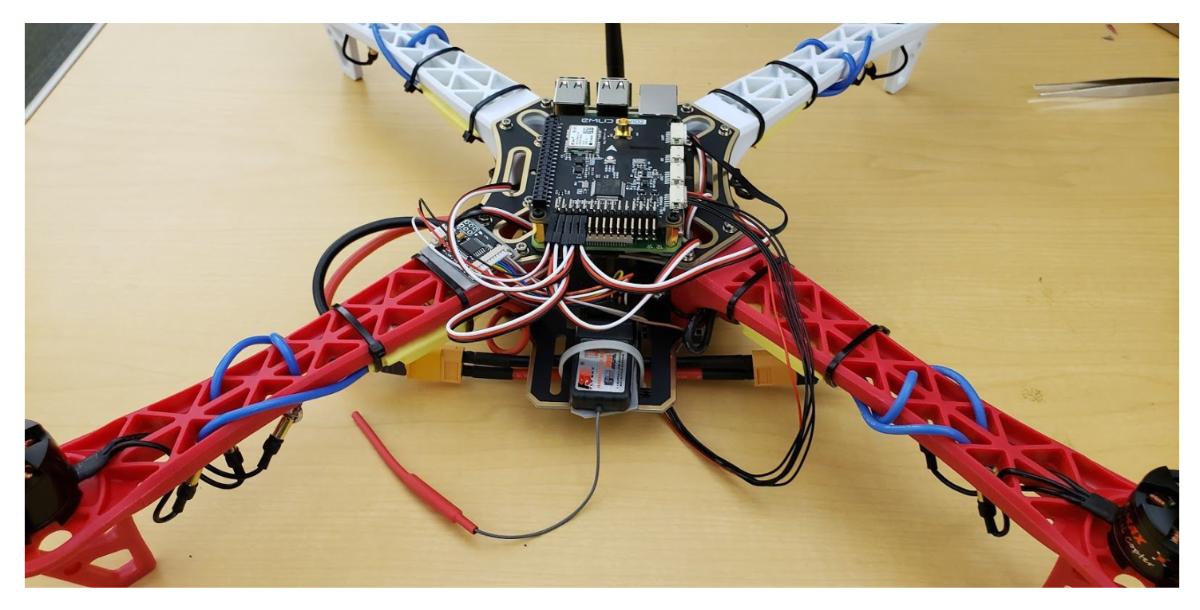
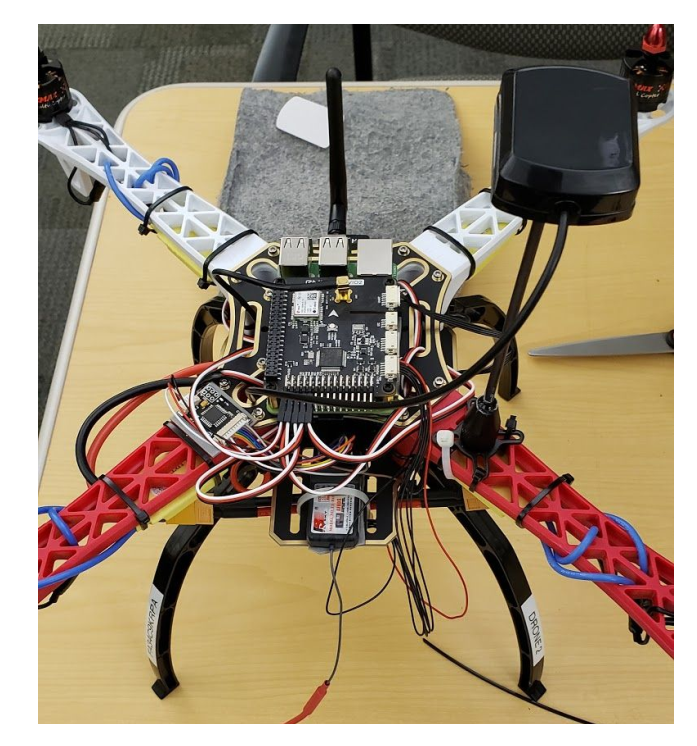
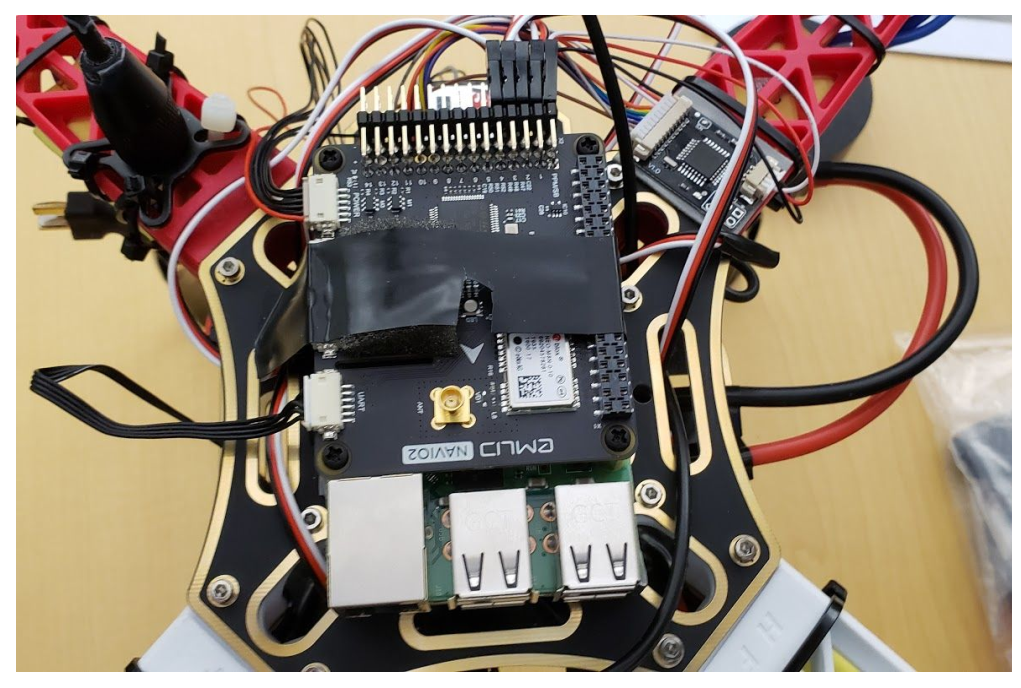
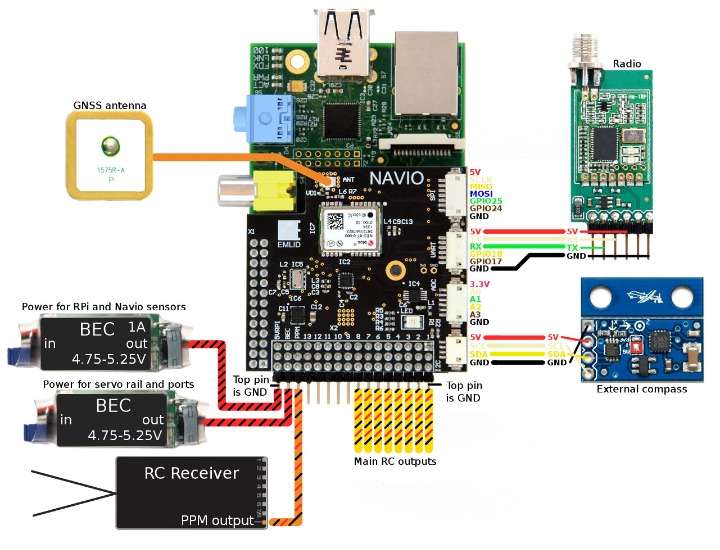
- Circuit Connection:
- Flowchart of the process of 3D Mapping:
The various controls of our mapping process:
1. Operational Controls:
- particular flight course planning the usage of GIS software.
- placing waypoints with specific GPS coordinates.
- regular altitude renovation at some stage in flights.
2. Records collection Controls:
- everyday calibration of UAV sensors.
- making sure 70% frontlap and 60% sidelap for picture overlap.
- accurate georeferencing the use of excessive-precision GPS.
3. Satisfactory manage Measures:
- visual inspection of gathered pictures.
- Validation of 3-D models towards ground reality records the use of GNSS.
- Correcting any recognized mistakes in facts.
4. Data Processing Controls:
- Orthorectification of pics to take away distortions.
- steady coloration correction throughout all photos.
5. Integration and Compliance Controls:
- ensuring the 3-D model is well matched with GIS structures.
- Adhering to privacy and environmental hints.
6. Quantitative analysis Controls:
- Statistical analysis of version accuracy.
- Calculation of RMSE for blunders evaluation.