How to Build the SmartBin:
First to start building the SmartBin, make a cardboard dustbin and a lid for it. Next, fix the lid to a servo motor and make two holes in the middle to fix the ultrasonic sensor. Then fix the servo motor with the lid and ultrasonic sensor to the cardboard box. After fixing the servo motor make two compartments: one compartment for the Arduino Uno, wires, and battery and another one for the waste which will be thrown into it.
.jpg)
.jpg)
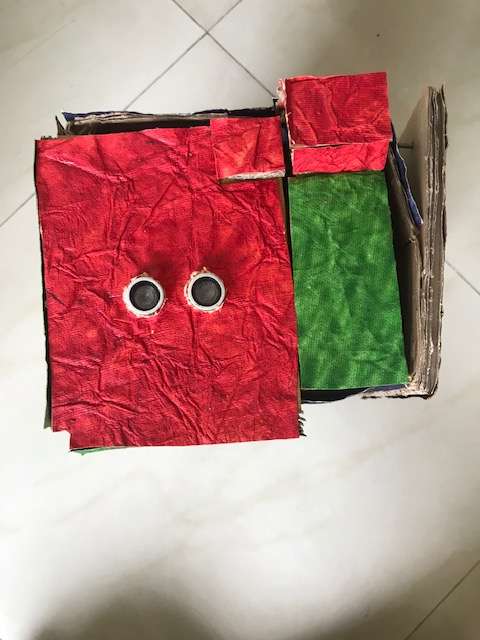
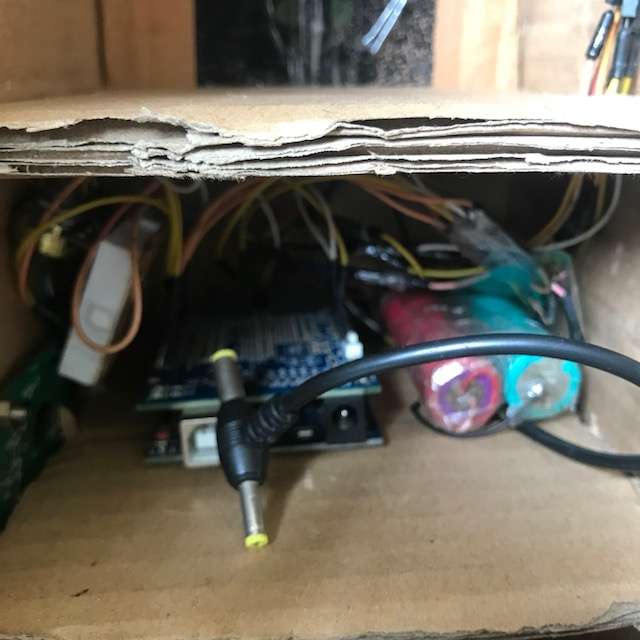
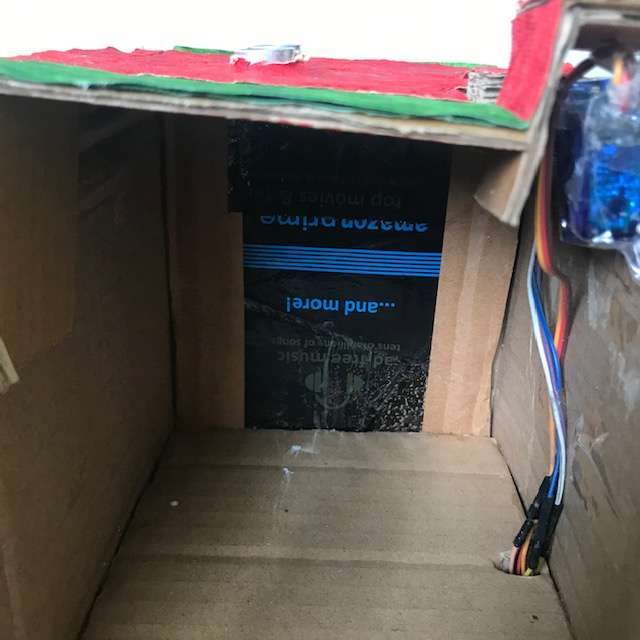
Next make rectangular cut in the middle of the dustbin to fix the Liquid Crystal Display(LCD).
 (1).jpg)
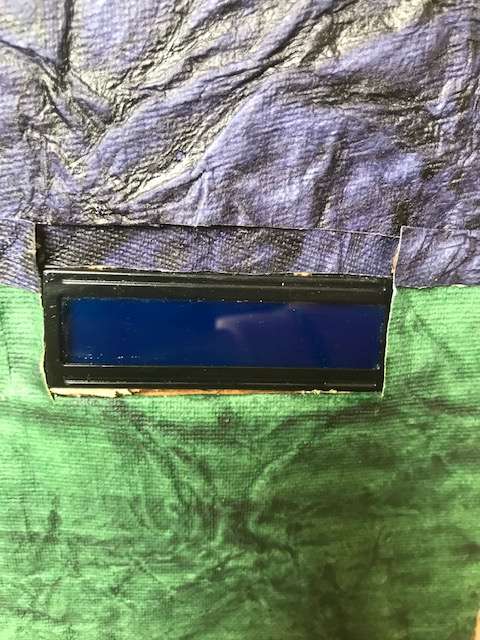
Now connect all the wires of the servo motor, ultrasonic sensor and liquid crystal display to the Arduino Uno according to the given schematics.
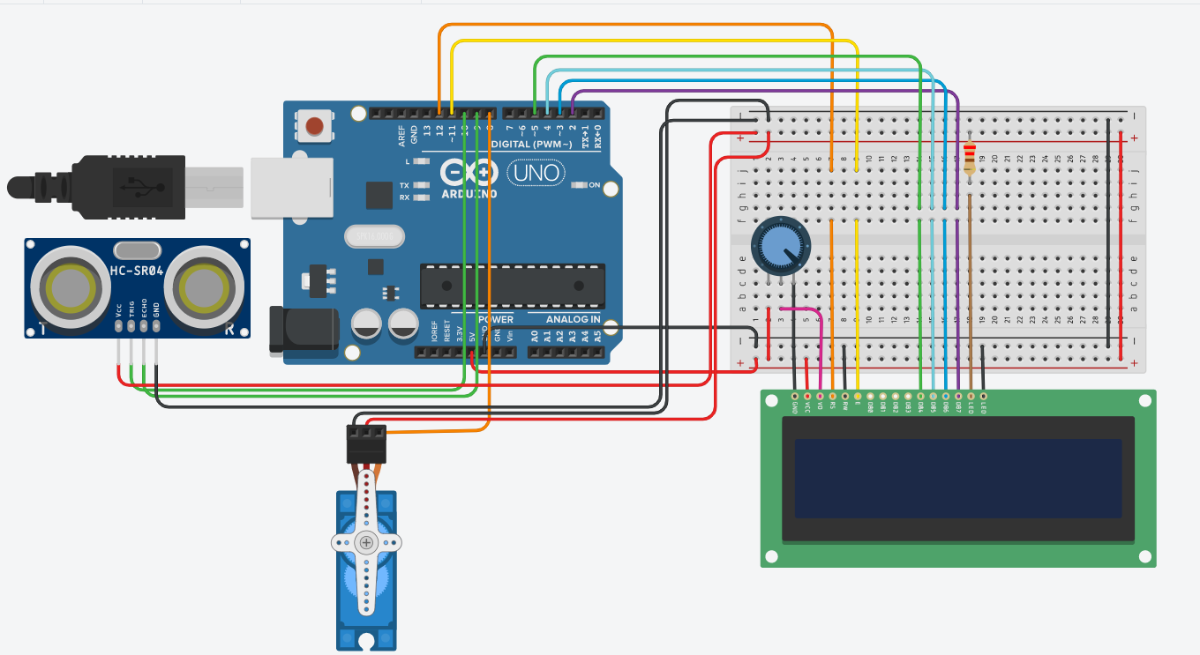
Explanation for the Code:
First include all the libraries required:
#include <Servo.h> //Include the Servo library
#include <LiquidCrystal.h>//Include the Liquid Crystal library
Initialize the library by associating any needed LCD interface pin with the Arduino pin number it is connected to it:
const int rs = 12, en = 11, d4 = 5, d5 = 4, d6 = 3, d7 = 2;
LiquidCrystal lcd(rs, en, d4, d5, d6, d7);
Declare the name of the servo motor and define the trigger pin and echo pin:
Servo servo;
#define trigPin 10
#define echoPin 9
Declare the variables: distance and duration:
float duration, distance;Void Setup:
Set up the LCD's number of columns and rows and start the Serial Monitor:
void setup() {
  Serial.begin (9600);

  lcd.begin(16, 2);
Declare the pin in which the servo motor is attached and define that the 'trigPin' is for output and 'echoPin' is for input:
servo.attach(8); //
pinMode(trigPin, OUTPUT); // Define that the trigPin is for output
pinMode(echoPin, INPUT); // Define that the echoPin is for input
Close the lid of the dustbin:
servo.write(0);Void Loop:
Write a pulse to the HC-SR04's Trigger Pin:
digitalWrite(trigPin, LOW);
delayMicroseconds(2);
digitalWrite(trigPin, HIGH);
delayMicroseconds(10);
digitalWrite(trigPin, LOW);
Measure the response from the HC-SR04 Echo Pin and determine distance from duration. Use 343 meters per second as the speed of sound:
duration = pulseIn(echoPin, HIGH);
distance = (duration / 2) * 0.0343;
Print the distance in the serial monitor:
Serial.println(distance);If the ultrasonic sensor's distance from an object is lesser than 40 cm and greater than 2 cm, open the lid of the dustbin, clear the liquid crystal display's screen and wait for 2.5 seconds. Then, close the lid of the dustbin and wait for 1 second. Finally, print "Thanks For Using" on the LCD screen.
  if (distance <= 40 && distance >= 2) { // Check if the distance is lesser than 20 cm and greater than 2 cm and,
                                         //if yes open the lid of the dustbin and print the message "Thanks For Keeping Our Environment Clean".
    for (pos = 0; pos <= 90; pos += 1) { // goes from 0 degrees to 90 degrees
      // in steps of 1 degree
      servo.write(pos);              // tell servo to go to position in variable 'pos'
      delay(5);                       // waits 5ms for the servo to reach the position
    }
    lcd.clear();
    delay(2500);
    for (pos = 90; pos >= 0; pos -= 1) { // goes from 90 degrees to 0 degrees
      // in steps of 1 degree
      servo.write(pos);              // tell servo to go to position in variable 'pos'
      delay(5);                       // waits 5ms for the servo to reach the position
    }
    delay(1000);
    lcd.print("Thanks For Using");
    delay(1000);
    lcd.clear();
  }
Else close the lid of the dustbin. Print "Safely Dispose" on the first line and print "Your Waste" in the second line. Write a delay for accuracy of the ultrasonic sensor at the end of the void loop statement.
else { // Else close the lid of the dustbin
   servo.write(0);
   lcd.print(" Safely Dispose");
   lcd.setCursor(2, 1);
   lcd.print(" Your Waste");
   delay(500);
   lcd.clear();
 }
 delay(200);
Project Completed:
Put a waste cover in the compartment made for the waste to keep the inner parts of the SmartBin clean and to easily dispose the waste. The SmartBin is now ready to use.
Final Result:
This is a prototype of SmartBin.
Upload the following code:

