
Overview
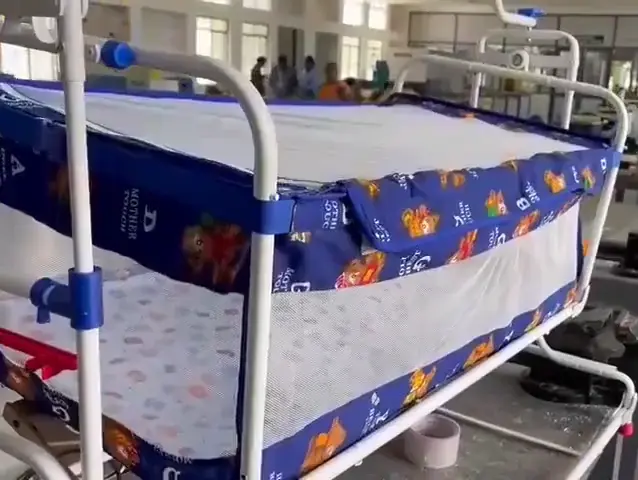
In today's busy world, parents and caregivers face a tough task in caring for their little ones, especially when they're away. We have developed a user-friendly Wi-Fi baby monitoring system as a solution to this problem. It monitors a baby's temperature, movements, and even heart rate in real time using a Raspberry Pi. With its unique automatic swing feature, which swings when the baby's eyes are open and stops when they're closed, it provides even more comfort. It's a complete solution made with our children's safety and wellbeing in mind.
Components
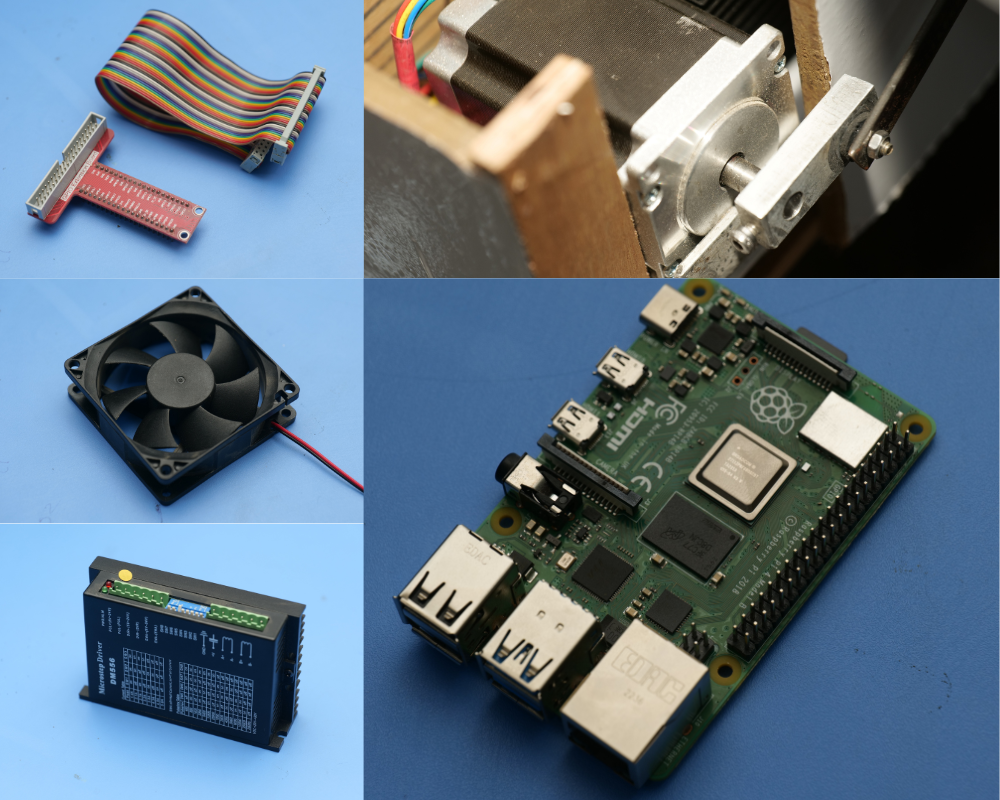
Stepper Motor, Raspberry pi, Ventilation Fan and Motor driver.
Step 1 Circuit design
A schematic circuit is designed in the proteus softaware for the development of the project..png)
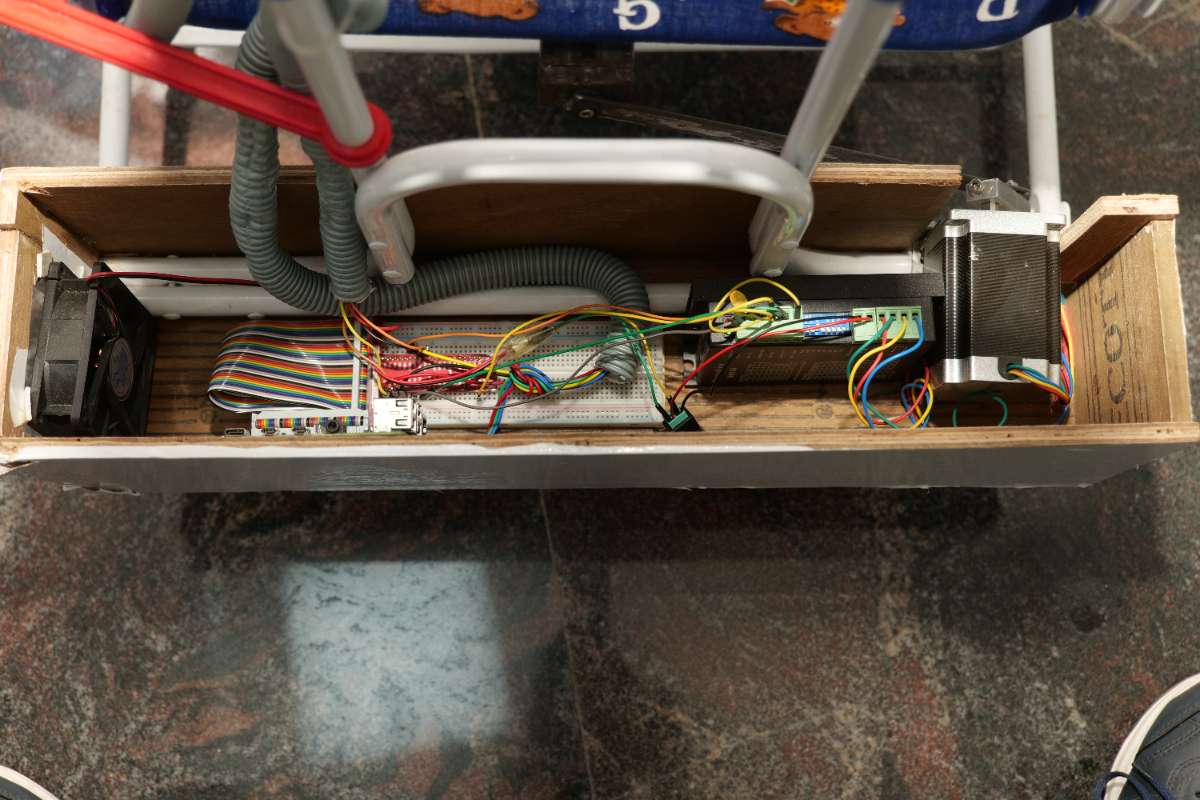
Step 2 - Build Component Compartment
A rectangular wooden box is attached to one side of the cradle. This compartment supports the motor driver and the microprocessor. Additionally, a ventilation fan is included to reduce heat from the microprocessor.
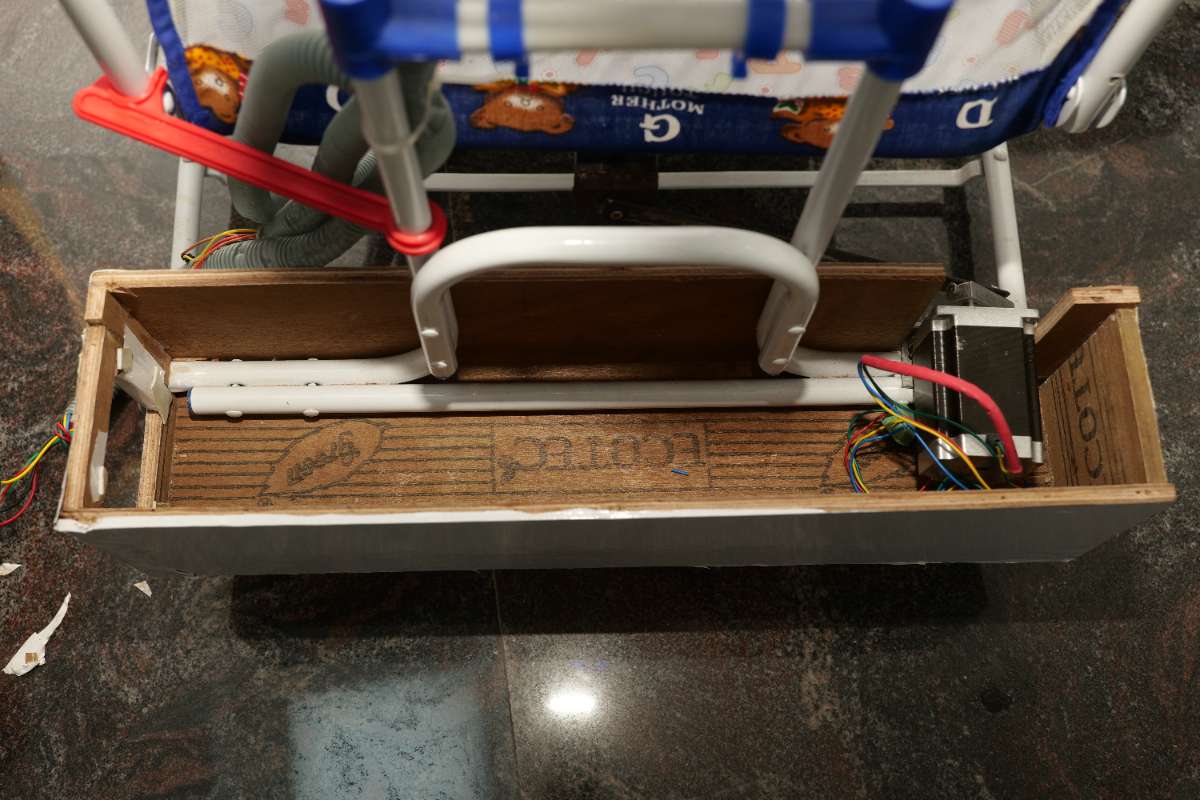
Step 3 - Motor Integration
The stepper motor is connected to the driver, which controls its rotation. A connecting rod-like metal plate is attached to the motor pin, and a similar rod is connected to another longer rod extension attached to the cradle. As the motor pin rotates, it swings the cradle..JPG)
Step 4 - Image Processing and Swing Automation
A O2710 2MP USB camera is integrated with the motor. The motor rotates if the camera recognizes a baby’s open eyes, thereby swinging the cradle. The image processing code is implemented on the Raspberry Pi terminal, which frames the open eyes from the captured picture and triggers the stepper motor's rotation.
def generate_frames():
    flag = 0  # Define flag as a local variable with an initial value
    while True:
        ret, frame = cap.read()
        frame = imutils.resize(frame, width=450)
        gray = cv2.cvtColor(frame, cv2.COLOR_BGR2GRAY)
        subjects = detect(gray, 0)
        for subject in subjects:
            shape = predict(gray, subject)
            shape = face_utils.shape_to_np(shape)
            leftEye = shape[lStart:lEnd]
            rightEye = shape[rStart:rEnd]
            leftEAR = eye_aspect_ratio(leftEye)
            rightEAR = eye_aspect_ratio(rightEye)
            ear = (leftEAR + rightEAR) / 2.0
            leftEyeHull = cv2.convexHull(leftEye)
            rightEyeHull = cv2.convexHull(rightEye)
            cv2.drawContours(frame, [leftEyeHull], -1, (0, 255, 0), 1)
            cv2.drawContours(frame, [rightEyeHull], -1, (0, 255, 0), 1)

b'Content-Type: image/jpeg\r\n\r\n' + frame_bytes + b'\r\n')
Step 5 - Sensor Integration
The system comprises a DHT11 sensor for environment temperature and humidity, an LM35 sensor for the baby’s temperature, and a heart rate sensor. These sensors are connected to the Raspberry Pi 4+, which reads the data and sends it to the microprocessor. The data from the sensors are analyzed to detect any significant changes in the baby’s environment.
def eye_aspect_ratio(eye):
    A = distance.euclidean(eye[1], eye[5])
    B = distance.euclidean(eye[2], eye[4])
    C = distance.euclidean(eye[0], eye[3])
    ear = (A + B) / (2.0 * C)
    return ear


(lStart, lEnd) = face_utils.FACIAL_LANDMARKS_68_IDXS["left_eye"]
(rStart, rEnd) = face_utils.FACIAL_LANDMARKS_68_IDXS["right_eye"]
cap = cv2.VideoCapture(0)
flag = 0


 Create an SMBus object
bus = smbus.SMBus(1)  # 1 indicates /dev/i2c-1, which is the I2C bus on Raspberry Pi 4

app = Flask(__name__)

# Function to read temperature from the MLX90614 sensor
def read_temperature():
    data = bus.read_i2c_block_data(MLX90614_I2C_ADDR, 0x07, 3)
    raw_temp = (data[1] << 8) | data[1]
    temperature = ((raw_temp * 0.02) - 273.15)+5
    return temperature

# Initialize variables for the Pulse Sensor
pulse_count = 0
last_beat_time = 0
pulse_rate = 0
BPM = 0

# Function to handle a pulse interrupt
def on_pulse(channel):
    global pulse_count, last_beat_time, pulse_rate, BPM
    pulse_count += 1
    now = time.time()
    if now - last_beat_time > 0.2:  # Calculate pulse rate and BPM every 0.2 seconds
        pulse_rate = pulse_count / (now - last_beat_time)
        BPM = pulse_rate * 60
        pulse_count = 0
        last_beat_time = now

# Add event detection to the Pulse Sensor pin
GPIO.add_event_detect(PULSE_SENSOR_PIN, GPIO.RISING, callback=on_pulse)
Step 6 - Data Transmission
The processed data, including environmental readings, image processing results, and video feed, are transmitted using a Wi-Fi module to the web dashboard.
.datas{
    display: flex;
    flex-wrap: wrap;
    align-items: center;
    justify-content: center;
    margin: 20px;
    padding: 10px 20px;
}

.datas .datas1{
    width: 300px;
    display: flex;
    align-items: center;
    justify-content: center;
    flex-direction: column;
    border: 2px solid rgb(241, 32, 123);
    border-radius: 30px;
    height: auto;
    margin: 10px;
}

.datas1 .values{
    padding-bottom: 10px;
    font-size: 25px;
}

.footer{
    background: #fdbbf2;
    padding: 20px;

}
Step 7 -Audio Processing Integration with Raspberry Pi
The ISD1820 Sound/Voice Board Recording Module records the baby's cries and sends them to the microprocessor. A deep learning model is used to analyze why the baby is crying, such as for burping, belly pain, hunger, or discomfort.
def get_files(directory):
    if not os.path.exists(directory):
        return 0
    count = 0
    # crawls inside folders
    for current_path, dirs, files in os.walk(directory):
        for dr in dirs:
            count += len(glob.glob(os.path.join(current_path, dr + "/*")))
    return count


 train file image count
train_samples = get_files(train_dir)
# to get tags
num_classes = len(glob.glob(train_dir + "/*"))
# test file image count
val_samples = get_files(val_dir)
test_samples = get_files(test_dir)
print(num_classes, "Classes")
print(train_samples, "Train images")
print(val_samples, "Val images")
print(test_samples, "Test images")
train_datagen = ImageDataGenerator(
    rescale=1. / 255,

)
test_datagen = ImageDataGenerator(rescale=1. / 255)
val_datagen = ImageDataGenerator(
    rescale=1. / 255,
    shear_range=0.2,
    zoom_range=0.2,
    horizontal_flip=True
)
input_shape = (224, 224, 3)
train_generator = train_datagen.flow_from_directory(train_dir, target_size=(224, 224), batch_size=32)

test_generator = test_datagen.flow_from_directory(test_dir, shuffle=True, target_size=(224, 224), batch_size=32)
val_generator = val_datagen.flow_from_directory(val_dir, target_size=(224, 224), batch_size=32)


print('Test loss:', score[0])
print('Test accuracy:', score[1])

predictions = model.predict(test_generator)
predicted_classes = np.argmax(predictions, axis=1)
true_classes = test_generator.classes
class_labels = list(test_generator.class_indices.keys())
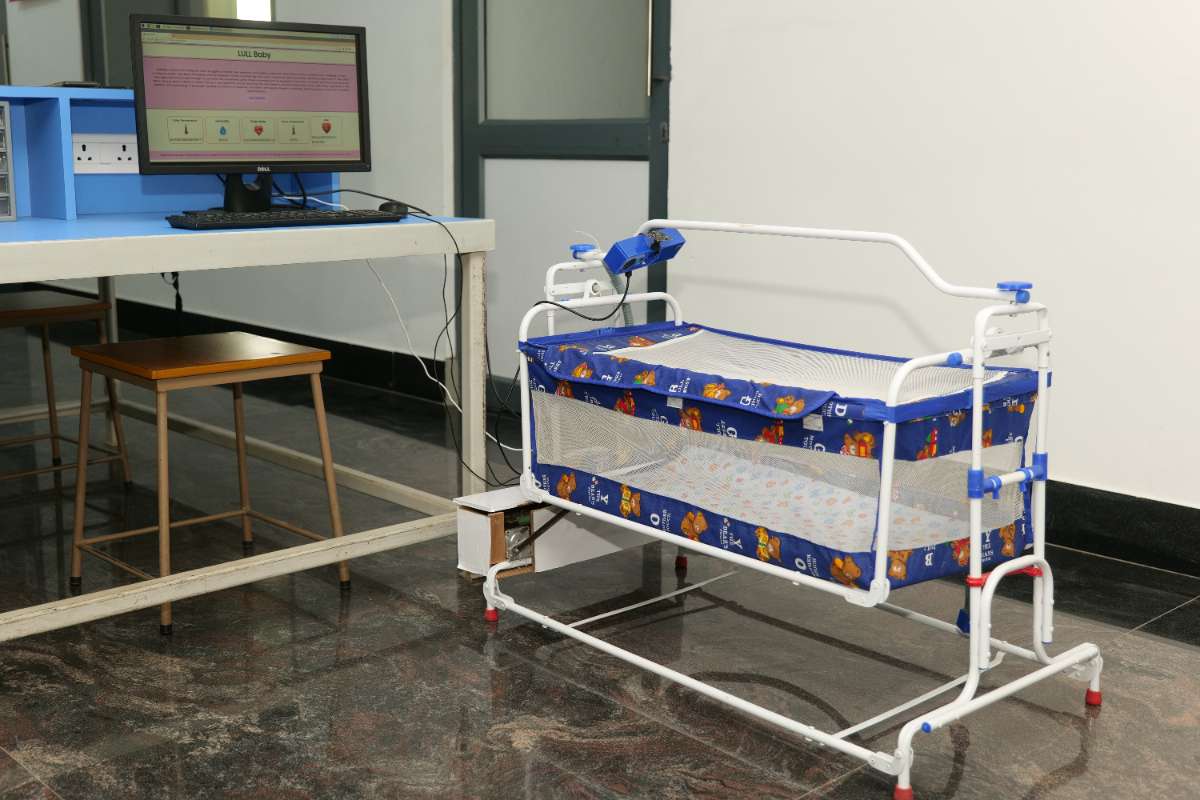
Step 8 - Web Dashboard Building
The key metrics to be displayed on the web dashboard include temperature in Celsius, BPM (heart rate), and sensor data along with the video feed from the camera. A wireframe of the dashboard is created, and the layout for data display is developed using HTML, CSS, and JavaScript. API endpoints are developed to fetch sensor data using Flask, and the data is fetched from the backend to the console.
Step 9 - Component Assembly
The stepper motor, driver, and ventilation fan are connected to a power supply with a 12V adapter. Once everything is connected, the housing is closed. Connect the Raspberry Pi 4+ to a monitor, keyboard, and mouse to implement the system.