
Step 1: Basic Circuit Designing
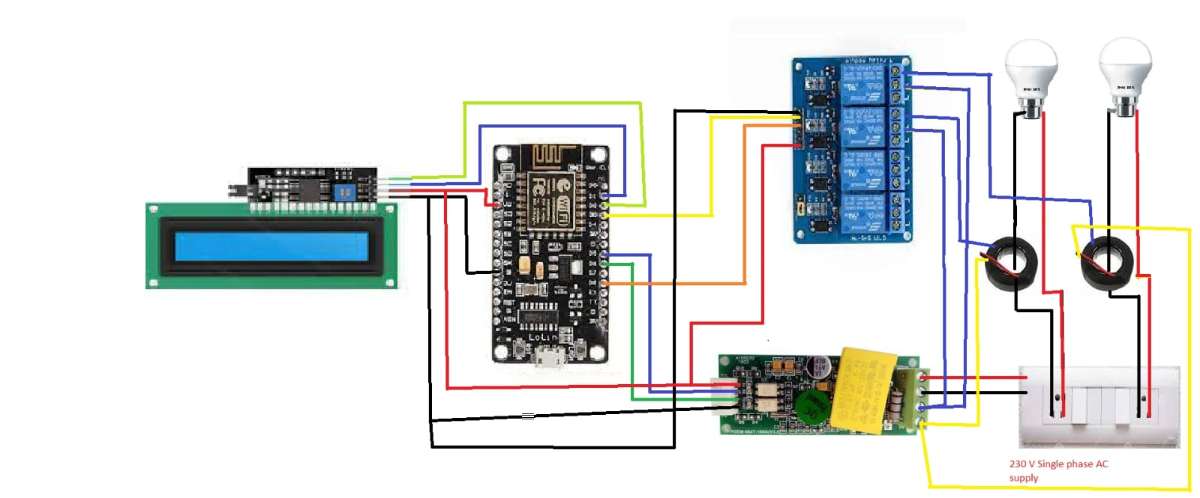
The first step in building a basic power meter is acquiring the voltage readings, so the use of power adapters as voltage transformer in order to calculate the power in the ESP 8266 microcontroller, connect the ESP 8266 with the LCD display and PZEM -004T module. The PZEM module is use to measure all the necessary reading which is required in an energy meter i.e. voltage, current, power, energy etc. through jumper wires. The power to operate the ESP is coming through the power adapter.
1.png)
Step 2: Final Connection and Storing Data on Cloud
After successfully implementing all the basic modules we moved further towards the final implementation of the Smart Energy Meter and Management System. In this Stage, we added additional hardware components viz., switches, Relay Board and basic home appliances, and store the data in cloud.
The relay module is use to control the appliances and also used in display the reading of the individual appliances.
After all the connections the data which is generated is store in ThingSpeak Cloud. The data can also view from the Blynk App in mobile and can also control through it.
Step 3:Integrating the Python code with the ThingSpeak Cloud
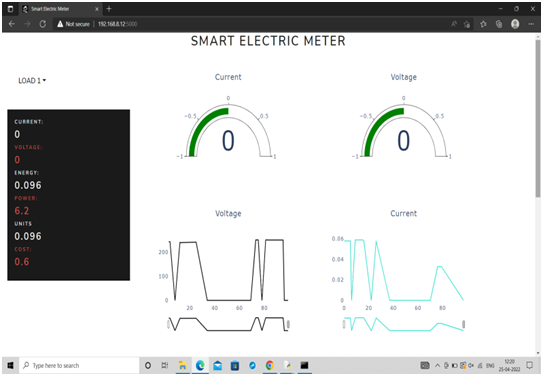
We have created a web based dashboard using python, and a module named plotly dash, which is used to create the dashboard. In which the file data.py is used to get data from the ThingSpeak cloud to the code, result.py file to create various charts and graphs that is displayed in the dashboard, and dash.py file to define the whole structure of the dashboard.
.jpeg)

Step 4: Final Model
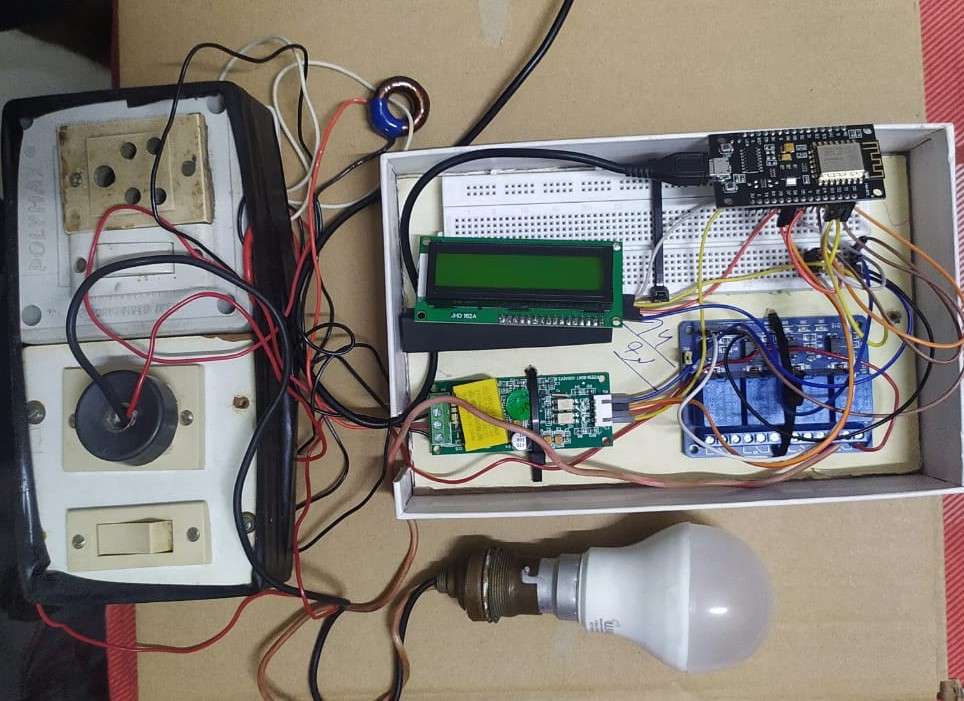
.png)