
INTRODUCTION:
A robotic arm, sometimes referred to as an industrial robot, is often described as a mechanical arm. A robotic arm is a robotic manipulator, usually programmable, with similar functions to a human arm; the arm can be the sum of the whole mechanism or it can be part of a more complex robot. In general, the total degree of freedom of a robotic arm is like a human arm. Similar to a human arm, a robotic arm has a shoulder, wrist, elbow, and hand. It can be used to automate the process of placing goods or products on pallets.
APPLICATION:
Robotic arms can be used for all kinds of industrial manufacturing, processing and manufacturing roles – in fact, any task that requires extremely precise, fast and repeatable movements. Typical applications of industrial robotic arms are welding, painting, assembly, PCB picking, packaging, labeling, palletizing, product inspection and testing. They also have the ability to assist in material handling and provide interfaces.
Circuit connections:
.png)
Method to do the project:
- In this project we used mg995 servo motors for the base, arm and elbow axes, we assembled the arm.
we attached the servo to the main part and adjusted it using m4 screws and nuts as the transmission axis. - They can follow the order of bolts and nuts.
- To finish it off we used a glue gun to fix it.
- we connect the claw to the wrist and finally connect the arm to the forearm.
- In electronics we use a Bluetooth module (HC 05), 1k and 2k resistor, Arduino and breadboard to control the arm.
- we connected to all external ports and supplied 5 volts externally. and we used a 5 volt 3.8 amp cell phone transformer to control the arm.
- We set up the code and downloaded the library as the Arduino ide defaults and developed the MIT app to improve the design.
- we set up the application and open it.
- we have the top button to connect the app with the Bluetooth module.
- finally we set the direction and control the arm.
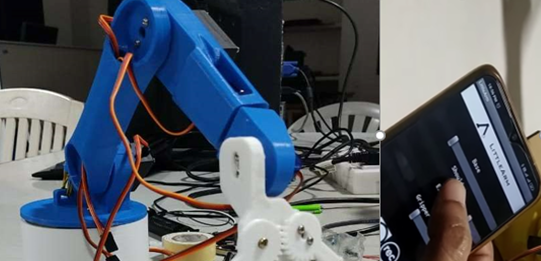
Image of the end hardware:
Video of the end hardware:
https://howtomechatronics.com/tutorials/arduino/diy-arduino-robot-arm-with-smartphone-control/