A. Working with Google Spreadsheet
Before starting with the hardware modules, first we will create the Google speadsheet to record the production material asset. Below are the steps to create and configure the Google speadsheet for this Production Material Asset Tracking System:
Step 1: Creating a new sheet:
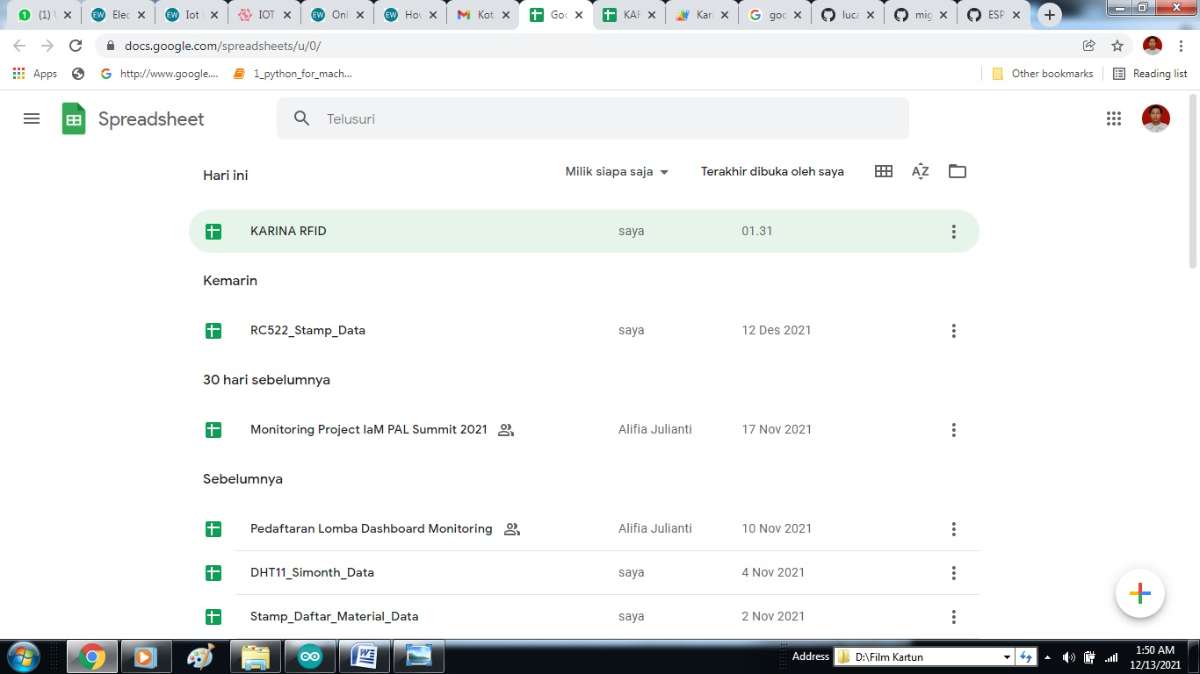
First login to Gmail with your Google account credentials and then select for Google spreadsheet there and opt to “Start a new spreadsheet”.
Step 2: Rename the sheet
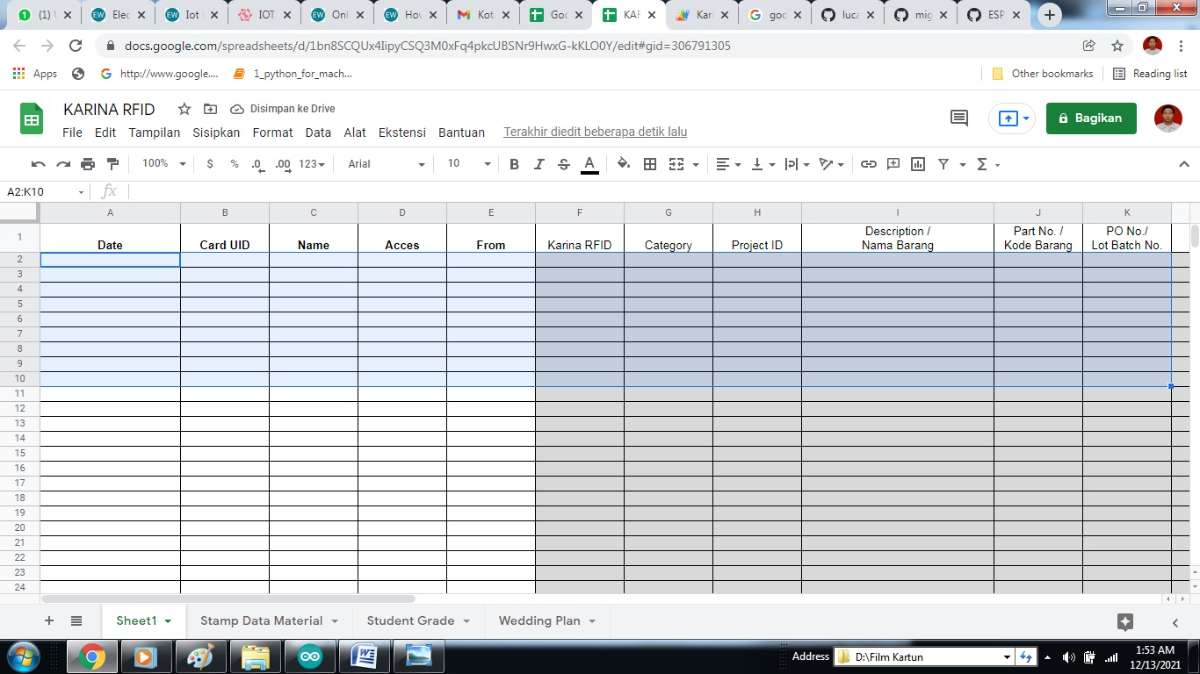
Rename the blank sheet to any name of your choice. In my case, it is KARINA RFID. Then create columns in the sheet for Date, Card UID, Name, Acces, From and etc.
Step 3:
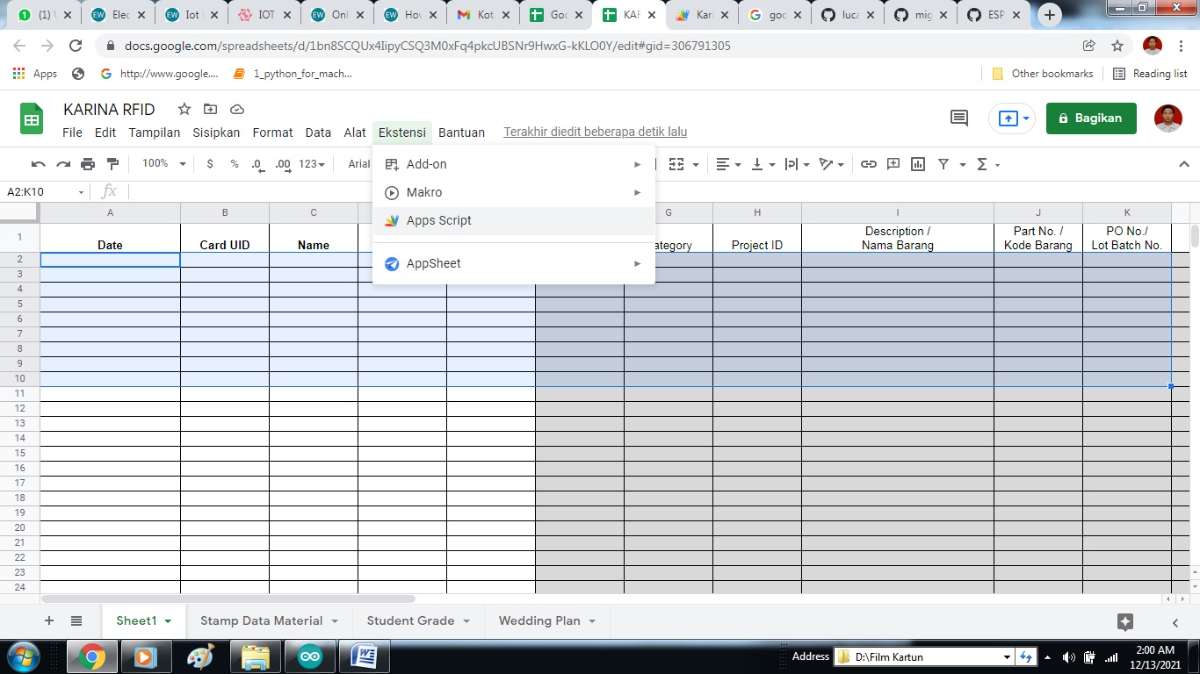
Now go to Ekstensi and click on the option “Apps Script” where we will write functions to insert data into the sheet.
Step 4:
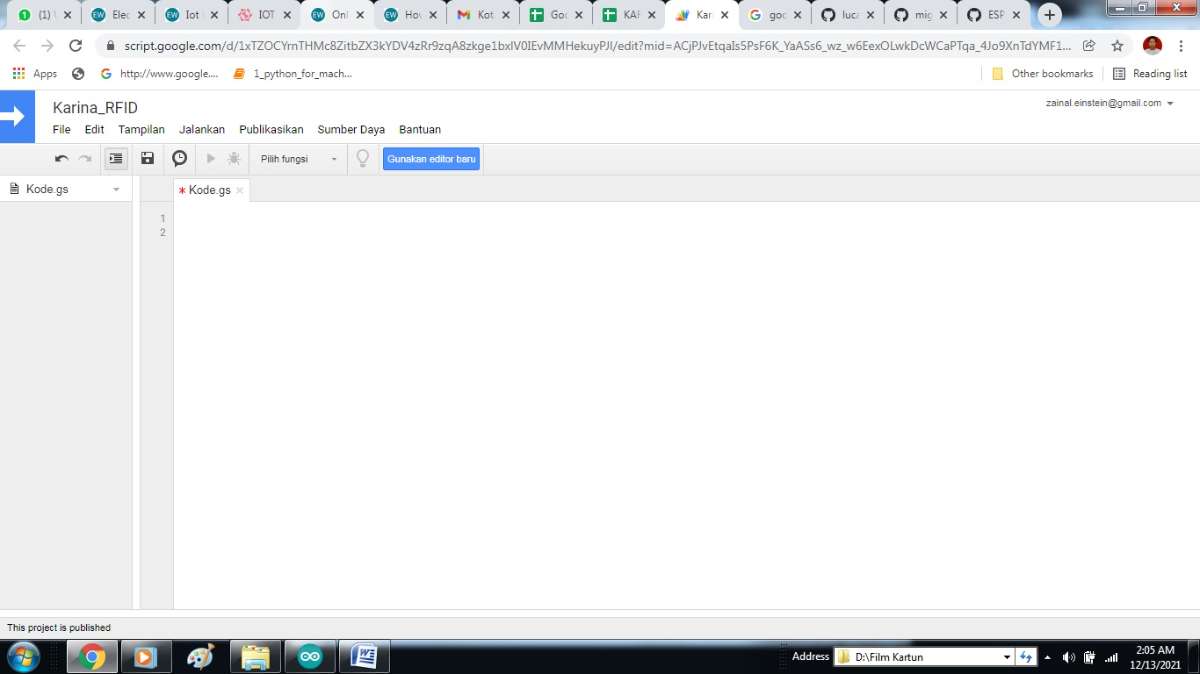
The new Google Script is created with default name “Untitled project”. You can rename this Google Script File to any name of your choice. In my Case, I have renamed it to “KARINA_RFID”.
Step 5:
Now download and paste the Google script code given below and replace the Sheet ID in place of the variable sheet_id in the code.
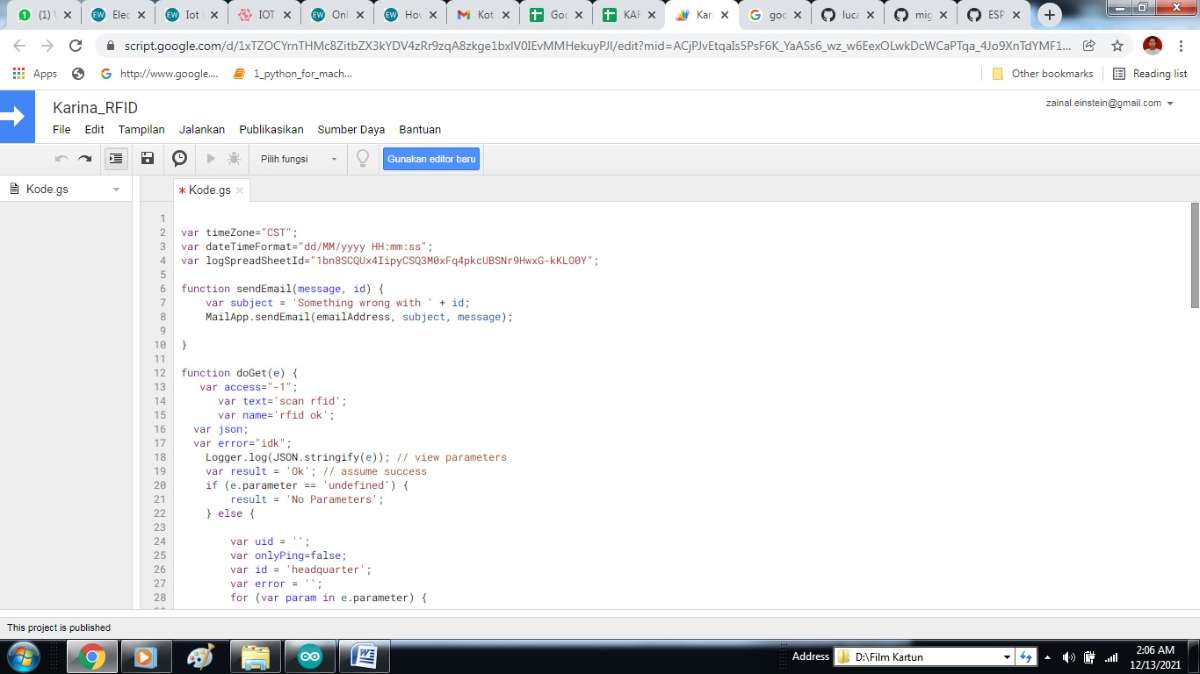
You can get the Sheet ID from the Sheet URL just like shown below:
https://script.google.com/d/1xTZOCYrnTHMc8ZitbZX3kYDV4zRr9zqA8zkge1bxlV0IEvMMHekuyPJl/edit?mid=ACjPJvEtqaIs5PsF6K_YaASs6_wz_w6EexOLwkDcWCaPTqa_4Jo9XnTdYMF1skBxZMPBB5WXx2xAPWplVgliVIulF8BOTJxLfEN-3-AFV8zaCkxST7xZZGc_ABQz03vLul0saM6hneQmGCY&uiv=2.
B. Getting Google Script ID
1. Go to Publikasikan and select “Terapkan sebagai aplikasi web”.
.jpg)
2. Select the “Project version” as “New”. Select “email id” in the “Execute the app as” field. Choose “Anyone, even anonymous” in the “Who has access to the app” field. And then Click on “Deploy”.
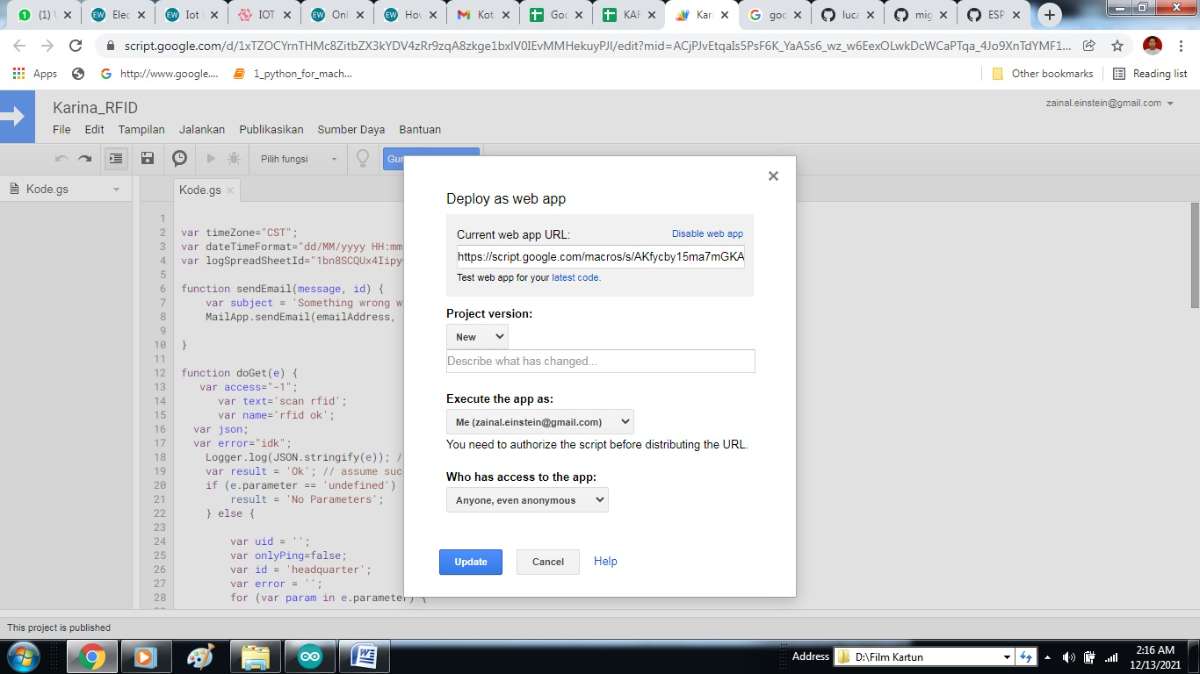
3. In the next step, provide all the required permissions. Now you can see a new screen with a given link and named as “Current web app URL”. This URL contains Google Script ID. Just copy the URL and save it in notepad for future use.
C. IoT based Passive RFID for Production Material Asset Tracking System Circuit Diagram
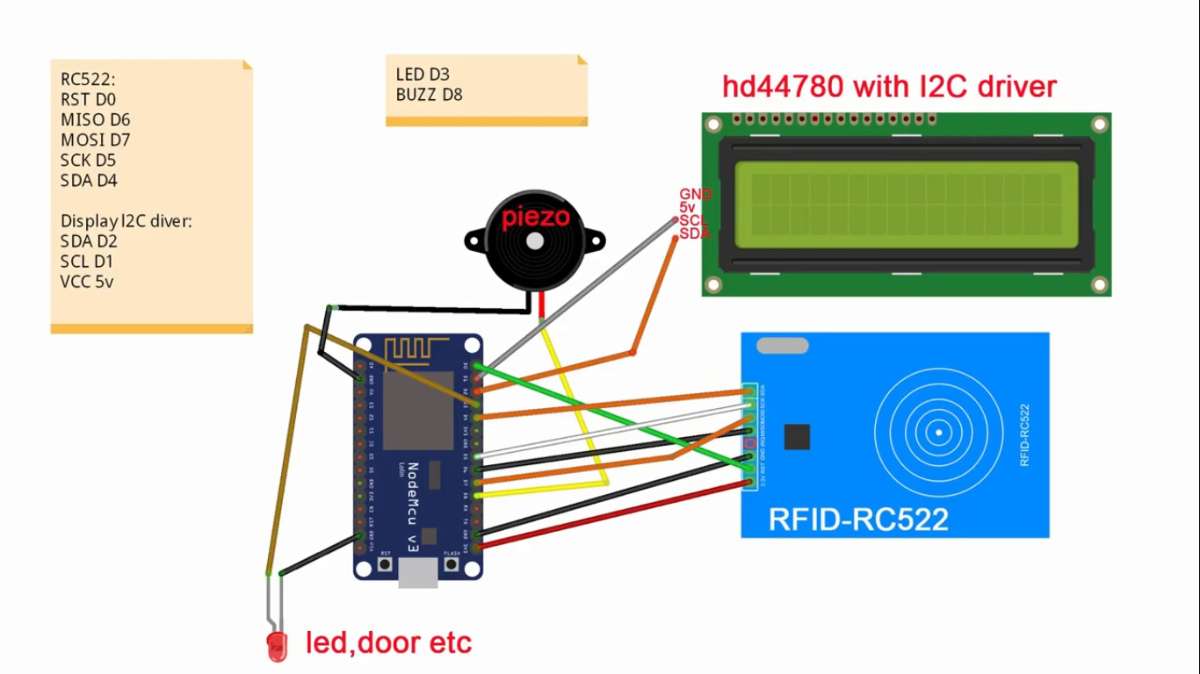
Circuit diagram for passive rfid tracking system over IoT is given below:
D. Programming NodeMCU to send Production Material Asset Data to Google Spreadsheet
Here we will program the NodeMCU to sync with Google sheet using the device ID and send the data to Google sheets using Google script. The complete program for this is given in the bottom of this article and the step wise explanation is given here.
Before proceeding with the program make sure you have already installed the required board details in your Arduino IDE using board manager to program an ESP8266 NodeMCU. After that, install the following libraries using Sketch -> Include Library -> Manage Library. Just search for the required library and click on install.
There are lot of ESP8266 NodeMCU projects here, where we have explained to program NodeMCU using Arduino IDE.
E. Programming to Enroll a Passive RFID:
1. In the Arduino IDE, go to File > Examples > RFID RC522 library > Enroll.
2. In the Arduino IDE, go to File > Examples > LiquidCrystal LCD I2C interface library > Enroll.
3. Upload the code to the NodeMCU, and open the Serial monitor at a baud rate of 115200.
F. Programming for Passive RFID Tracking System:
The first thing is to do in the program is to include all the required libraries. Here in my case, I have included “MFRC522.h” for using RFID RC522 sensor and “ESP8266WiFi.h” for using ESP8266 NodeMCU Wi-Fi module. For using the I2C interface of an LCD display we have use LiquidCrystal_I2C.h library. Then we have to configure the serial port in which Passive RFID sensor will be connected.
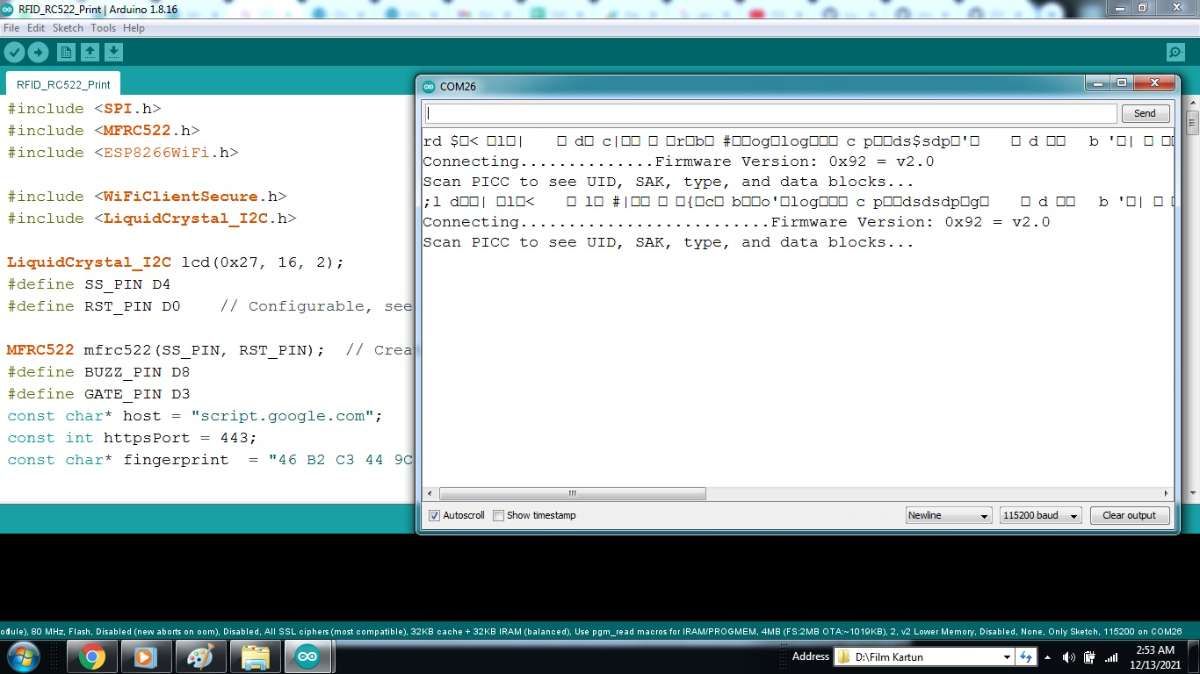
You can get the code from the Sheet URL just like shown below:
https://github.com/unreeeal/ESP/tree/master/ESP-RFID-GOOGLE.
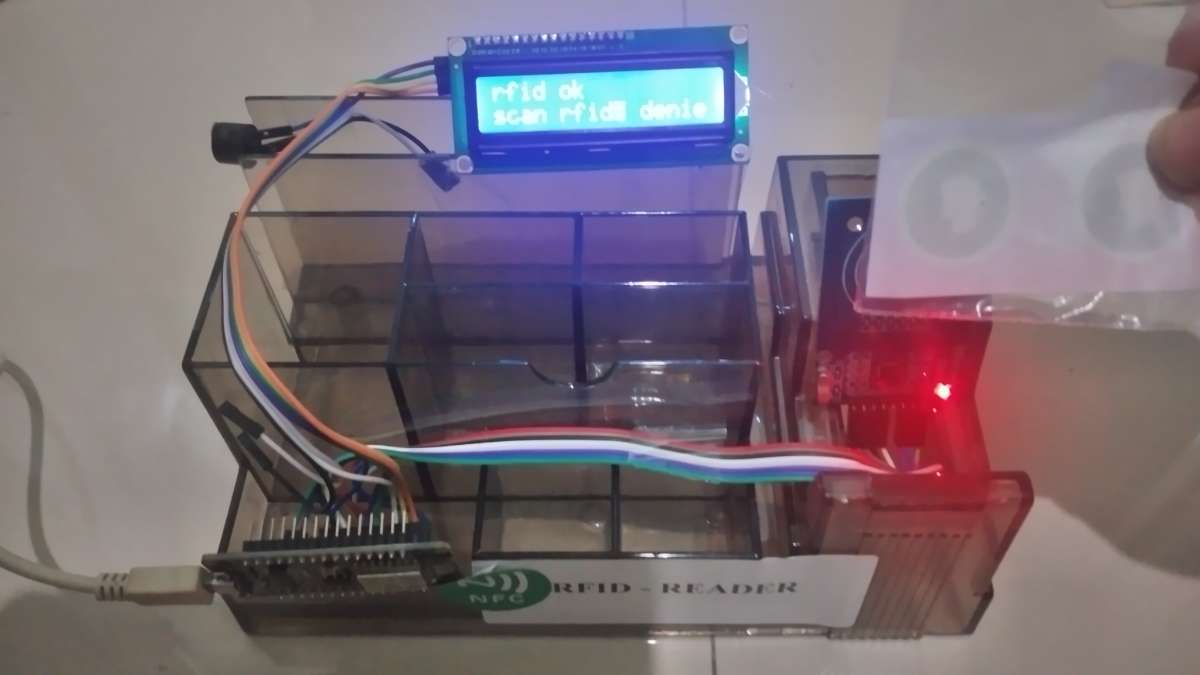
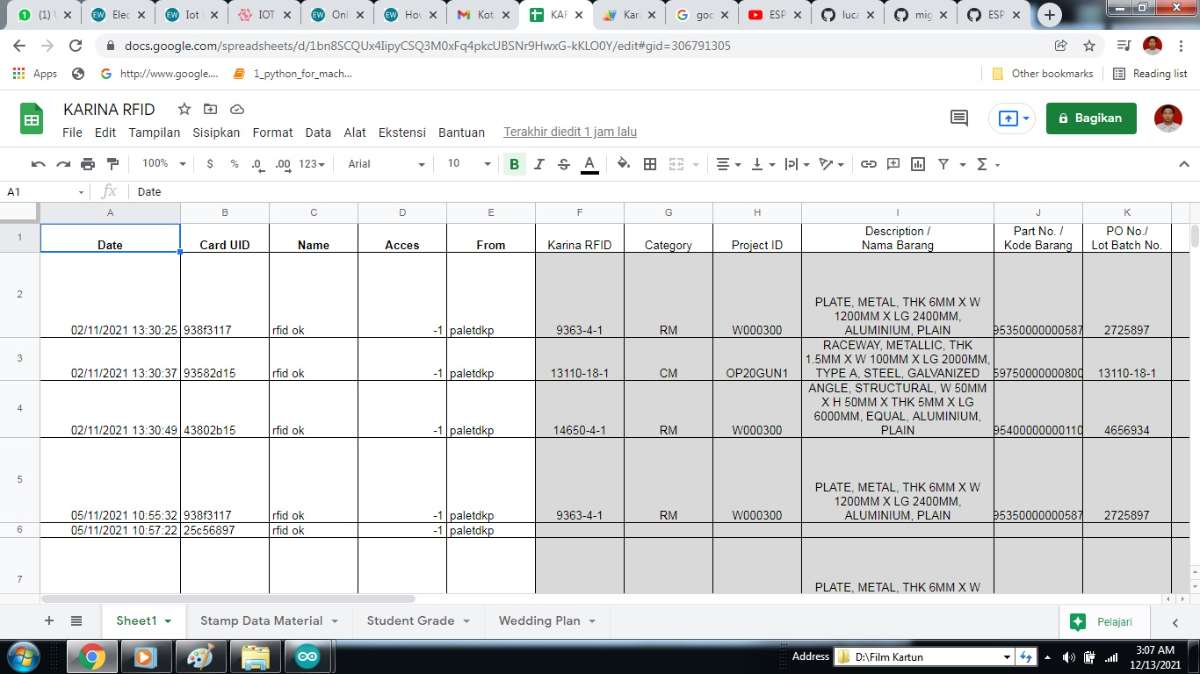
Below images show how the passive rfid tag is recorded in the google sheet.
This is how a IoT based Passive RFID for Production Material Asset Tracking System can be built using NodeMCU.
