1.Connect the servo motors, ultrasonic sensors, moisture sensors and push button to the Arduino uno according to the following circuit diagram.

.png)
2.Upload the code to Arduino uno using Arduino IDE which should be on raspberry pi. If you don't know how to install Arduino IDE on raspberry pi then click the following https://www.raspberrypi-spy.co.uk/2020/12/install-arduino-ide-on-raspberry-pi/
Arduino Code:
#include <Servo.h>
// Variables for servo motors
Servo servo1;
Servo servo2;
int servo1_pin1 = 12; // Digital pins 12 and 8 are reserved for servo motors
int servo2_pin2 = 8;

// Variables for push_button
int touchPin = 4;
int touch_val = 0;

// Variables for moisture sensor
int value = 0;

// Variables for ultra sonic sensor
#define echoPin1 6 // Digital pins 6,7,2,3 are reserved for ultrasonic sensor
#define trigPin1 7
#define echoPin2 2
#define trigPin2 3

 long duration1; // variable for the duration of sound wave travel
int distance1; // variable for the distance measurement
long duration2; // variable for the duration of sound wave travel
int distance2; // variable for the distance measurement


void setup() {
 Serial.begin(9600); // setting up serial communication for displaying output

 // Configuring and setting push button
 pinMode(touchPin, INPUT);

 // Configuring and setting the servo motors
 servo1.attach(servo1_pin1);
 servo1.write(90);
 servo2.attach(servo2_pin2);
 servo2.write(90);

// Configuring and setting the ultra sonic sensors
 pinMode(trigPin1, OUTPUT); // Sets the trigPin as an OUTPUT
 pinMode(echoPin1, INPUT); // Sets the echoPin as an INPUT
 pinMode(trigPin2, OUTPUT); // Sets the trigPin as an OUTPUT
 pinMode(echoPin2, INPUT); // Sets the echoPin as an INPUT

 pinMode(11,OUTPUT);
  }

void loop() {
  delay(1000);
 touch_val = digitalRead(touchPin);
 if(touch_val==1){

   value = analogRead(A0);

   if (value > 950) {  // 950 value was obtained through trial and error user can set it to any value depending on the wetness of the object
     Serial.println("Dry waste");
     servo1.write(60); // here we are telling our servo to rotate as per given angle in parenthesis
     servo2.write(120);
     delay(5000); // some time delay so that waste can slide down
     servo1.write(90);
     servo2.write(90);
    }
   else {
     Serial.println("Wet waste");
     servo1.write(120);
     servo2.write(60);
     delay(5000);
     servo1.write(90);
     servo2.write(90);
    }

   digitalWrite(trigPin1, LOW);
   delayMicroseconds(2);
   digitalWrite(trigPin1, HIGH);
   delayMicroseconds(10);
   digitalWrite(trigPin1, LOW);

   duration1 = pulseIn(echoPin1, HIGH); // here we are checking the level of our waste
    distance1 = duration1 * 0.034 / 2;
   Serial.print("Distance1: ");
   Serial.print(distance1);
   Serial.println();

   digitalWrite(trigPin2, LOW);
   delayMicroseconds(2);
   digitalWrite(trigPin2, HIGH);
   delayMicroseconds(10);
   digitalWrite(trigPin2, LOW);

   duration2 = pulseIn(echoPin2, HIGH);
   distance2 = duration2 * 0.034 / 2; // it is a predefined formula
   Serial.print("Distance2: ");
   Serial.print(distance2);
   Serial.println();

 if((distance1<= 9)||(distance2<=9)) // Ulrasonic sensors used here show discrepancy in the measured distances below 7 cm thus we have fixed the threshold upto 9 cm
  {
   digitalWrite(11,HIGH);  // sending the output to Raspberry pi through digital pin 11 which is connected to the 26th GPIO pin on raspberry pi
   Serial.println("Full");    // sending the result to serial output window
 }
 else{
   digitalWrite(11,LOW);
   Serial.println("Not Full");
  }
  }

}
3.To use the dustbin , a person needs to press the push button and keep his/her waste on the plate fixed on the servo motors.
4. Please refer the following website for setting up soil moisture sensor with Arduino using LM393 comparator. In this project we need to connect only 3 pins of LM393 comparator with Arduino i.e. Vcc ,GND, AO
5. We will directly use GPIO pins for communication between Arduino and Raspberry pi.
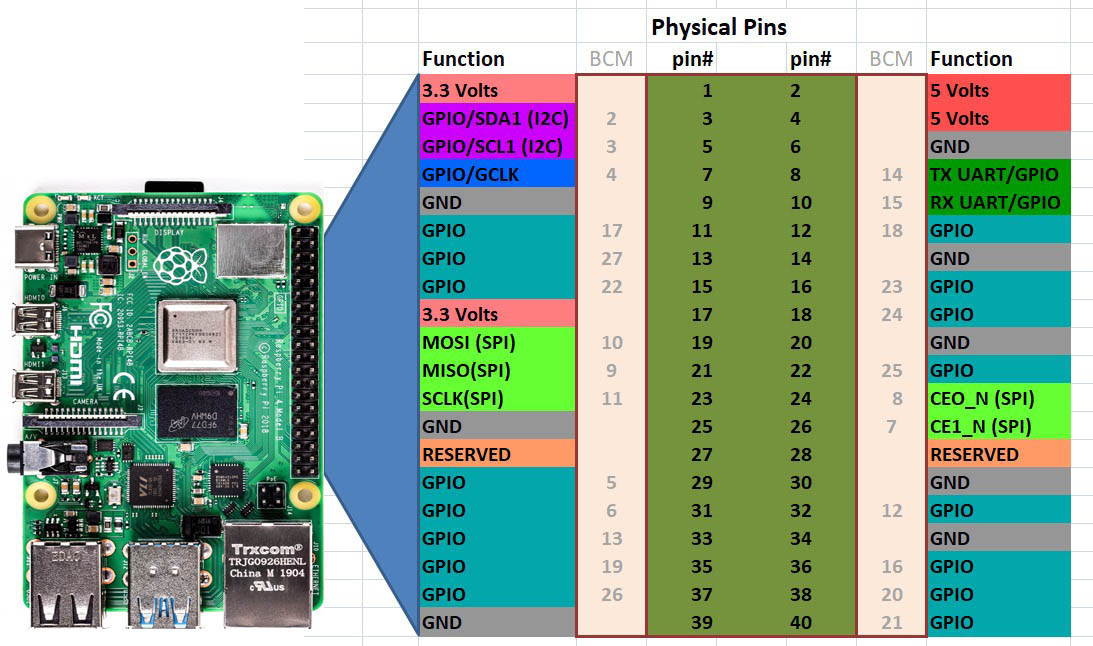
6. Upload the following code on Raspberry pi and connect GPIO pin - 26 of Raspberry pi with Digital pin 11 of Arduino.
Raspberry Pi Code:
from flask import Flask # importing flask library for building website on python
import RPi.GPIO as gpio
pin = 26
gpio.setmode(gpio.BOARD)
gpio.setup(pin,gpio.IN) # setting gpio pin 26th as input pin
app = Flask(__name__)

@app.route("/")
def index():
   return "Hello from Smart Dustbin"

@app.route("/status")
def check_level():
   if((gpio.input(pin))==True): # if digital pin 11 on arduino is high it means garbage bin is full else not full
       return "garbage is full"

   else:
       return "Not Full"

app.run(host = "0.0.0.0" , port = 8500)
6. If you are unable to locate pin 26 on raspberry pi then refer the following image.

Output:
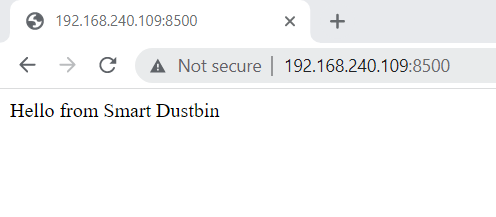
- After running the python script we will get the URL link of our website. Like this :
- https://0.0.0.0:8500/
- either you can visit this website from the chrome browser on the raspberry pi itself.
- or you can use this link as well:
- https://[your IP address from which raspberry pi is connected]:8500/
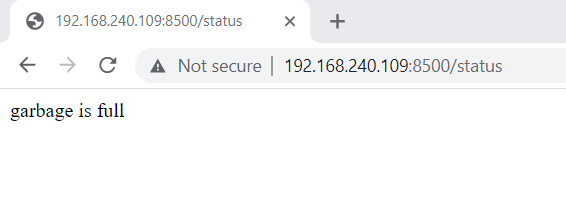
- To check the level of the garbage use this link:
- https://0.0.0.0:8500/status/
- or
- https://[your IP address from which raspberry pi is connected]:8500/status/


.png)

