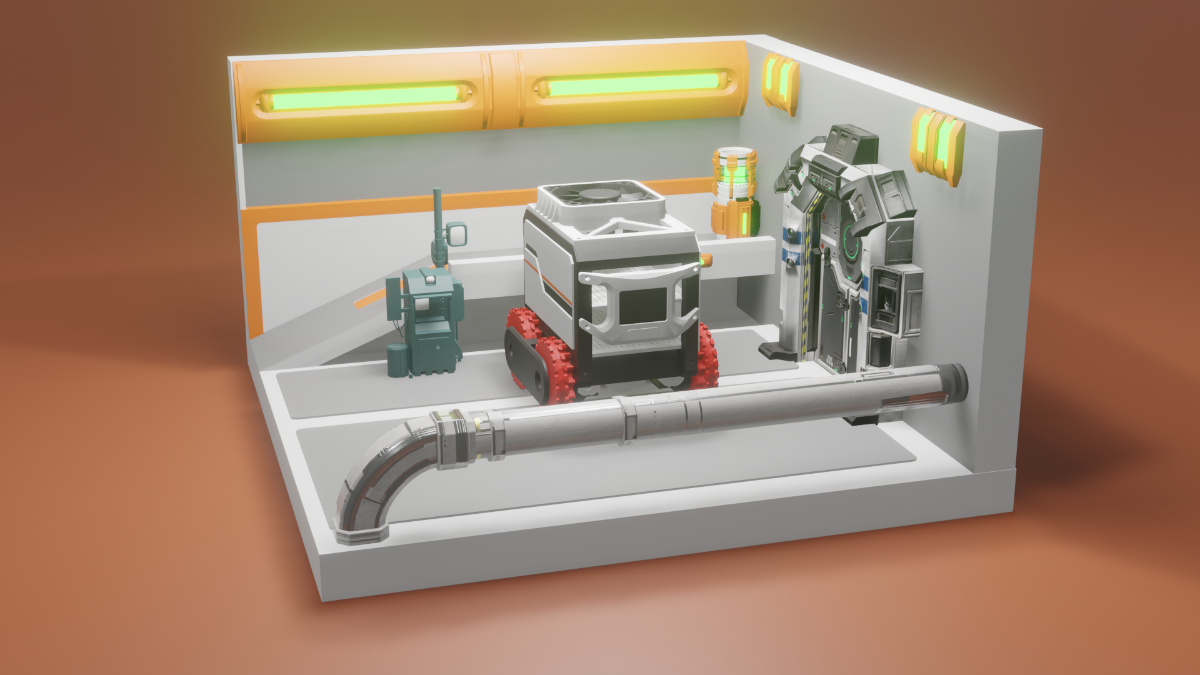
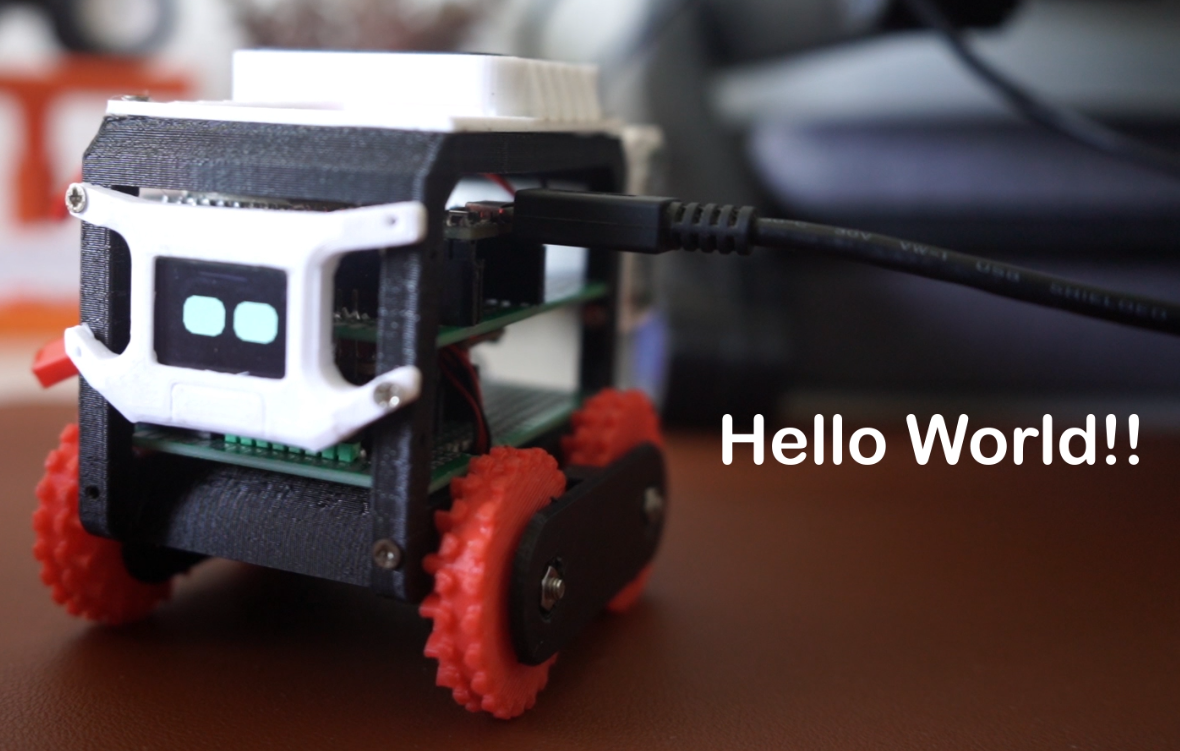
DLR (Dumb Little Robot) is a part of my bigger project called Deskbots. Little robots that live on your work desk. Till now I have made 3 different variations of them.
This is the first version of this project. I have only added basic expressions more are coming in the future. I will also add SLAM and Swarming features in the future. I am already experimenting with SLAM with really good results. Explaining everything in one project would be too much so I have decided to make multiple parts of it. This project contains instructions on how to assemble the robot and use it.
3D PRINTED PARTS
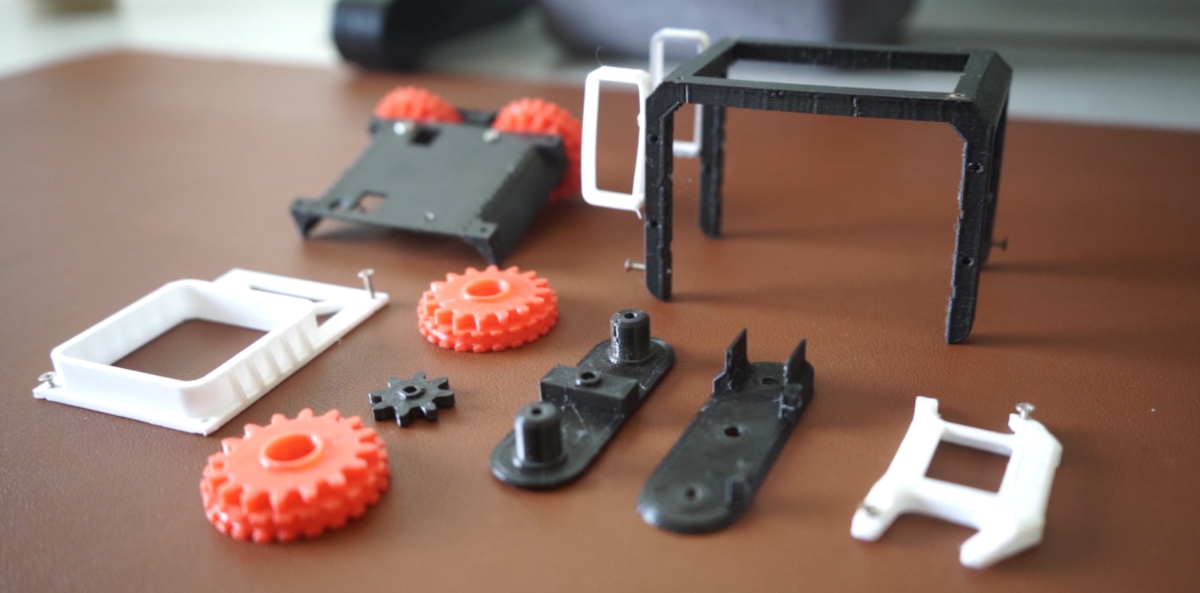
The body was printed with PLA on Ender 3 Pro. It is joined together using M3 and 2mm screws. I didn't design it to be strong I wanted to go as small as possible. So some parts are kind of weak. But the good news is I have included the raw design files so you can change the design easily.
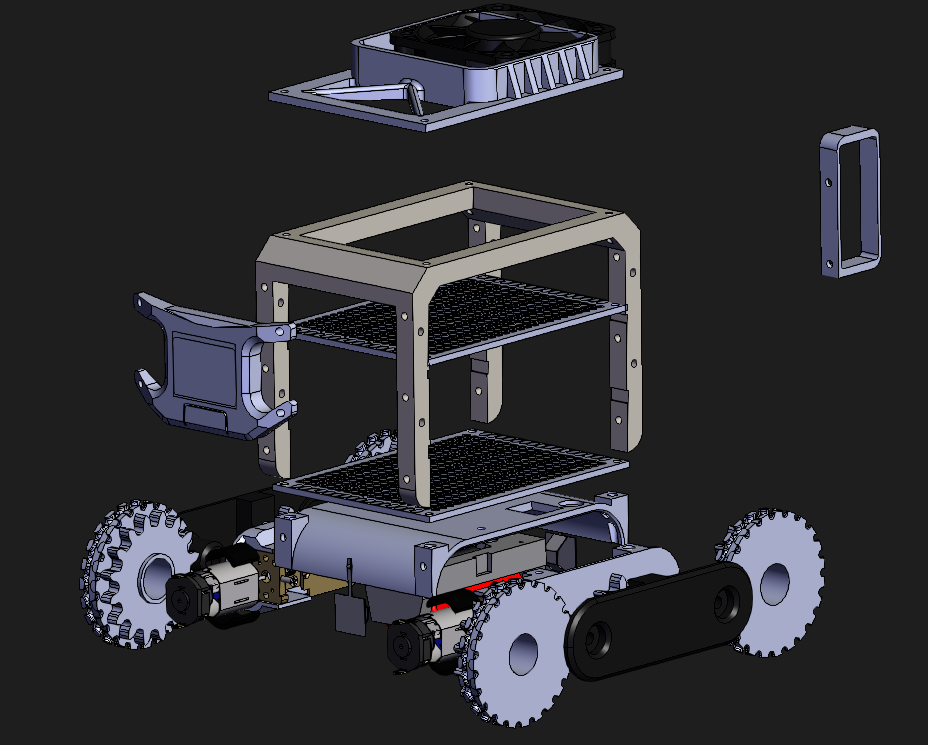
You can download the STL files from here. Grabcad has an explode model feature so please use it if you are not sure which part goes where. I have shown the assembly in detail in the tutorial video.
CIRCUIT AND BOARD CONNECTION
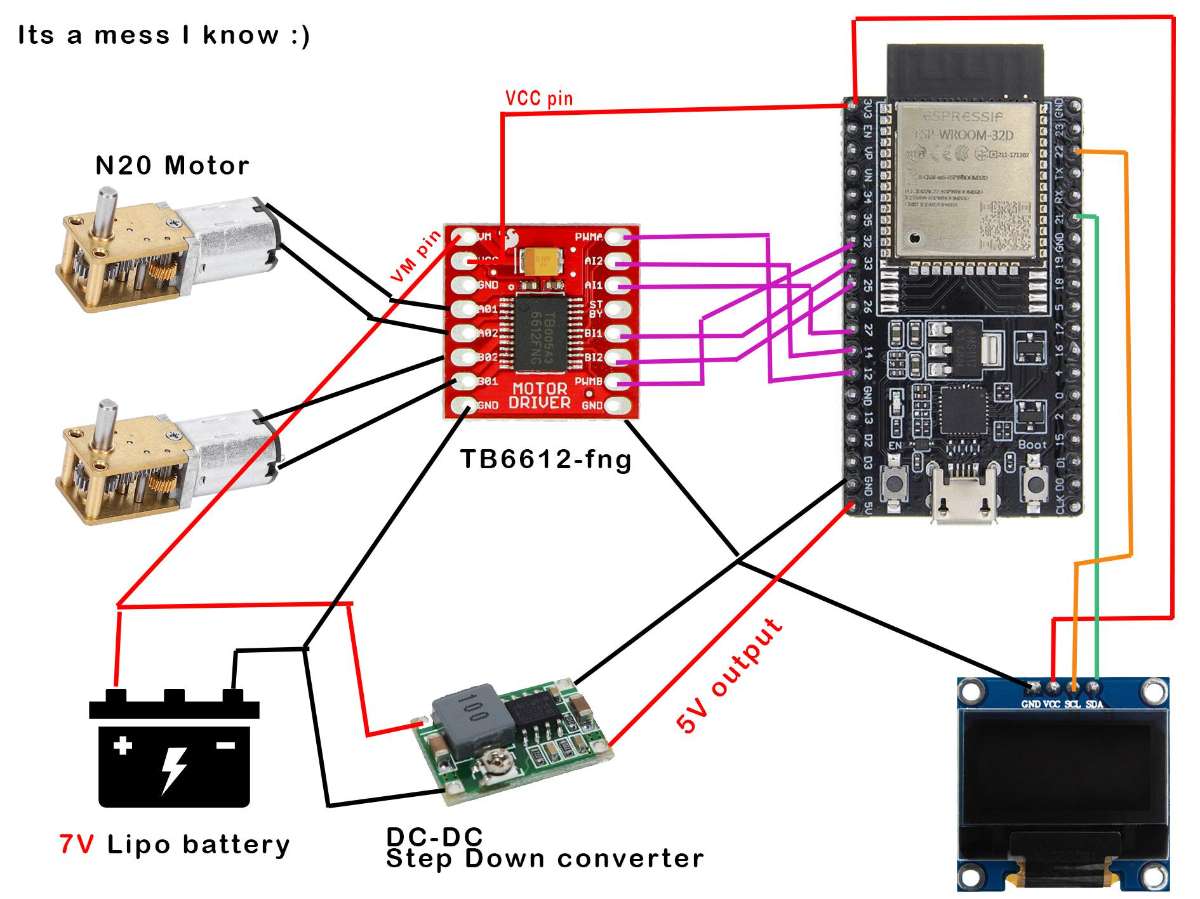
My goal was to keep the circuit as small as possible so I used a double side perf board. The circuit is divided into two layers top layer contains ESP32 and the bottom layer has a motor driver and step-down module. There is also room for MPU6050 but for now, I am not using it because I put MPU and OLED in the same line so when I was trying to use them both at the same time I was having some issues with animations. So for now I have removed the MPU.
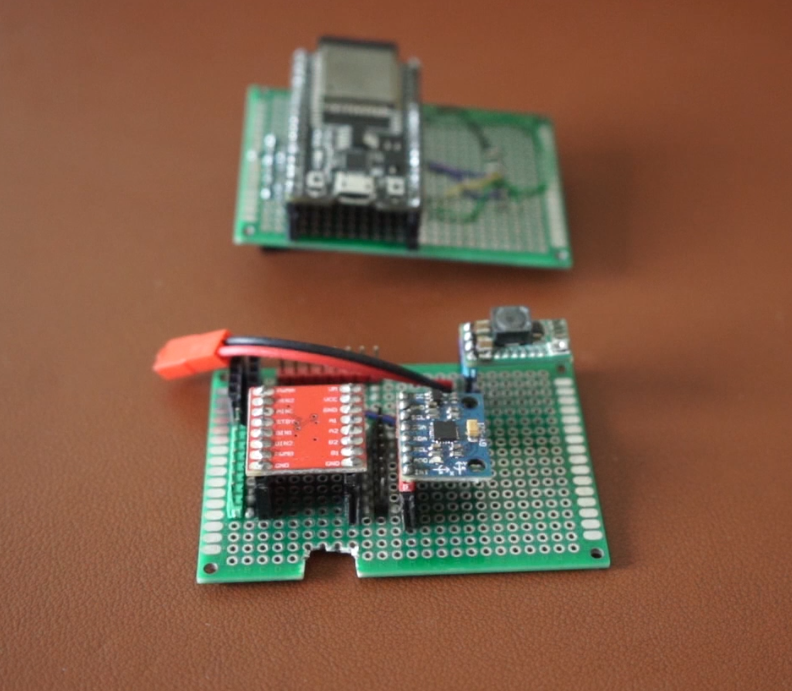
I am really proud of how I figured out a way to reduce the wiring. Basically, different components are mounted on two PCBs to connect the PCB I used really big female headers as a board-to-board connector. They gave me enough room to place sensors with pins and headers.
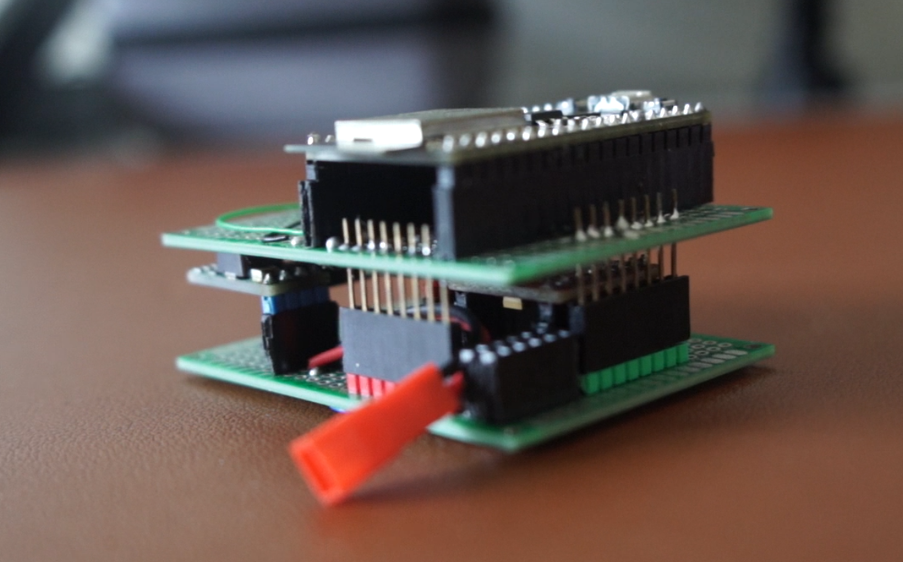
Battery and power
am using a 7-volt Lipo for power. Step step-down module is used to reduce the voltage to 5V to supply the ESP32. Oled is powered from ESP32 itself through the 3V line.
"DO NOT SUPPLY MORE THAN 5V to ESP32"
Powering Motor driver
The motor driver has two power connections one for the motor driver chip and one for the motors. For Motors we supply 7V to the "VM" pin and for the driver chip, we supply 3-5V to "VCC" from the ESP32 board.
Please read this article to know how this motor driver works.
UPLOAD THE PROGRAM
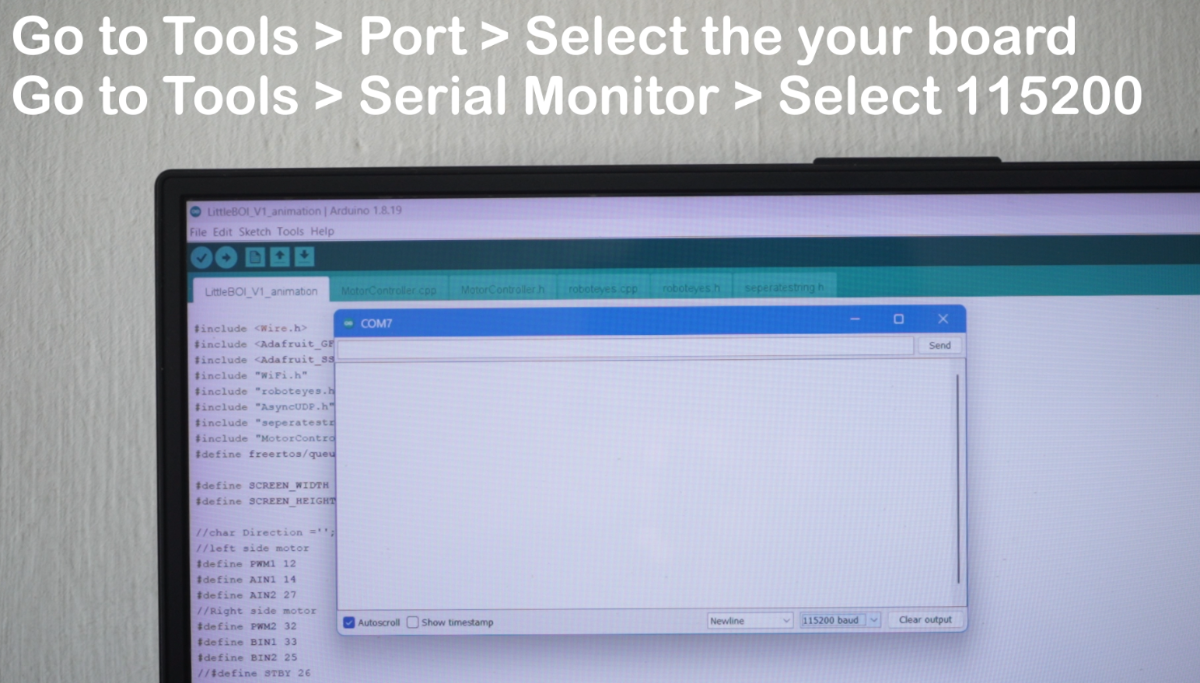
Use Arduino IDE to upload the sketch. You will have to select the ESP32 board in order to do so. By default, you won't see ESP32 in the board's manager. Use this link to add ESP32 to Arduino IDE
"DO NOT CONNECT THE BATTERY AND USB CABLE TO ESP32 AT THE SAME TIME"
You will need some additional libraries to compile the code. They all are available in the Arduino library manager. Please read this article on How to add libraries to Arduino IDE in case you need help.
- Adafruit GFX
- Adafruit SSD1306
- AsyncUDP
To compile the code select your ESP32 board. This code should work on most of the ESP32 boards.
Tools > Ports > Select your board(ESP32 Dev Kit 1)If everything is set up okay code should compile. Then just upload the code if all is good you will see the bot blink for the first time. The code is available on GitHub if there is any problem please raise an issue I will try to help you.
*Please use IDE 1.8 new one gives a lot of errors
*If you get any error related to analogwrite function try commenting or uncommenting #include <analogWrite.h> in MotorController.h file
CODE EXPLAINED
The code is really simple basically it receives data over wifi and separates the string and controls the motor depending on the command reviewed. "roboteyes.h", "seperatestring.h" and "MotorController.h" are custom libraries. These are included in the sketch folder. I will update more expressions and face animation in the future. This was my first attempt at making a library so any feedback and suggestion would be helpful.
All the libraries you will need.
 	#include <Wire.h>
	#include <Adafruit_GFX.h>
	#include <Adafruit_SSD1306.h>
	#include "WiFi.h"
	#include "roboteyes.h"
	#include "AsyncUDP.h"
	#include "seperatestring.h"
	#include "MotorController.h"
	#define freertos/queue.h
Change your SSID and password to your wifi network.
    const char * ssid = "SINGTEL-42E6";//Change your wifi name
    const char * password = "huiweimaev";//Change your wifi password
This is the UDP port. I have made it 1234 so it's easy to remember but you can change it to any four-digit number you want.
if(udp.listen(1234)) {//UDP port number if there is any problem change this.Here we create "dispTask" which handles the facial animations. Thanks to FreeRTOS we can play the animation and move the robot simultaneously. There are better ways of doing this, like using a queue, but I could not make it work. So if you can improve this part please let me know.
    xTaskCreatePinnedToCore(
	    dispTask,   // Display task
	    "dispTask", // Task name
	    4096,       // Stack size
	    NULL,       // No parameters
	    0,          // Priority
	    &xHandle,       // No handle returned
	    0);
This function reads the incoming data over wifi and separates each command into an array
Plzgetstring(PhrasedData);// Get the incoming data and separate the commands into an array.APP
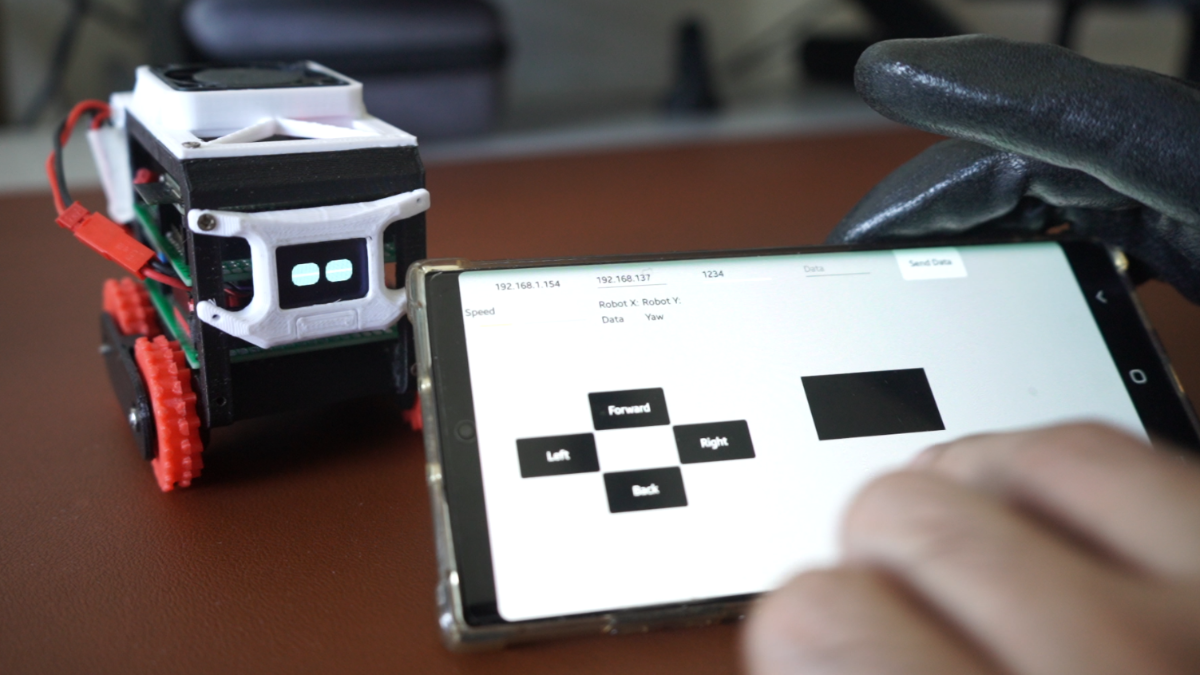
Download and Install the app on your phone. The APK file is included with the code on GitHub. To use the app you need two things IP address and the UDP port number.
The Default UDP port is 1234
To get the IP address open the serial monitor while the Deskbot is connected to the PC via USB. Then press reset on ESP32. If the wifi connection is successful you will see the IP address.
Tools > Serial monitor > Change baud rate to 115200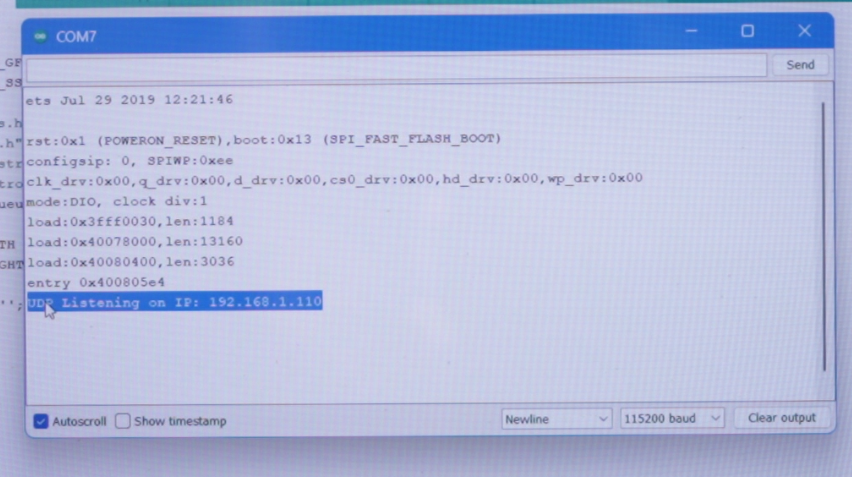
Open the app and type the IP address and UDP port number. Your phone and Deskbot should be on the same Wi-Fi network. If everything went ok you should be able to drive the bit.
"DO NOT CONNECT THE BATTERY AND USB CABLE TO EPS32 AT THE SAME TIME"
Now we are done enjoy playing with your new cute and cuddly friend. If you are stuck anywhere or need more detailed instructions let me know I will update this page.
THINGS YOU CAN IMPROVE
Structure
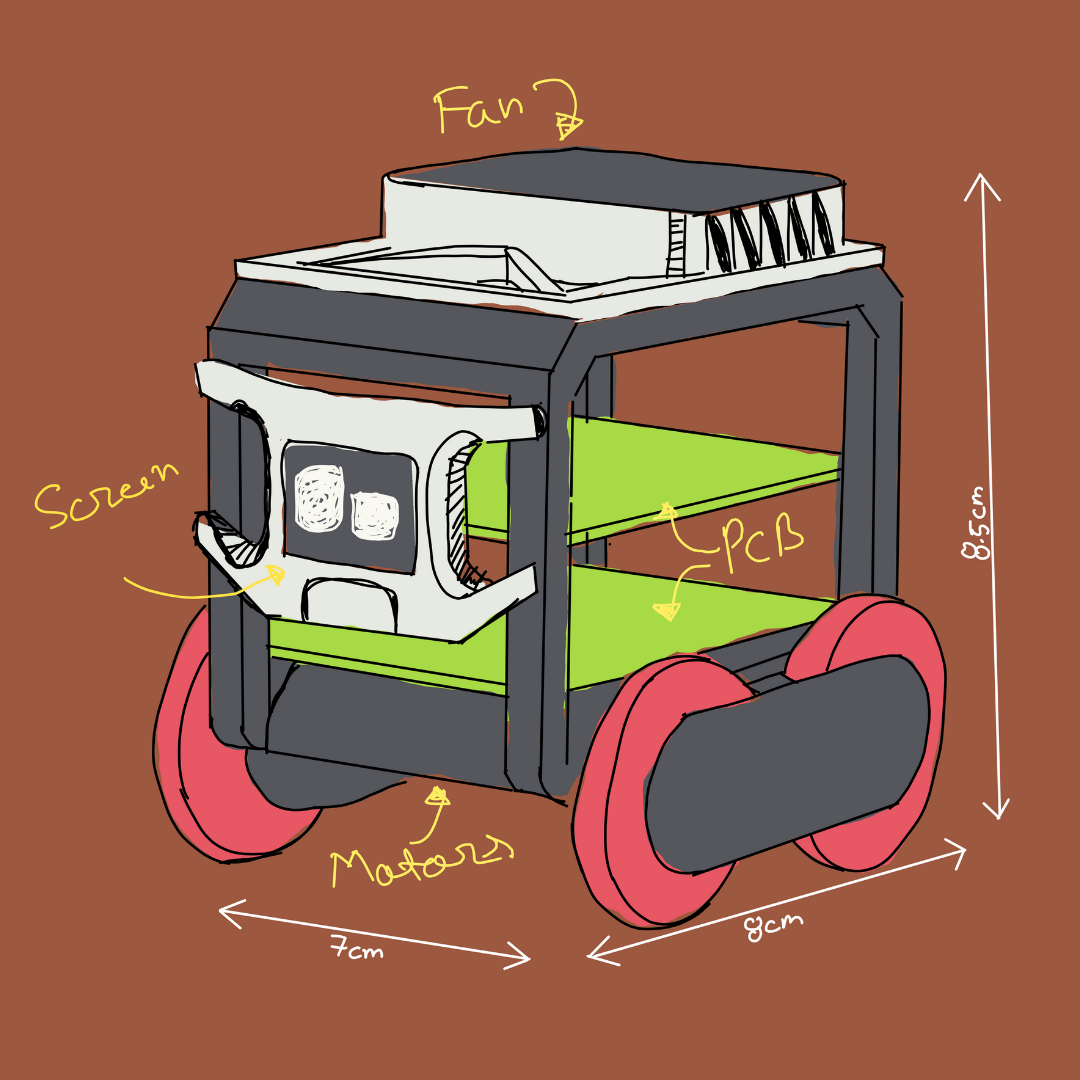
I was trying to make this thing as small as possible so some parts are very thin like the top chassis. The top structure for holding the boards has a lot of wiggle room. PCB was supposed to slide in and out like you swipe a credit card but I messed up the tolerance so now the wheels block the sliding. It happened because I used an M3 screw which has a really big screw head. I order some smaller screws but they did not arrive on time. You can see me struggling to put everything together here in the video. I would suggest you use smaller screws and adjust the model files but everything will still fit since it is printed in PLA so it is a little bit flexible.
Custom libraries
To keep the code clean I made a custom library for motor control and animation. This is my first attempt I wanted something quick but it can be improved by someone with more experience. Also, I used Tasks to display animations this is not the most efficient way of doing this. Anyone who has experience with FreeRTOS please help me improve this.
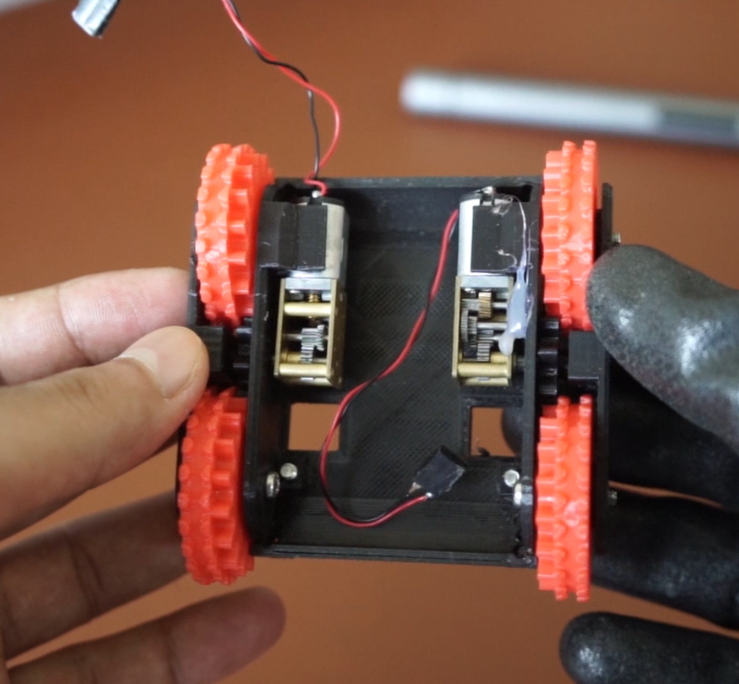
Gear train
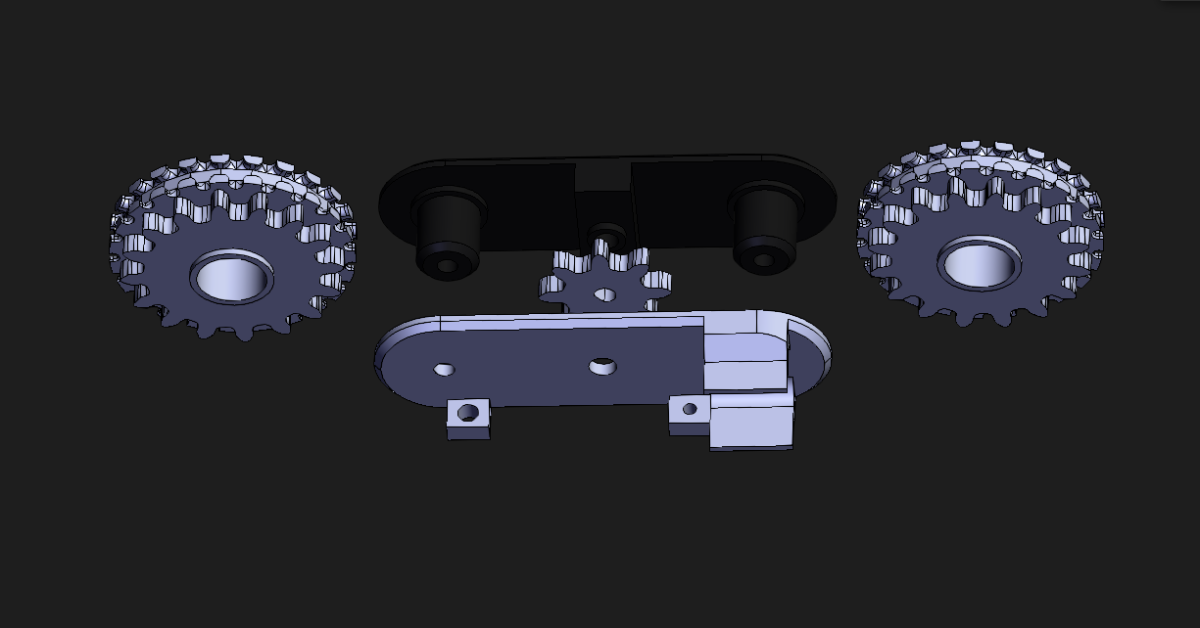
The wheel system is a gear train. You should use maths to make them properly but the gear feature in my software was not working properly so I kind of just drew them manually and adjusted the tolerance till they fit together. I will use small bearings to make everything run smoothly in the future.
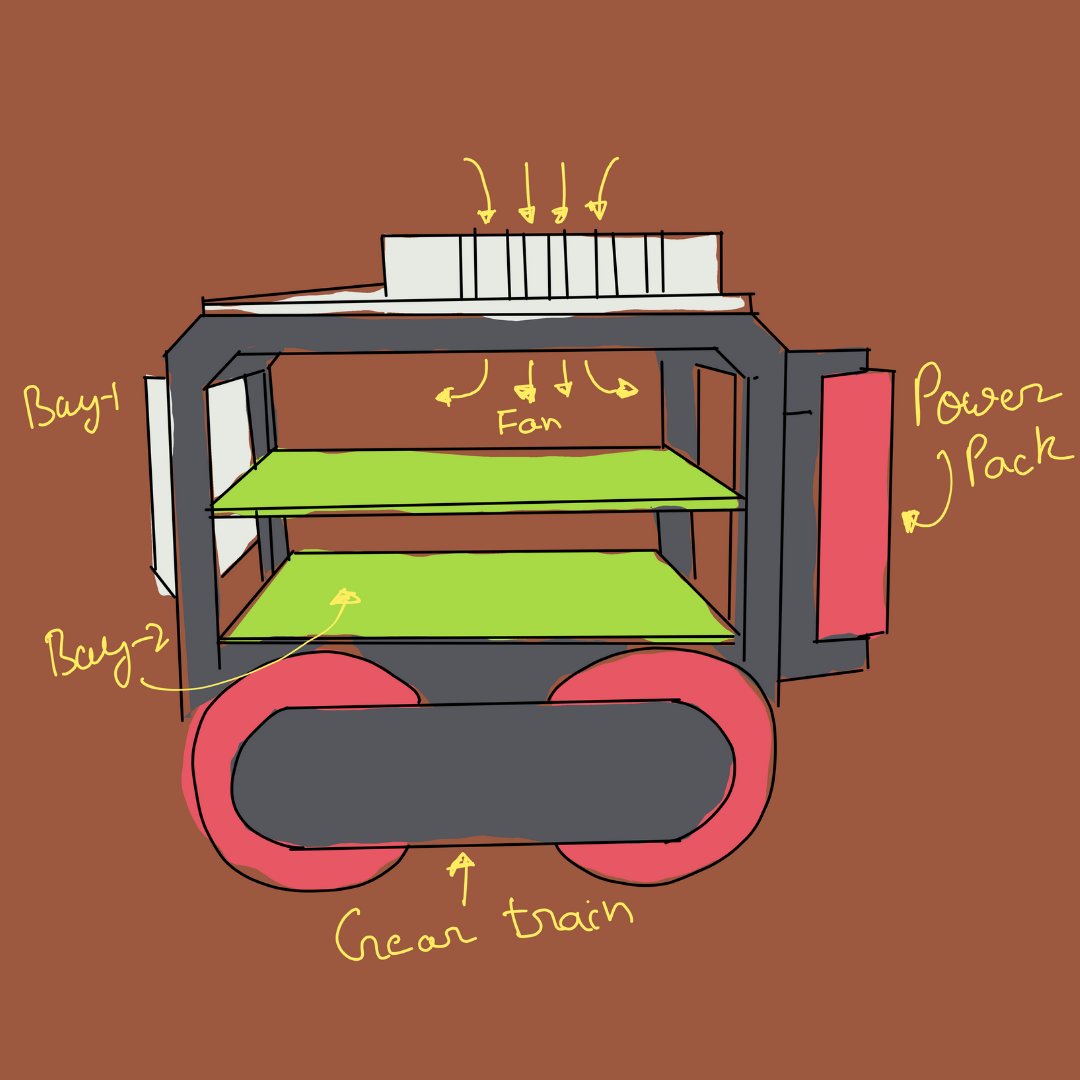
Battery placement
Originally battery was supposed to go at the bottom but then I decided to go for a bigger battery and placed it at the back. Now if you try to climb an angle greater than 30 degrees bot flips. You can use two small 3V lipos that will fit at the bottom.
Wheels
You will notice the wheels have grooves on them. They help the bot climb most of the surfaces. Due to the gear mechanism, the bot has lot of torque. Grooves are actually meant for adding rubber bands like tank tracks but sometimes rubber band slips so if you need more grip you can cut the rubber band and glue inside the gaps to each wheel.
FUTURE UPDATES
This was the first part of this project so I have only included basic stuff. In future updates, I will add more realistic animation and more sensors.
My ultimate goal with this project is to make a tiny little desktop assistant that lives on my desk and is smart enough to navigate without bumping or falling off the table. What's the real-life use I don't know.
You might have seen some extra things in the code like the MPU6050 reference and some redundant features in the app. That is because I am already experimenting with SLAM. The black box you see in the app is a canvas where you will see the map drawn by the robot as it travels on the desk. Also, the fan on the top is not connected to anything. I was planning to add LEDs and thought things might get hot so I added the fan. It looks cool so I kept it.
Let me know what you think about the design any comments or advice will be helpful.
