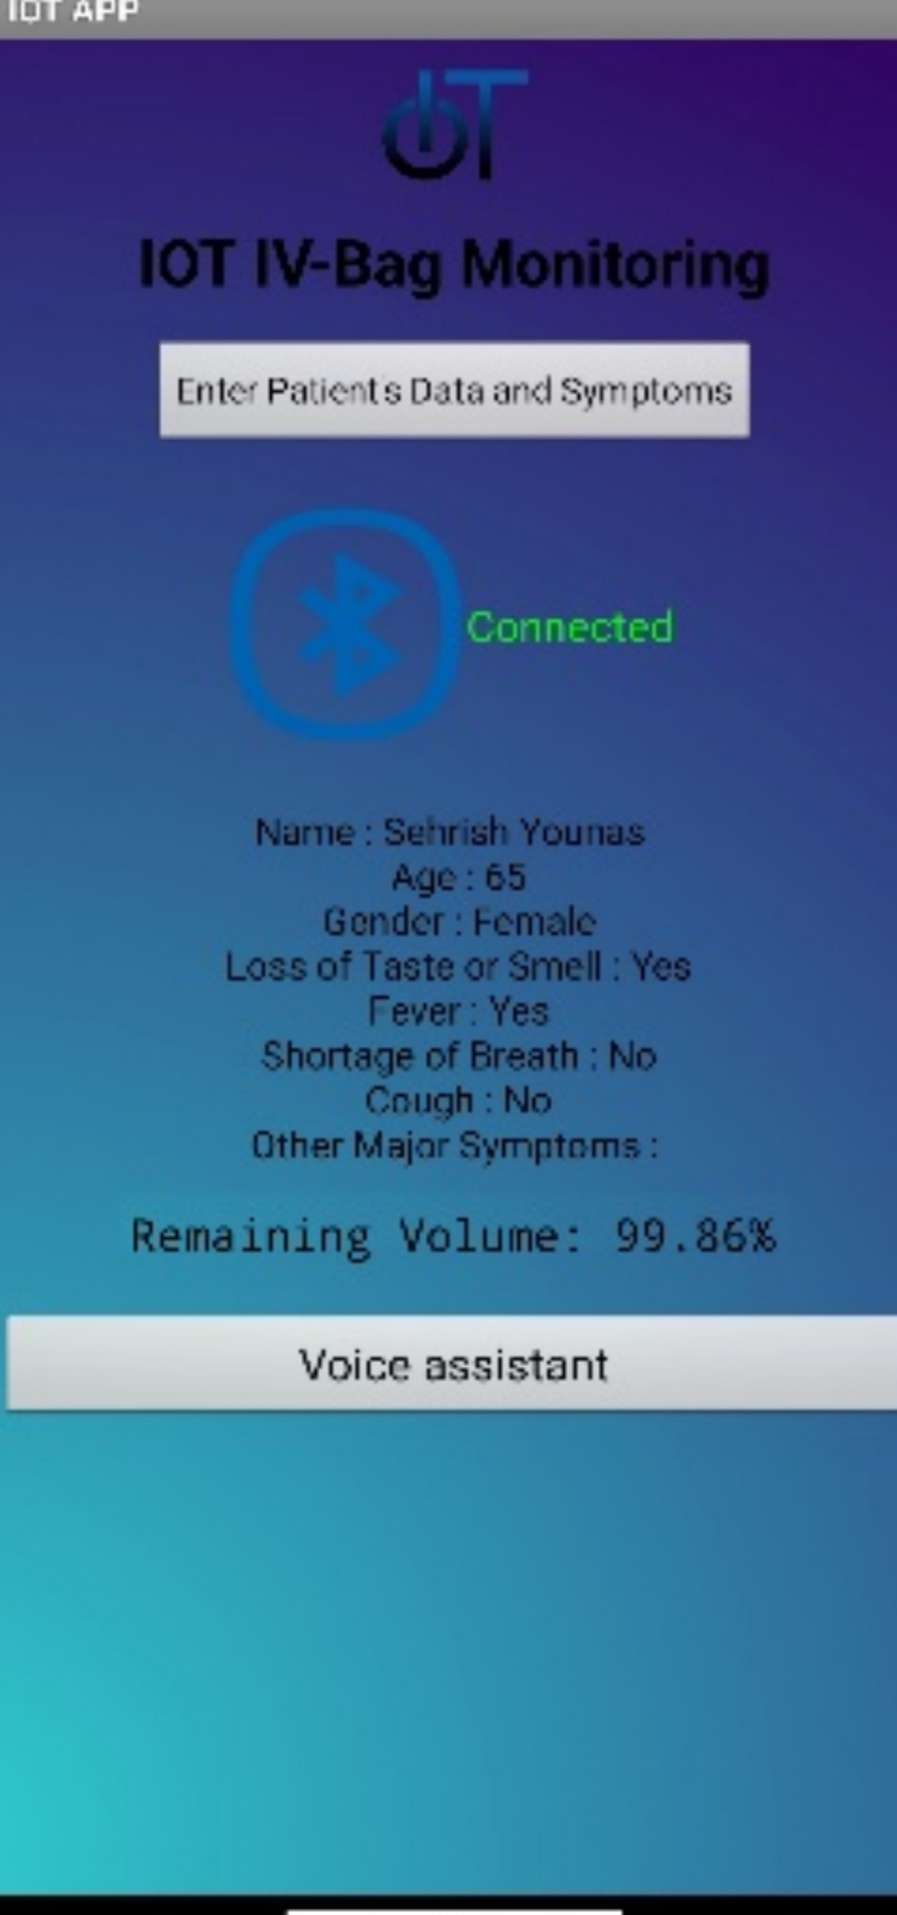
This proposed system presents a mechanism for hospitals to monitor drip infusion levels efficiently using IoT technology. Our proposed system consists of a Strain Gauge load cell converts the force applied into resistance and this resistance using A/D conversion is converted into force, and Arduino displays this data on LCD and Mobile App. The mobile app is the software part of this system designed using MIT App Inventor.
This control mechanism can notify nurses or doctors if the fluid level in the IV-bag falls to a specified level. to avoid reverse blood flow and prevent air embolism
Following are the goals of the designed system:
- Keep track of each patient's IV bag status
- Show consumed Percentage %
- Alert System
How the designed system will be problem-solving:
- The IV bag is stopped/changed at the correct time
- No need to keep an eye every time on the watch or clock.
- No need to walk every time in the wardroom to monitor each IV bag’s status.
- Reduction of pressure on management work and better efficiency at work.
The challenge was how to make it effective and cost-efficient.
We started with:
Step1. Preparing materials and tools:
- Arduino UNO R3
- 5Kg Load Cell
- Load Cell Amplifier (HX711)
- LCD 16x2
- I2C Interface for LCD
- Bluetooth Module (HC 05)
- Push Button
- Simple Rod
- Base to attach the rod
Step 2. Connect your Circuit:
- Connecting with Load Cell and Load Cell Amplifier:
Load cells have 4 wires:
- Red for Excitation+
- Black for Excitation-
- White for Output-
- Green for Output+
The load cell convert applied force into a set of electrical resistance. But after the force is removed, it returns to its original state.
The output produced by the Load Cell is in millivolts so we need an amplifier for its amplification. HX711 is the load cell amplifier used for this purpose. Load Cell is first connected with amplifier and this amplifier is connected with Arduino.
Following are the connections between Load Cell, Load Cell Amplifier (HX711), and Arduino.

Note:
Be careful about the side of the load cell when you’re putting weight on it. Usually, there is an arrow on the module that shows the force direction. With the help of this arrow, you can place the weight and the load cell correctly.
 (28).jpeg)
- Connecting with Bluetooth Module HC-05:
Bluetooth is a good example of wireless communication. HC-05 is a Bluetooth module that can communicate in two ways. This means It is full-duplex. Following are the connections between Bluetooth and Arduino:
Arduino Uno - HC-05
- Rx - Tx
- Tx - Rx
- 5v - +5v
- GND - GND
The connection is completed. After turning on the Arduino Uno, The indicator LED in the HC-05 will start blinking continuously
Note: First upload the code to Arduino, and then connect it with Rx and Tx of Bluetooth Module.
- Connecting with I2C Module and LCD:
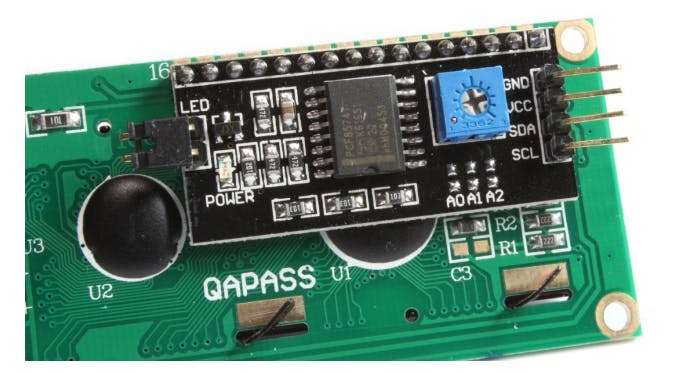
First solder the I2C Module. There is no label on the I2C Module for connecting to 16x2 LCD. So solder it with the help of the image given below:

After soldering connect the I2C Module to Arduino Uno.
Arduino UNO-I2C module
- Analog Pin 4 - SDA
- Analog pin 5 - SCL
- 5V - Vcc
- GND - GND

3. Adding Relevant Libraries to Arduino IDE:
We have to include HX711 and Arduino-LiquidCrystal-I2C-library.
- First download these libraries
- Then open Arduino IDE
- Go to Sketch>Include Library> Add.ZIP Library
- Next, select the downloaded ZIP file and click open
4. Upload the Code:
After adding these libraries, create a new sketch and write the code. After writing it, click on the upload button.
After it, the LCD screen will start showing the weight and remaining percentage. Hang the IV-Bag and you will get your readings.
Note: For the next IV-Bag, reset the system by reset button and hang the next IV-Bag for monitoring.
5. Connecting with Mobile App:
For getting readings on mobile for remote monitoring:
- Open the app.
- Connect the Bluetooth with HC-05. (Please note that HC-05 module should remain on for connecting with Bluetooth of Mobile Phone)
- After connecting it, readings will start displaying on the app screen.


