How to Build the LightSync MIDI Project With My GitHub Repository:
You can also refer to my Github Repository or Watch My Video Tutorial Of this Project Including SETUP & DEMO
Step 1: Setting Up Your Components
1.Required Components:
- ESP32 WROOM or Arduino board
- WS2812B LED Strip (144 LEDs)
- Electronic Music Keyboard with MIDI USB output
2.Prepare Tools:
- Computer with Arduino IDE
- USB cables for ESP32 and keyboard
Step 2: Hardware Setup
1.Connect ESP32 and LED Strip:
- Wire the data pin of the LED strip to the ESP32 (e.g., pin 13).
- if you are using Arduino, then DATA_PIN is 6
- Connect power (5V) and ground (GND) appropriately.
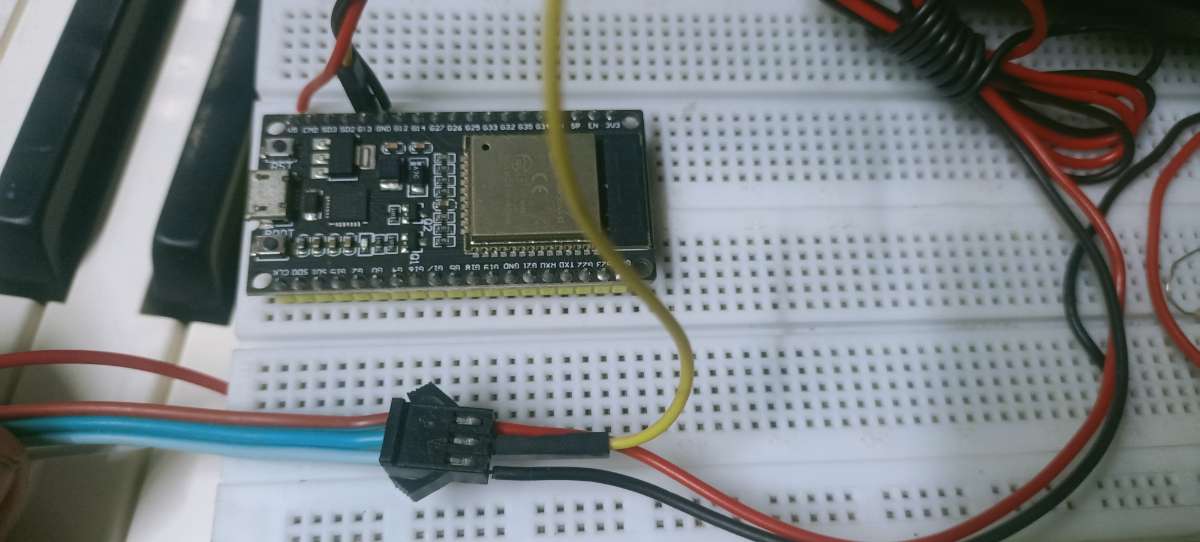
2.Connect MIDI Keyboard:
- Plug the MIDI USB output of the keyboard into the computer.
Step 3: Software Installation and Configuration
1.Install Arduino IDE:
- Download and install the Arduino IDE from arduino.cc.
2.Download Required Libraries:
- Install the FastLED library for controlling the LED strip.
3.Upload ESP32 Code:
- Copy the ESP32 code from My GitHub repository.
- Open Arduino IDE, paste the code, and upload it to the ESP32(press Boot Key on esp32 while Uploading).
Step 4: Configure MIDI and LED Mapping
1.Map MIDI Notes to LED Positions:
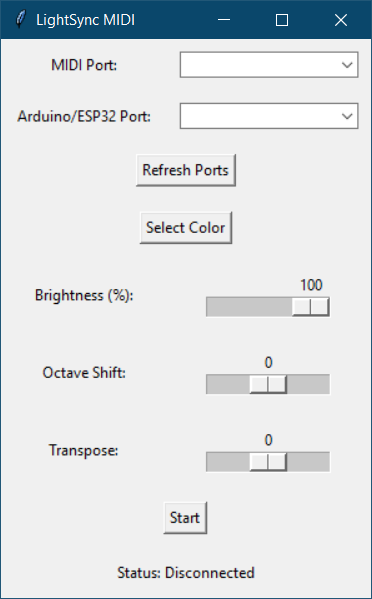
- Adjust the Octave/Transpose in My python application to map MIDI notes to corresponding LEDs on the strip(For More Details Visit My GitHub: LightSync MIDI
2.Test MIDI Connectivity:
- Use the provided Python application to test MIDI communication between the keyboard and ESP32.
Step 5: Integration and Testing
- Power On and Test:
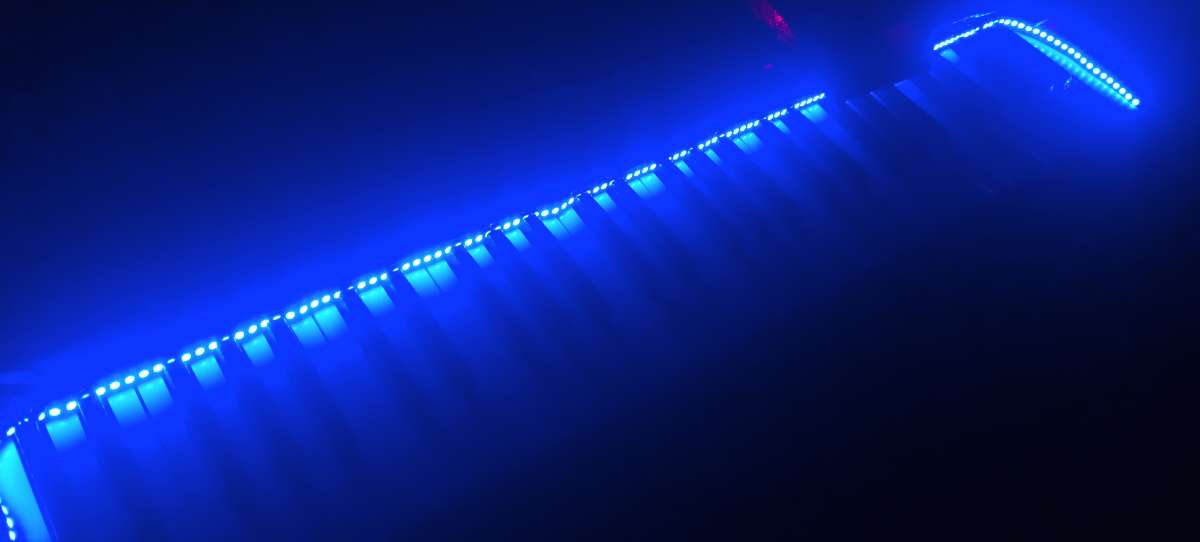
- Power on the setup and verify that MIDI input triggers the correct LED responses.
- Test different LED effects and brightness settings.
- Connect with Synthesia Piano Learning App:
- This Project is Compatible with Synthesia or any other MIDI based Piano learning app/DAWs
- The LED will Light up where the user need to press the key then it will jump to next note in the keyboard ♬
- we can use this instead of old traditional way of learning Piano/Keyboard
- increases efficiency and self Learning of musical instruments.