
The Arduino Uno Music Box is an interactive project that combines hardware components to create musical rhythms using solenoids, a buzzer, and a joystick. Here's a step-by-step explanation of how this project works:
Hardware Setup:
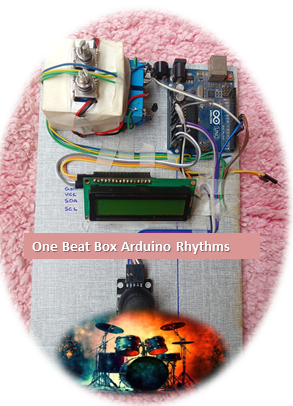
- Arduino Uno: Powers the entire system and controls the interactions
- 16x2 LCD Display (I2C): Connected via A4 (SDA) and A5 (SCL) pins for displaying messages and rhythm selection.
-
(1).jpeg)
- Joystick Module: Connected to analog pins A0 (X-axis) and A1 (Y-axis) for selecting and navigating through rhythms.
.jpeg)
- Joystick Switch: Connected to digital pin 5 to initiate rhythm selection and start playing.
- Buzzer: Connected to pin 4 for adding sound effects to the rhythms.
- Solenoids:
- Solenoid 1 (Snare Drum): Connected to pin 7.
- Solenoid 2 (Bass Drum): Connected to pin 6.
.jpeg)
Initial Power On:
- Upon powering on the Arduino Uno, a welcome message is displayed on the LCD, indicating the system is ready.
Rhythm Selection:
- To select a rhythm, press the joystick switch. This action triggers the display to show the available rhythms on the LCD screen.
Navigating Rhythms:
- Use the joystick's X-axis to navigate left or right through the list of available rhythms displayed on the LCD.
Playing Rhythms:
- Once a rhythm is selected by pressing the joystick switch again, the LCD displays the name of the chosen rhythm and starts playing it.
- The Arduino activates the corresponding solenoids and buzzer according to the rhythm's pattern.
Creating Music:
- Each rhythm involves a combination of activating solenoids (for percussion) and the buzzer (for melody), synchronized to create musical beats.
Enhancements:
- The project can be expanded by adding more rhythms, integrating additional instruments, or enhancing the user interface with more features.
Video
- Watch the video below to see the Arduino Uno Music Box in action:
This project not only demonstrates basic interfacing with Arduino components but also explores creative ways to combine hardware and software to produce musical outputs. It's an excellent starting point for learning about microcontroller programming and electronics.