


INTRODUCTION
In this project, we are using DHT-11/22 (Temperature & Humidity Sensor) and MQ-135 (Gas sensor) to take the measurements of various parameters i.e., temperature, humidity and volumetric concentration(PPM) of various air pollutants like NH3, NOx, alcohol, Benzene, smoke, CO2, etc. Then this data is processed and converted into specified units(mg/m3) and then sent to the open-source data platform, Thing-speak in our case using Node MCU micro-controller. All the coding of the project is done in the Micro-Python language. This project actually helps to provide accurate readings of the temperature, humidity, and air quality index of the specific area/locality where the project will be deployed.
- AIR QUALITY INDEX :
Air Quality Index is a parameter used for determining the risk and forecast of public health due to rising levels of pollution, abnormal weather conditions, and climate change impact. The risk of public health increases as the value of AQI increases. This data is used by the government bodies to communicate how much the polluted air currently is and how polluted its forecast is going to be. There are a total of six, AQI categories, i.e. namely Good, Satisfactory, Moderate, Polluted, Poor, Very Poor, and Severe. The value of AQI is determined by taking a reading of a total of eight pollutants, that are, PM10, PM2.5, NO2, SO2, CO, O3, NH3, and Pb for nearly 24-hour averaging period.
- Use of MQ-135 gas Sensor and PPM Calculation formula:
MQ-135 uses SnO2 as sensing material for its various pollutants. Its resistance decreases as the pollution level increases. The range of values in PPM for various pollutants are as below:
Ammonia: 10 ppm-300 ppm
Benzene: 10 ppm-1000 ppm
Alcohol: 10 ppm-300 ppm
Converting PPM to Micro-grams per cubic meter :
mg/m^3 = ppmv * M / (0.08205 * T)
where,
mg/m^3 -- Micro-gram of pollutant per cubic meter of air
ppmv -- Air pollutant concentration in parts per million by volume
M --Molecular weight of air pollutant
T -- Ambient Temperature in Kelvin
0.08205 -- Universal Gas Constant
DEMONSTRATION
Step 1: Micro-Python Firmware Flash and Burn
- Firstly install Python 3.X on your computer, using the link https://www.python.org/downloads/
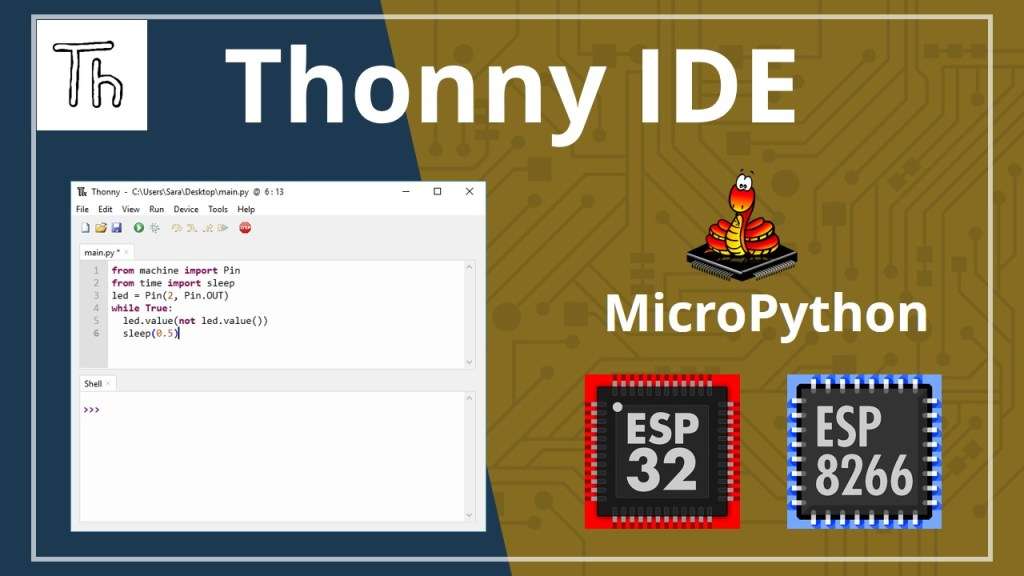
- Then install Thonny IDE, using the link https://thonny.org
- After installation of IDE go to https://micropython.org/download#esp8266 page and download the right firmware for your board.
- Plugin the module and then open the Thony software. Go running> Select interpreter, select your ESP8266 as an interpreter, COM port, and firmware.
Step 2: Hardware Connections

- Power to the module can be provided externally (+5V) or it may run when connected to your computer's USB Port.
- Connect the MQ135 to the analog pin of the NodeMCU (A0).
- Connect the DHT11/22 (Temperature & HumiditySensor) to the digital output pin of the module with a pull resistor of 10k to +Vcc(Not requires if you are using the module).
Step 3: Code
For this project, you’ll need a boot.py file and a main.py file. Their specific roles are explained below-
1. boot.py file:- The boot.py file has the code that only needs to run once on boot. This includes importing libraries, network credentials, instantiating pins, connecting to your network, and other configurations. We create our web server using sockets and the Python socket API.
The official documentation imports the socket library as follows:
try:
    import usocket as socket

except:
    import socket
We need to import the Pin class from the machine module to be able to interact with the GPIOs.
from machine import PinAfter importing the socket library, we need to import the network library. The network library allows us to connect the ESP32 or ESP8266 to a Wi-Fi network.
import networkThe MQTT protocol is supported in a built-in library in the Micropython binaries -- this protocol is used to send data from your ESP8266, over WIFI, to a free cloud database.
We used umqtt.simple library , and knowing our SERVER ID, it is possible to create our MQTT client object :
from umqttsimple import MQTTClient
SERVER = "mqtt.thingspeak.com"

client = MQTTClient("umqtt_client", SERVER)
The following lines turn off vendor OS debugging messages:
import esp
esp.osdebug(None)
Then, we run a garbage collector:
import gc
gc.collect()
A garbage collector is a form of automatic memory management. This is a way to reclaim memory occupied by objects that are no longer used by the program. This is useful to save space in the flash memory.
The following variables hold network credentials:
ssid = '<your_ssid>'
password = '<your_network_password>'
Then, setting the ESP32 or ESP8266 as a Wi-Fi station:
station = network.WLAN(network.STA_IF)After that, activating the station:
station.active(True)Finally, the ESP32/ESP8266 connects to the router using the SSID and password defined earlier:
station.connect(ssid, password)The following statement ensures that the code doesn’t proceed while the ESP is not connected to the network.
while station.isconnected() == False:
  pass
After a successful connection, print network interface parameters like the ESP8266 IP address – using the ifconfig() method on the station object.
print('Connection successful')
print(station.ifconfig())
Create a Pin object called led that is an output, that refers to the ESP8266 GPIO2:
led = Pin(2, Pin.OUT)
2. main.py file:- The main.py file contains the code that runs the webserver to serve files and perform tasks based on the requests received by the client.
First, we have to import the libraries for modules, sensors (MQ135, DHT) and for IoT Platform Thing-speak (MQTT Client) :
from machine import Pin
from time import sleep
import dht,math,time,network,micropython,esp
from machine import ADC
from umqttsimple import MQTTClient
import ubinascii
from MQ135 import MQ135
To initialise the sensors by creating a DHT and MQ135 instance as follows :
sensor_dht = dht.DHT11(Pin(5))
sensor_mq135 = MQ135(0)
Then create MQTT client instance and write your channel ID , write APi key from channel created on ThingSpeak. Then create MQTT "Topic"
SERVER = "mqtt.thingspeak.com"
client = MQTTClient("umqtt_client", SERVER)

CHANNEL_ID = "<your_channel_ID>"
WRITE_API_KEY = "<your_channel_write_API_key>"

topic = "channels/" + CHANNEL_ID + "/publish/" + WRITE_API_KEY
Run the loop to measure the temperature, humidity, air quality with the help of sensors as follows :
while True:
    sensor_dht.measure()
    temperature = sensor_dht.temperature()
    humidity = sensor_dht.humidity()

    rzero = sensor_mq135.get_rzero()
    corrected_rzero = sensor_mq135.get_corrected_rzero(temperature, humidity)
    resistance = sensor_mq135.get_resistance()
    ppm = sensor_mq135.get_ppm()
    corrected_ppm = sensor_mq135.get_corrected_ppm(temperature, humidity)
With those variables updated, we created our "MQTT Payload" and that's it! We are ready to send data to ThinsSpeak :
  payload = "field1="+str(temperature)+"&field2="+str(humidity)+"&field3="+str(corrected_ppm)

    client.connect()
    client.publish(topic, payload)
    print("Payload published successfully")
    #print(publish_check)
    client.disconnect()
    time.sleep(30)
Now, if we go to our channel page you will see that each field is having data related to the sensors :
We can easily connect our server to the circuit by the simple steps. One can follow the guide, if a novice, which is provided on the website of this particular server.
3. Adding the libraries for sensors and IoT Platform :
To work with the Gas sensor module and Thing-speak server, we need to upload libraries for each in the code section, else there would be hurdles on the path of the outcome. Links for MQ135 Library and umqttsimple.py Library are provided in the folder in the code section named as "Final Code".
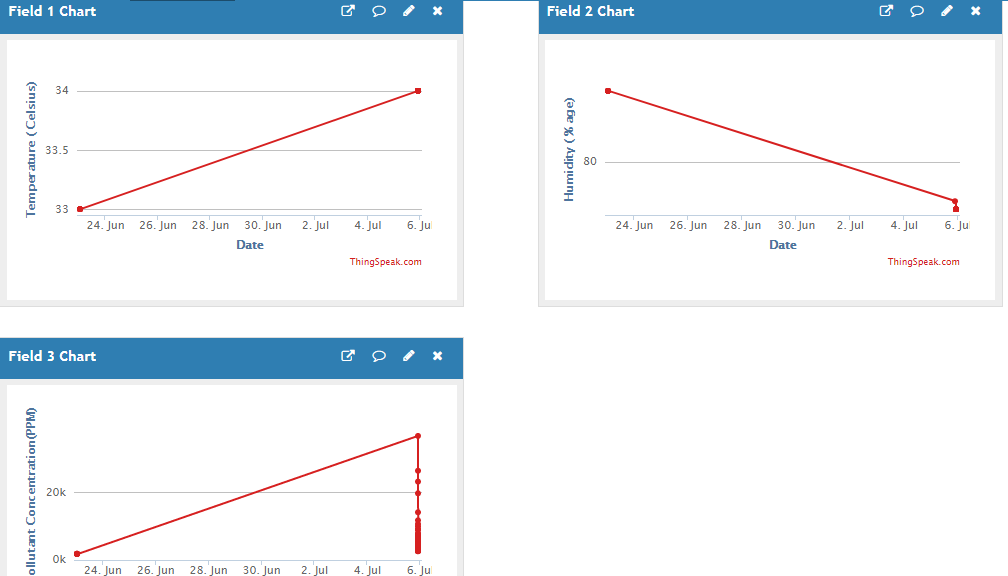
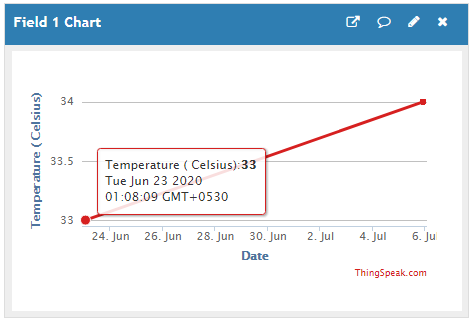
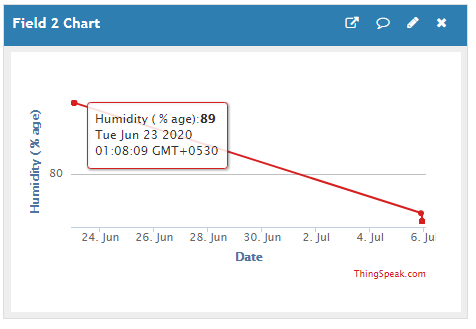
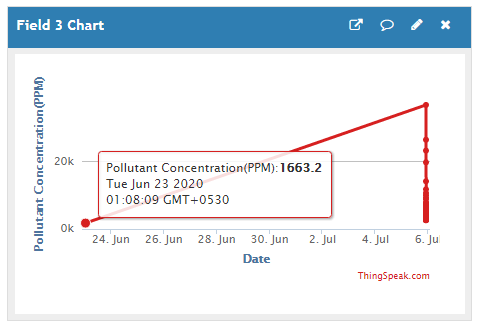
Result
There are different readings of each and every module at distinct time intervals which are recorded in a chart displayed at the online server- Thingspeak. These readings are shown below in different graphs :
Conclusion
The module is capable of doing analytics and storing the values measured from two different sensors. It can be extended to further integrate more sensors like Dust sensors. The concept of IoT enables comprehensive data assimilation that reveals critical information about the quality of air, the level of temperature and humidity, and the presence of various gases present in the environment. ThingSpeak platform is highly useful to analyze the Cloud data on the environmental condition, as an air quality monitoring system. This can help the general public to know the risk to their health due to wet and dry conditions. For example, high indoor humidity causes the air too dry, so people having diseases like whizzing will be more affected, and also for normal people, it is difficult to stay in that environment.