A polygraph, commonly known as a lie detector, is a device used to measure and record several physiological indicators such as blood pressure, pulse, respiration, and skin conductivity while a person answers a series of questions. 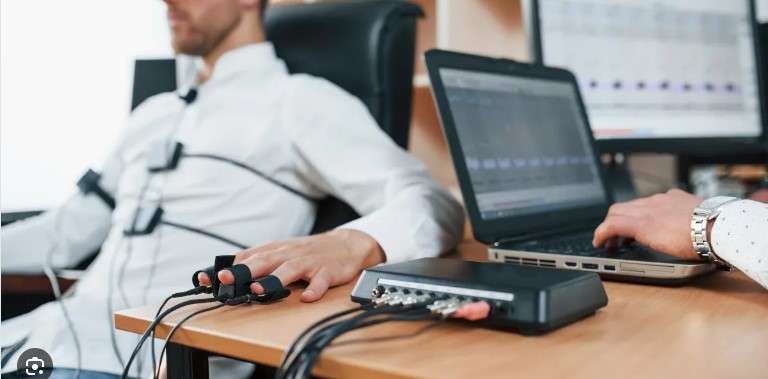
The basic parameter on the basis of which the reliability of the response is determined is the galvanic skin conductance. The device presented in this video is basically a galvanic skin conductance meter with several additional advanced functions and settings, made possible by the Windows software that the authors from Theremino team have developed specifically for this purpose. This device is actually a modern replica of the so-called E-Meter, device used in Scientology practices.
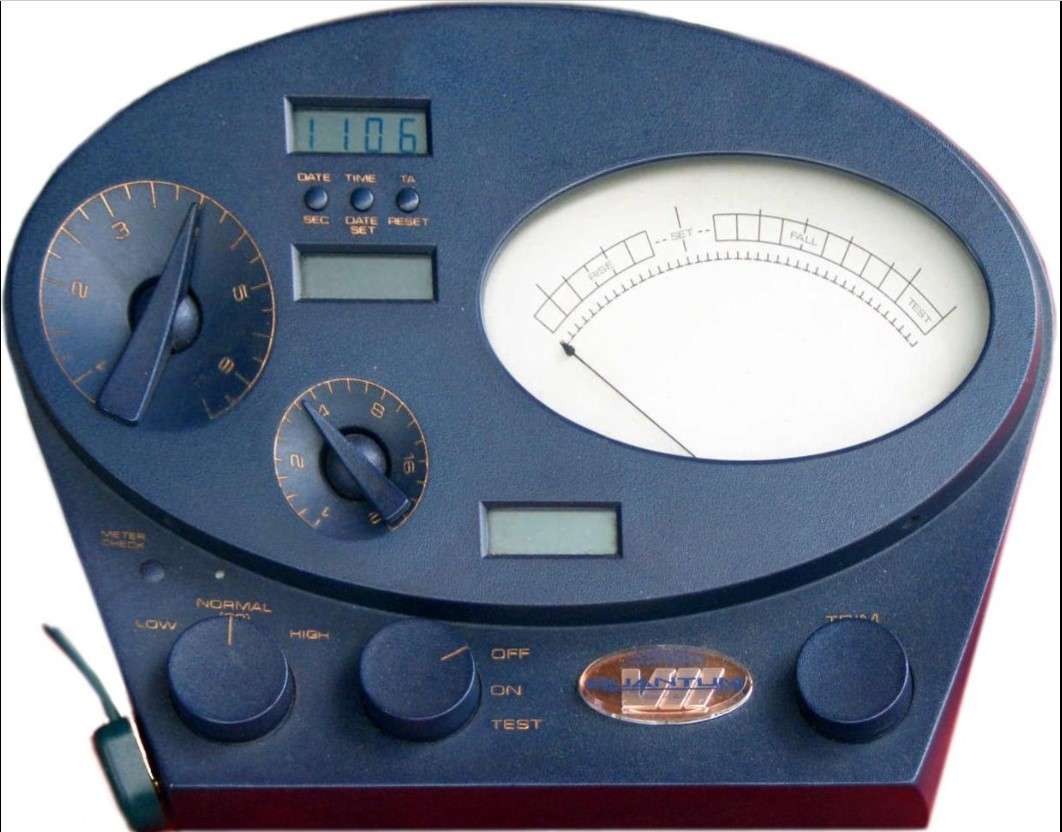
Officially known as the "Electropsychometer," it was invented by Volney Mathison and later adapted by Ron Hubbard, the founder of Scientology. The price of an original device like this exceeds an incredible five thousand dollars. The device presented in this video is based on the Theremino Master board, it is very cheap and simple to make, and has identical or even better features and options than the original device.
Theremino is an Open Source system, to connect computer with the real world. Unlike similar systems (for example Arduino), this system works immediately, and does not require any firmware programming. The communication between the PC and the external components is done through "Theremino Master" board which is just an input-output device and not a micro programmable controller as Arduino.
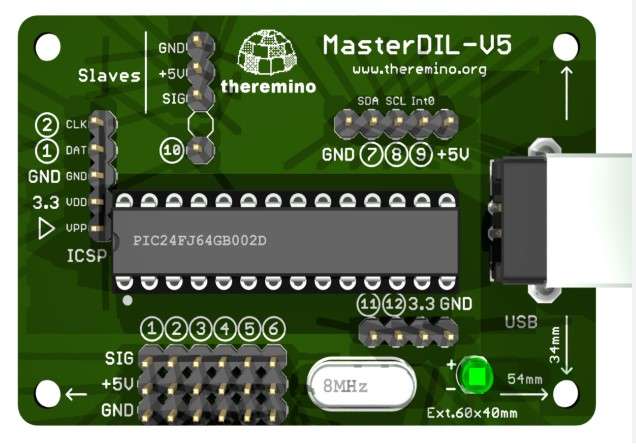
You can get the Theremino Master board ready for about twenty dollars or make it yourself, because the code and instructions for making it are free. You now have more than 150 great Windows applications on the Theremino website that allow you to control the components, modules, or sensors connected to the Theremino Master board. The Thermino system uses the power of the PC and the flexibility and low cost of the microcontrollers, so with this combination we can make great device.
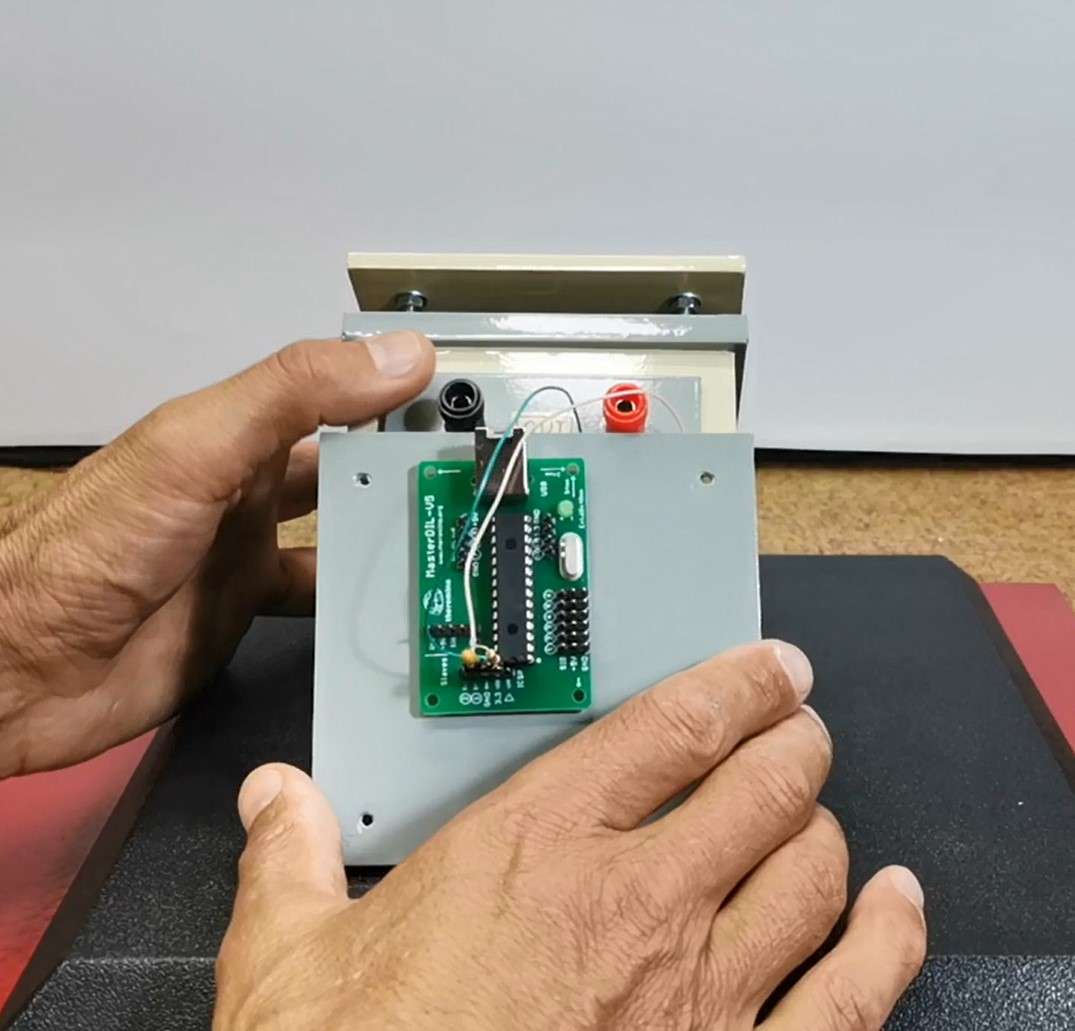
The device is extremely simple to build, in fact, like all Theremino projects, and consists of only a few components:
- Theremino Master board
- Resistor 22K (Red, Red, Orange, Golden)
- Capacitor 1µF
- and two electrodes actually two metal cylinders
This project is sponsored by PCBway. This year PCBway is celebrating the 10th anniversary of its successful existence. On the occasion of this event, PCBway provided its users with more conveniences such as big savings for certain products, as well as discounts of up to 80%. From July 1st to July 31st, log in to the PCBway site, and start the PCBway 10th Anniversary Tour, where you will enjoy Coupons, Lucky Draw, Exclusive Badges, unboxing blind boxes, and many other surprises. PCBway is always your great choice.

The software part consists of a beautiful Windows application developed by the Theremino team. The application is graphically designed to be very similar to the original device made with discrete components.
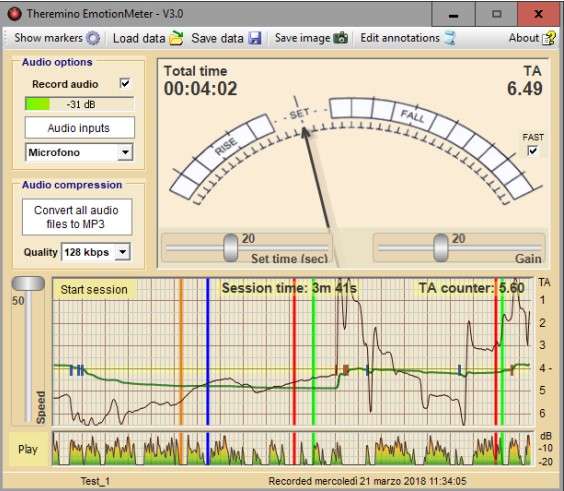
However, this software completely automates the entire setup process, and also contains a number of useful additional options.
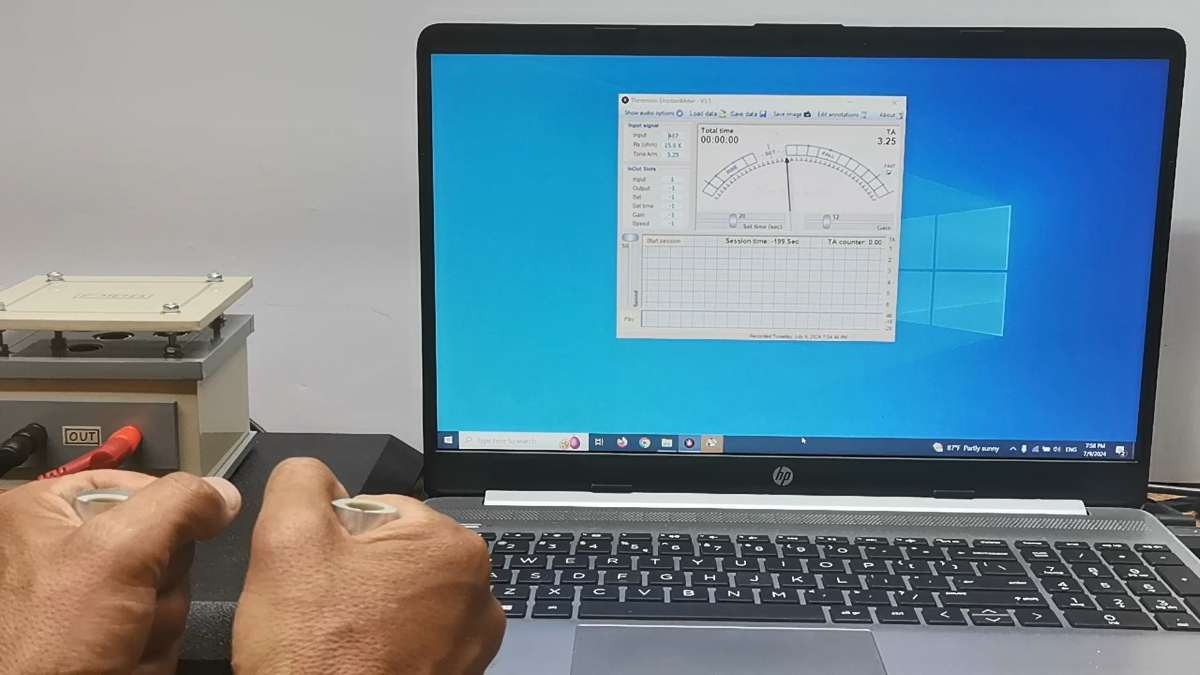
Now, let's briefly explain how to install and run the software. First we need to download the app Theremino Emotion Meter c. 3.1 from the given address. Then we unpack the archive into a folder that contains all the necessary files. We activate the .exe file, which automatically starts the Theremino Hal application, in which the characteristics of the board's inputs and outputs are defined. In this case the Theremino Hal should look like this.

To check the functioning of the device, we should hold the electrodes with both hands, during which a deflection should appear on the scale. And now I will try to explain to you the way of working with the device as briefly as possible, and you can find a detailed description in pdf format on the website given above. he E-Meter measures changes in the electrical conductance of the skin, similar to the Galvanic Skin Response (GSR) used in polygraphs. The idea is that mental and emotional states can affect the body's electrical properties. After turning on the device, we should take the electrodes in both hands and hold them with constant pressure.
First, the arrow deflects to the right, then slowly moves to the "SET" position. We should not have rings or other metal objects on our hands. It is necessary to hold the electrodes with a constant pressure until the he arrow rests on the "Set" position. In order to check the functionality again, we should briefly press the electrodes strongly, during which a deviation to the right should appear again. When the arrow settles at the set position we can start testing. To be honest, I have always been skeptical about this type of device, but this time I was very pleasantly surprised with its functionality. We are most sure if we test the functioning on ourselves.
For this purpose, when we bring the arrow to rest, we should start a favorite song or video that causes positive or negative emotional changes in us. At the same moment, the arrow begins to move towards the Fall position, which actually means a decrease in the surface resistance of the skin caused by emotional changes. If you follow the manufacturing and testing instructions, you won't believe how sensitive and functional is this device. After all in this claim, you will have to assured for yourself, because there is no way I can demonstrate it to you in a video.
Otherwise, this device has many more advanced and extremely useful functions than the original Emotion meter device, such as a graphic display of the entire session as well as an audio recording of it in mp3 format.

When we are done with the session, we need to remember the recorded material, and then we can play it again at any time, depending on the needs
The developers of Theremino system have made firmware and application (ArduHAL) so that instead of Theremino board, you can use Arduino Nano microcontroller which is often found in do-it-yourselfers. So if we have an Arduino Nano we can make a basic Theremino project in less than an hour and we can easily see the benefits. Now I will present you how to make this project with an Arduino Nano microcontroller board.
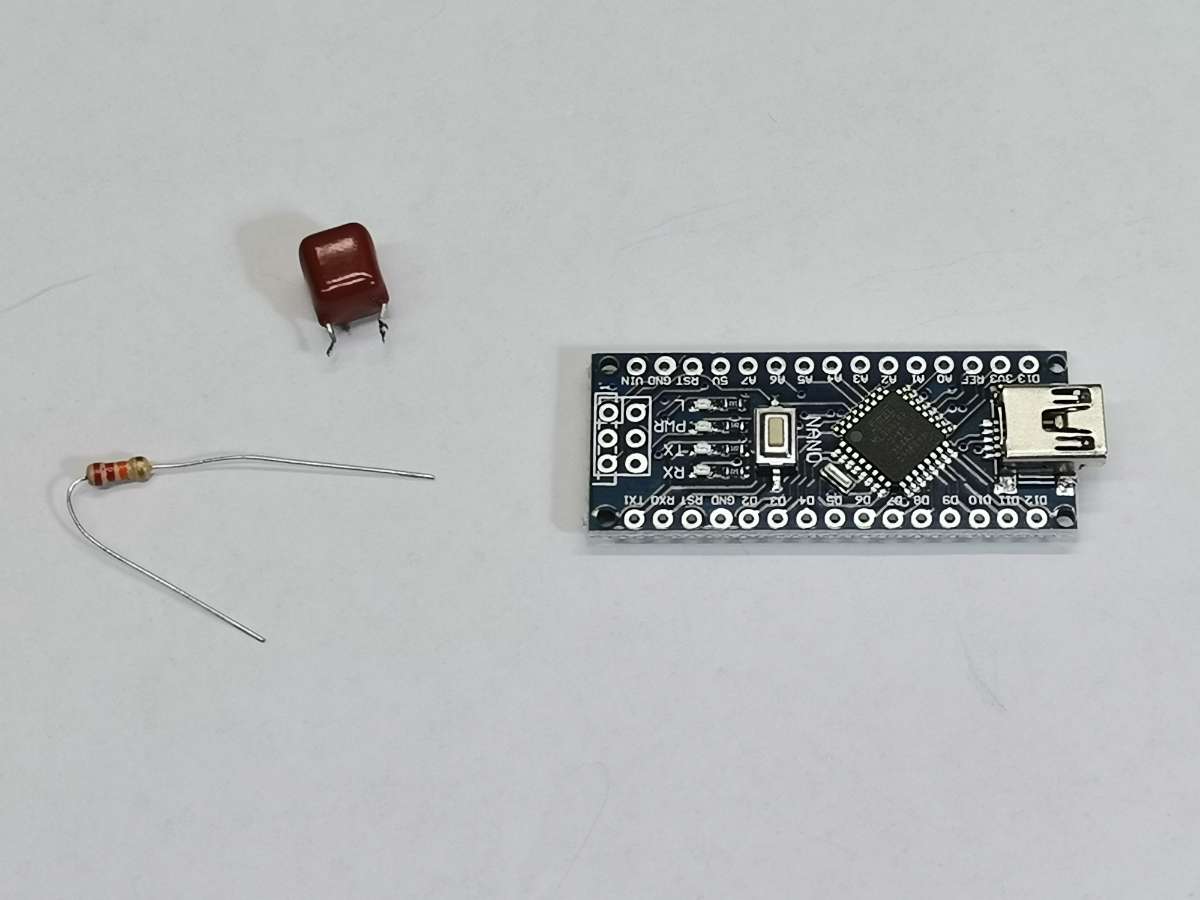
Otherwise, this version also consists of only three elements:
- Arduini Nano microcontroller board
- resistor 22K ohms
- and capacitor 1µF
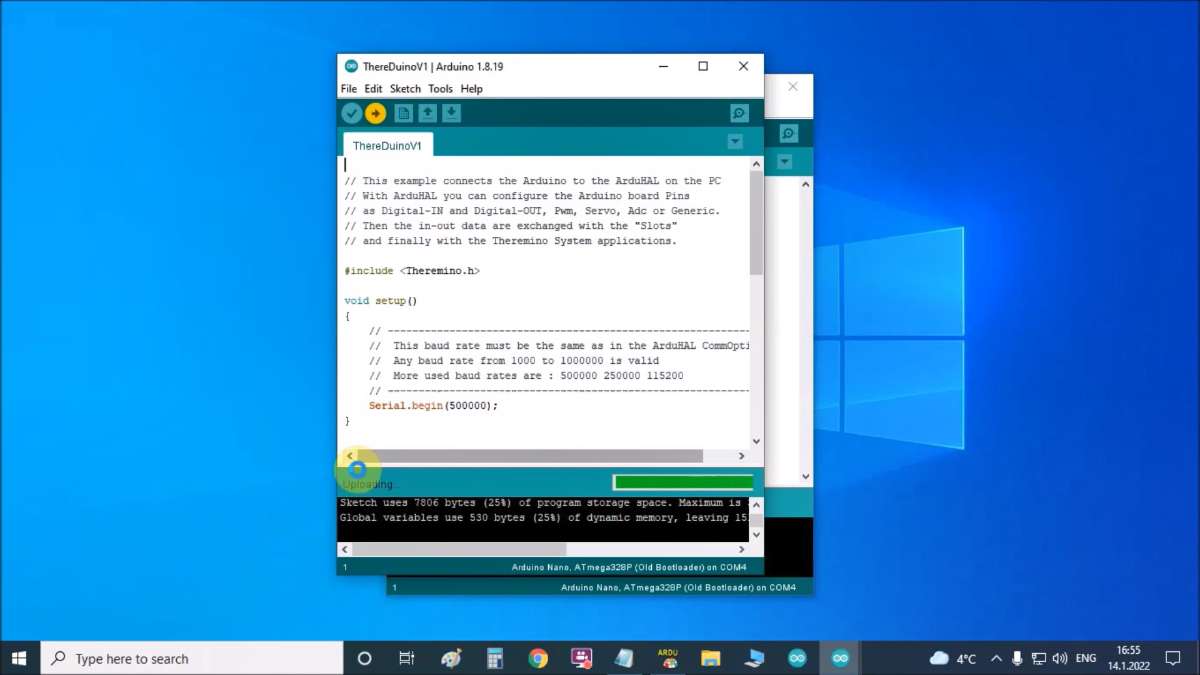
Let's first explain how to upload the firmware to Arduino nano microcontroller. Let me mention that this procedure is done only once at the beginning and then this Arduino is used for all Arduino-Teremino compatible projects. I hope most readers already have some experience, so I will explain this step briefly. Browse to the location of the Arduino library folder. Open the folder “libraries” and copy here the folder “Theremino” which contains the.zip file "ArduinoLibrary_Theremino_V1.9 " that you can download it from the official site. Now open Arduino IDE software, go to file - examples - Theremino ThereDuino - and click to ThereDuino V1. Now we need to upload given sketch to Arduino Nano board and thats all.
Now the Arduino is ready and we can use it in all the supported Theremino projects which are around 100. Next you need to start the "ArduHal" application which is used for mapping and configuring Arduino ports. This application is a link between the Windows software and the microcontroller. Specifically for this version, ArduHal application should look like the picture. 
This time the folder for this program should contain the following files.

First, we manually launch the arduchal application that was previously configured for this project, and then we launch the .exe file that launches the application. Everything is identical to the device with the Theremino board, with one note that the device with the Theremino board is much more sensitive, so I recommend this project with Arduino for basic testing, and also in case we do not own a Theremino board at the moment. However, I am sure that after the first projects with the help of Arduino-Teremino Board, you will want to get the original Theremino Board, which is primarily compatible with all projects, has a higher speed of communication and other advantages.
And finally a short conclusion. This is another wonderful Theremino project with outstanding sensitivity and functionality that only requires three components to build, and no programming experience or complex settings.