Object detection is a computer vision technique that involves identifying and locating objects within an image or video. It is a fundamental task in various applications, such as surveillance, autonomous driving, and image retrieval.
This time I will explain to you how to make a powerful object detection device that uses only an inexpensive ESP32 Camera module with a built-in FTDI USB to serial converter.
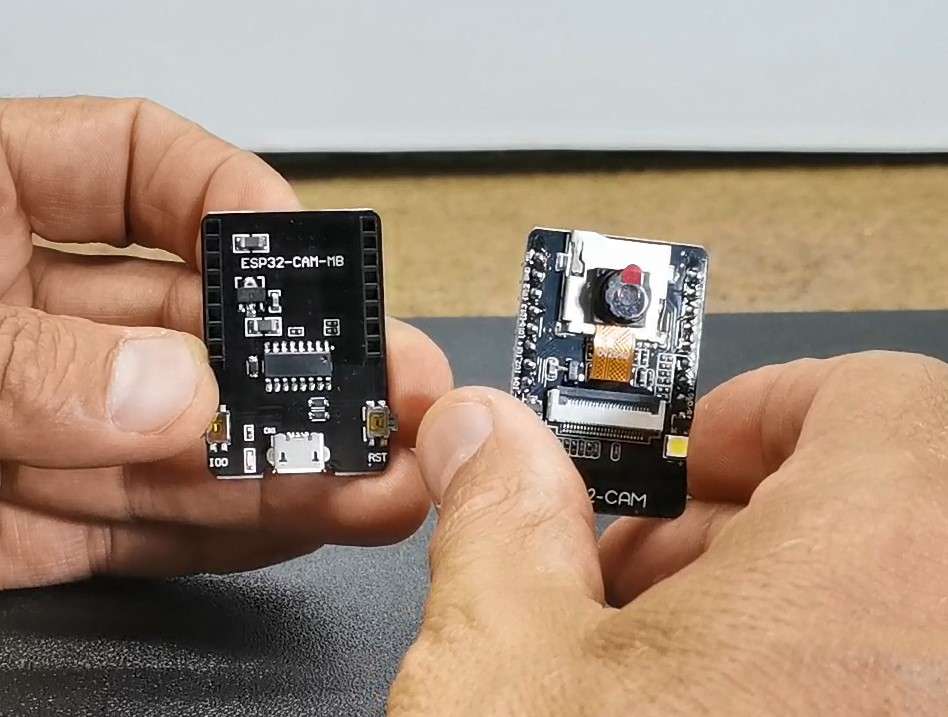
This means that there is no need for any soldering or connection of external components. We only need to connect the Module directly to the USB port of the PC. Basically the whole system consists of two parts
- Esp32 Camera module with arduino code installed
- and the second part is а pc software, actually Python code that uses Open CV, which is a powerful library for computer vision tasks, including identifying and localizing objects, as well as object detection. In our case are processed series of images received from the camera module.
Now I will explain the installation method in order.
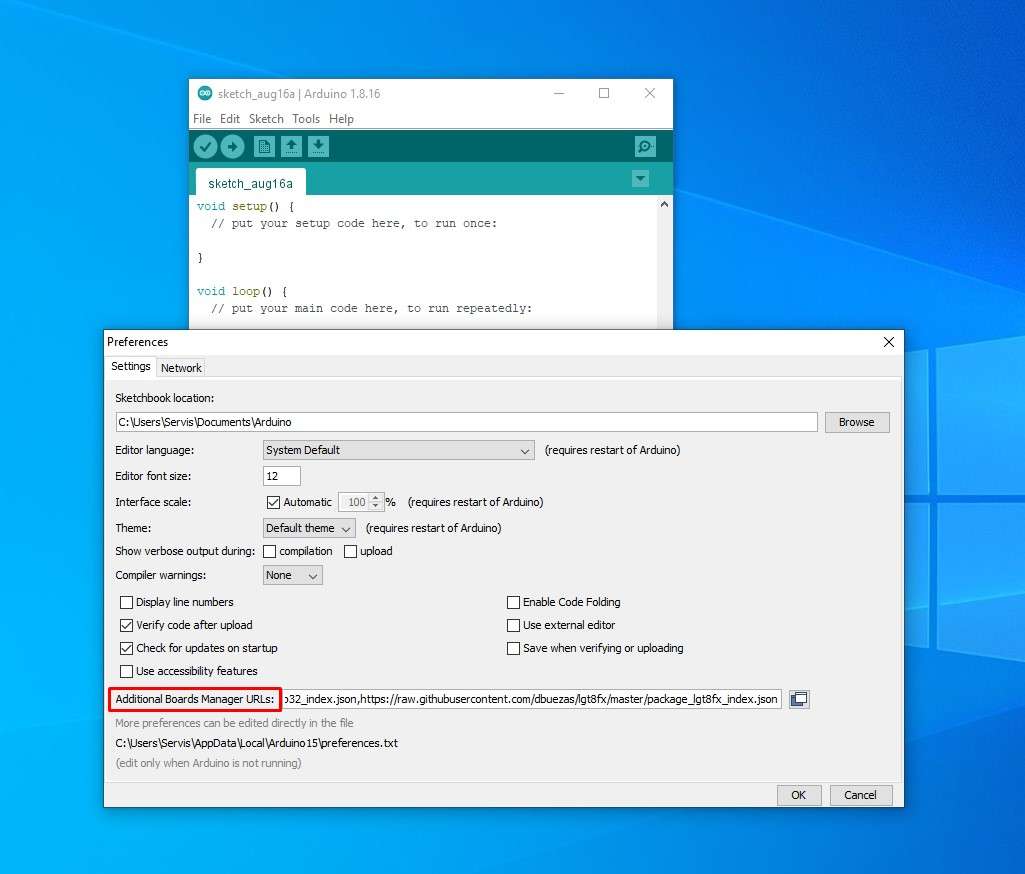
First we need to enable camera module support in the Arduino environment. For this purpose we go to Arduino IDE - File - Preferences - where we add the ESP32 URL to "Board Manager URLs" as follows:
(https://raw.githubusercontent.com/espressif/arduino-esp32/gh-pages/package_esp32_index.json)
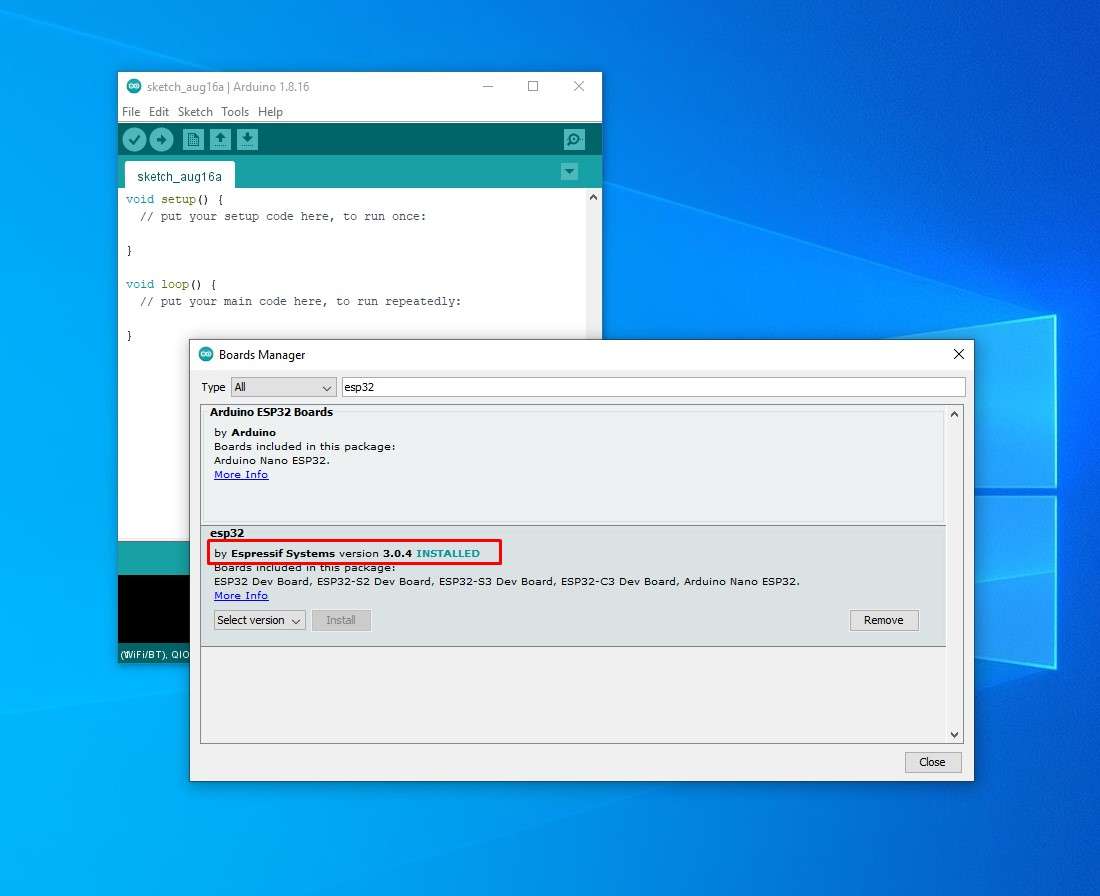
Now click "Tool-->Board-->Board Manager", and search for "esp32". It is recommended to
install version 2.0.6 or newer ESP32 core. I installed the latest version.
Next, on Arduino IDE -> Tools -> ESP32 Arduino we choose: AI Thihker ESP32-Cam
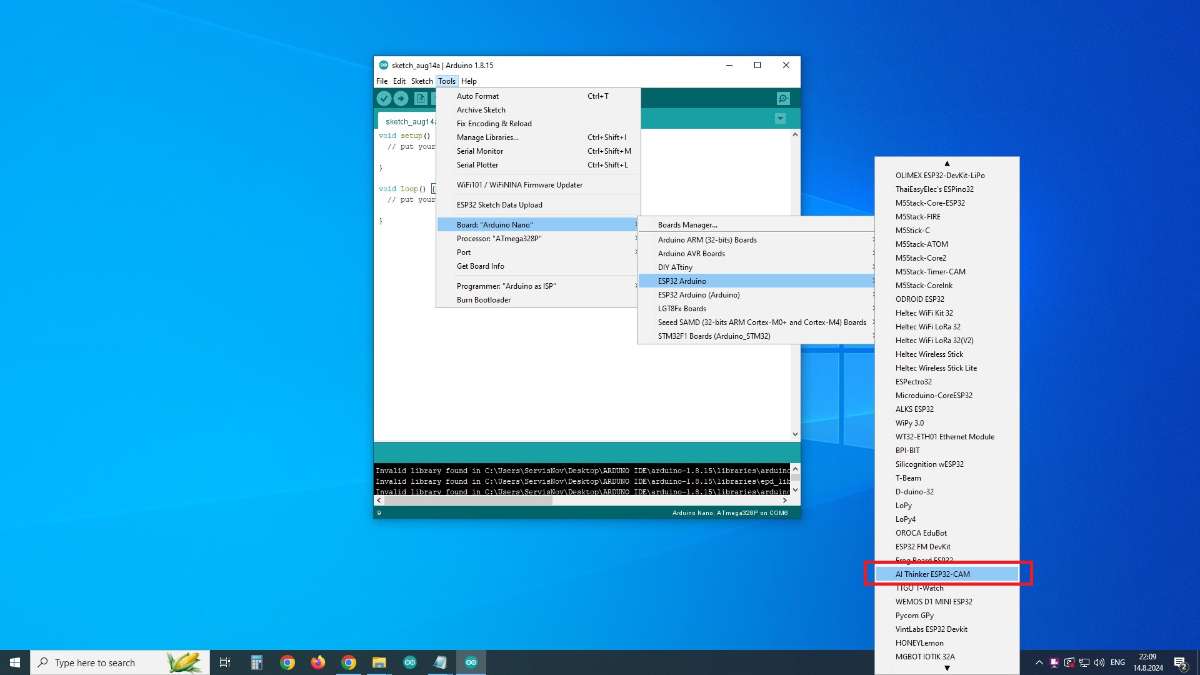
With this, the procedure for entering support for the specific Camera Мodule in the Arduino IDE is completed.
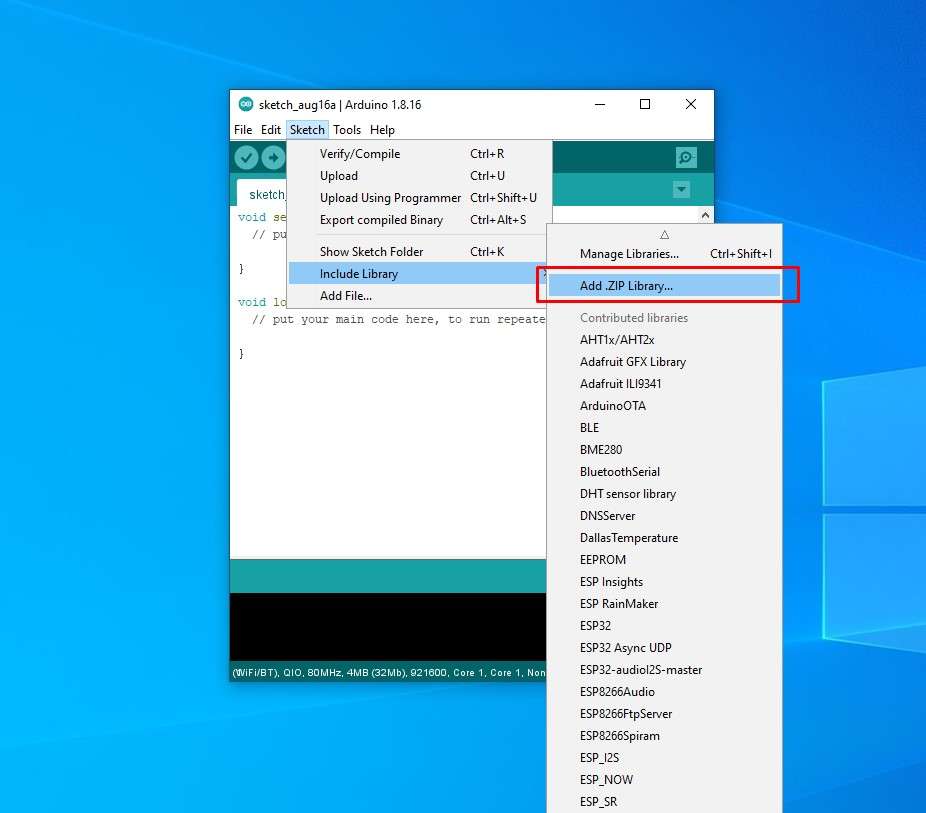
Next we install the ESP32cam library from the attached .zip file.
We go to Sketch - Include Library - add ZIP library and select the given library
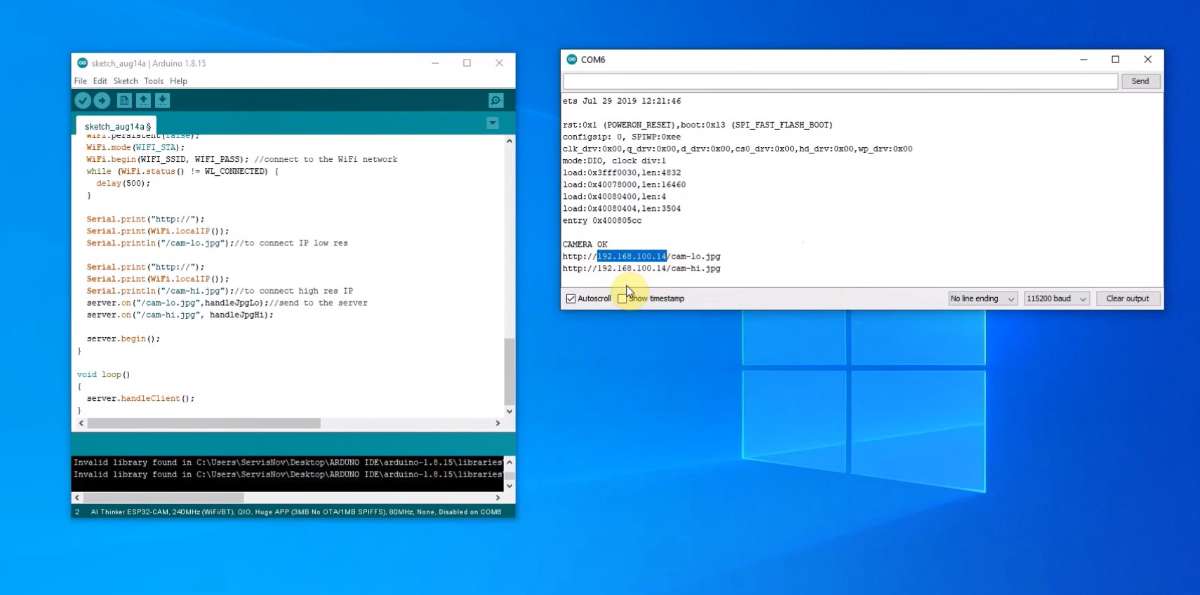
After this we upload the provided Arduino code. Just don't forget to enter the credentials of our Wi-Fi network beforehand in the code. Now in the Arduino Serial Monitor we check if the camera is initialized and working, and we also need to remember the IP address that was assigned to it in the local network because we will need it when starting the Python code
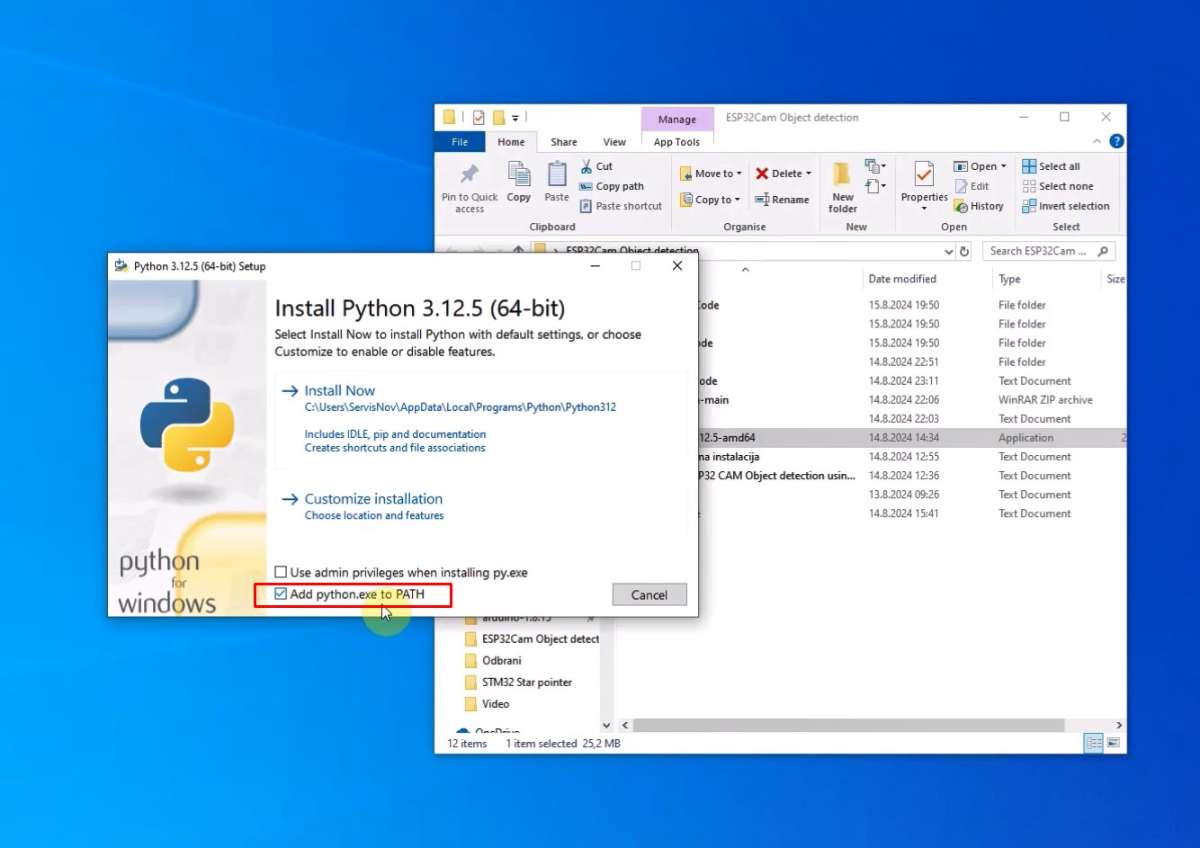
Next comes the installation of the Python environment section. For this purpose, we go to the Python page, download the latest version, and install it with default settings, noting that we need to mark the checkbox "add python .exe to path"
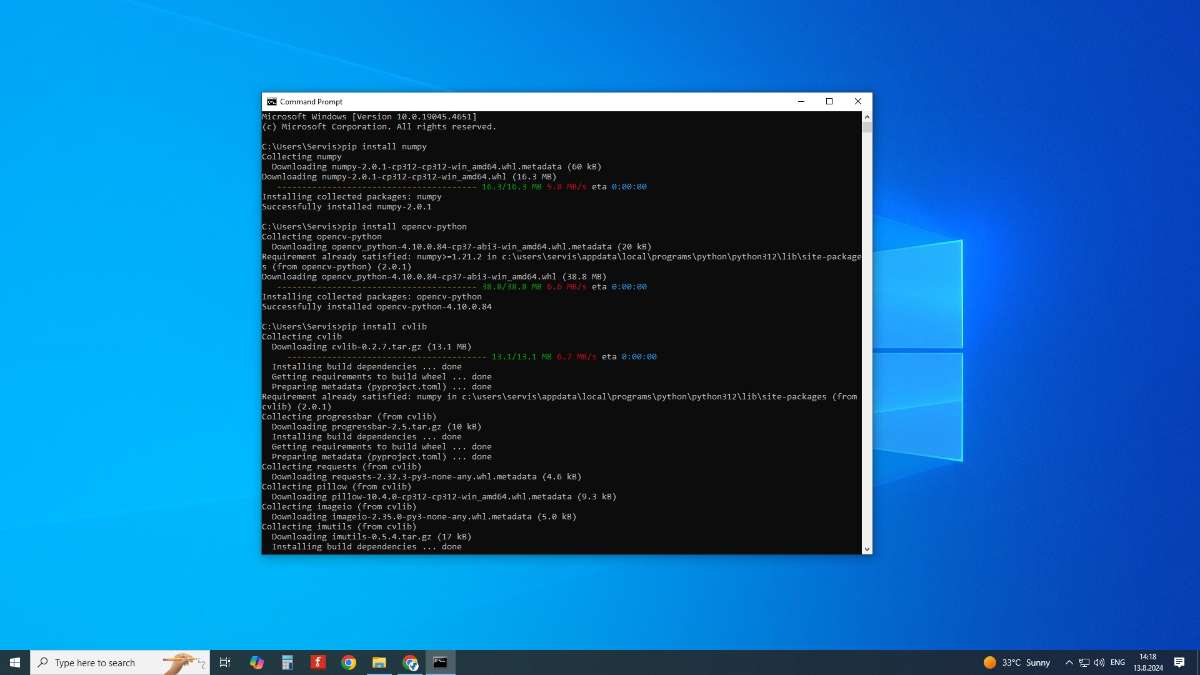
As I mentioned at the beginning, in order for Python code to work, several necessary libraries need to be installed, namely NumPy, OpenCV and cvlib libraries. For this purpose, we go to the command prompt and execute the following commands
-type: pip install numpy and press enter. After the installation is done.
-type: pip install opencv-python and press enter.
-type: pip install cvlib and press enter
Now we start the Python IDLE editor which is an integral part of the Python installation, or any other Python editor. We go to File - Open - and search for the provided Python code. Let me mention that together with the code, there are three more files that must be located in the same folder as the code. When we open the code, we need to enter the IP address from the camera that was previously given to the Arduino Serial Monitor.
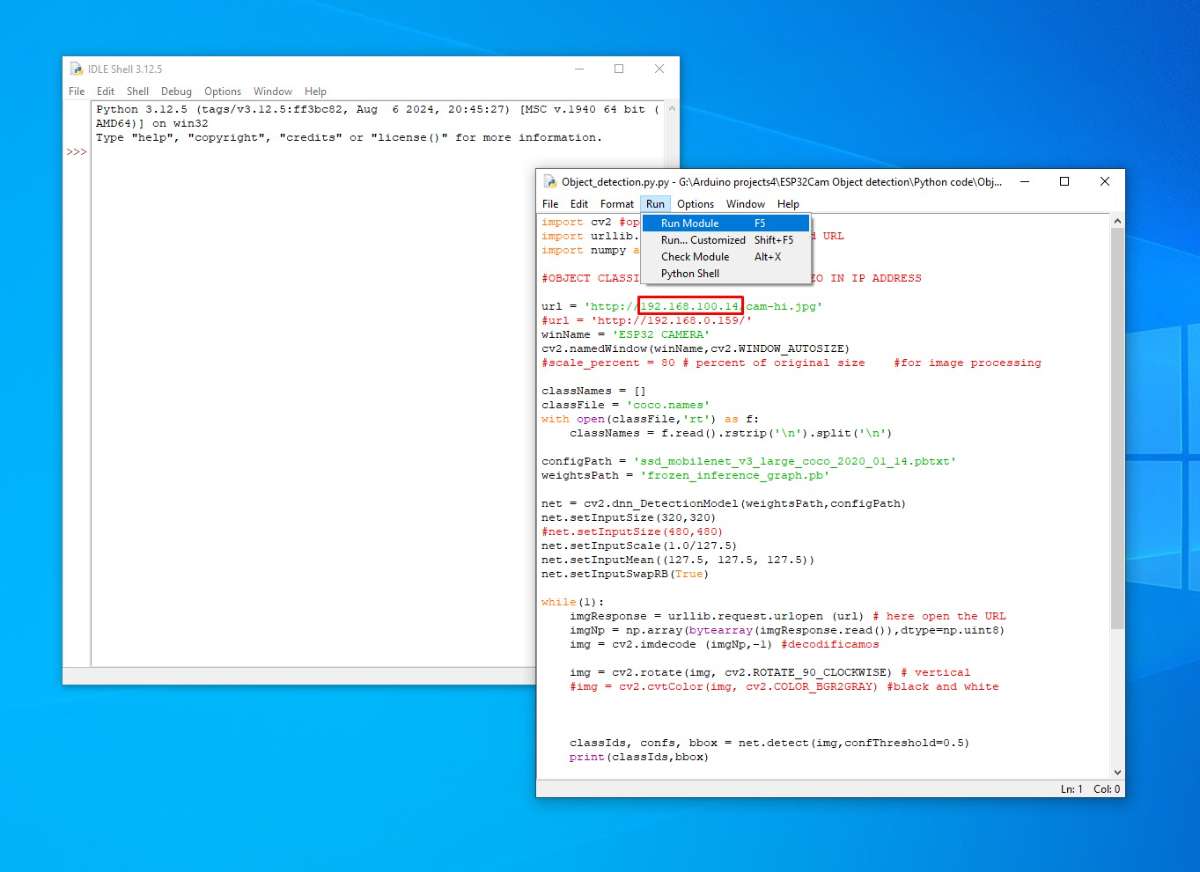
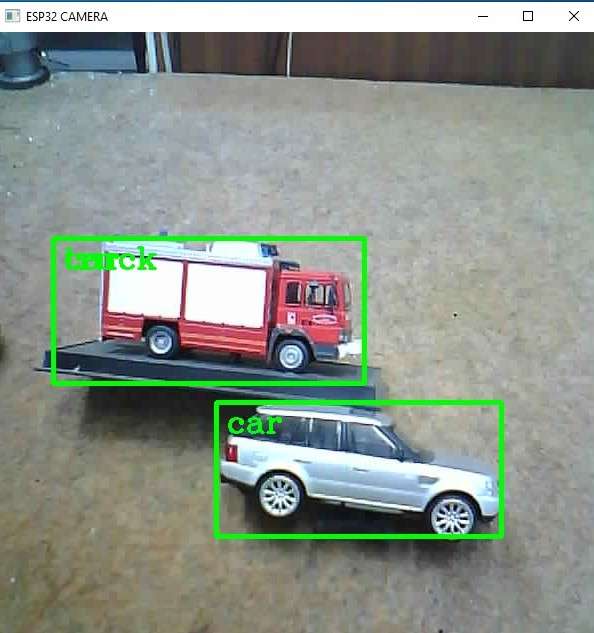
We press RUN, and if we have completed the previous steps, a video from the camera appears on the screen for a few moments, on which various objects surrounded by a rectangular green frame are detected. The name of the detected object is written on the upper part of the frame.
And now let's see how it looks in real conditions. As can be seen from the examples, the system is capable of detecting objects with high precision.