Introduction
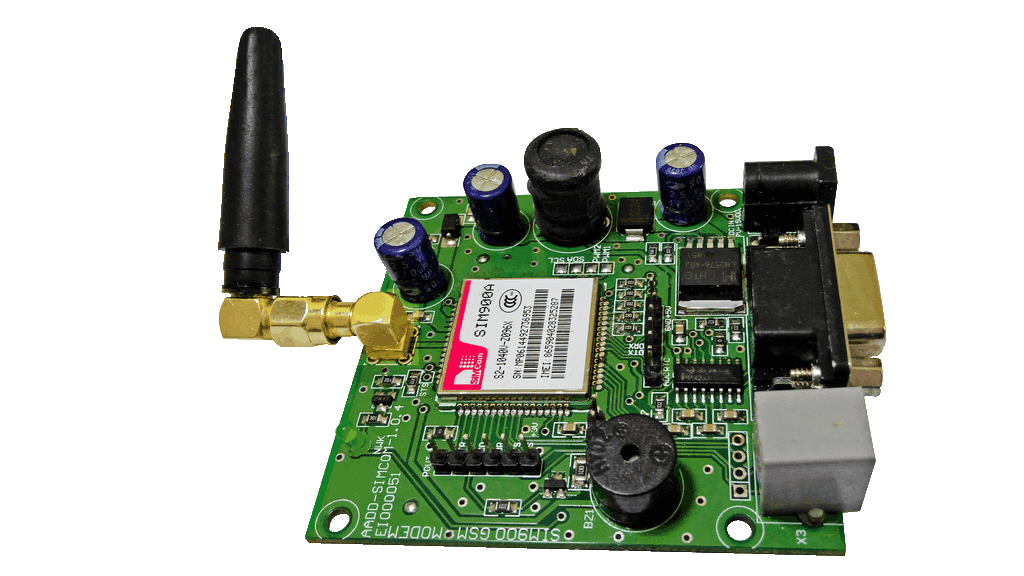
SIM900A Modem can work with any GSM network operator SIM card just like a mobile phone with its own unique phone number.
SIM900A GSM/GPRS modem is plug and play modem with RS232 serial communication supported. Hence Advantage of using this modem will be that its RS232 port can be used to communicate and develop embedded applications.
Applications like SMS Control, data transfer, remote control and logging can be developed. SIM900 modem supports features like voice call, SMS, Data/Fax, GPRS etc.
SIM900A modem uses AT commands to work with supported features.
Note that to be connected to a cellular network, the modem requires a SIM card provided by a network provider.

Power Requirement
This board requires external power supply of ~12V and can draw up to ~2A of current at its peak.
Indicators
It has two LED indicators as,
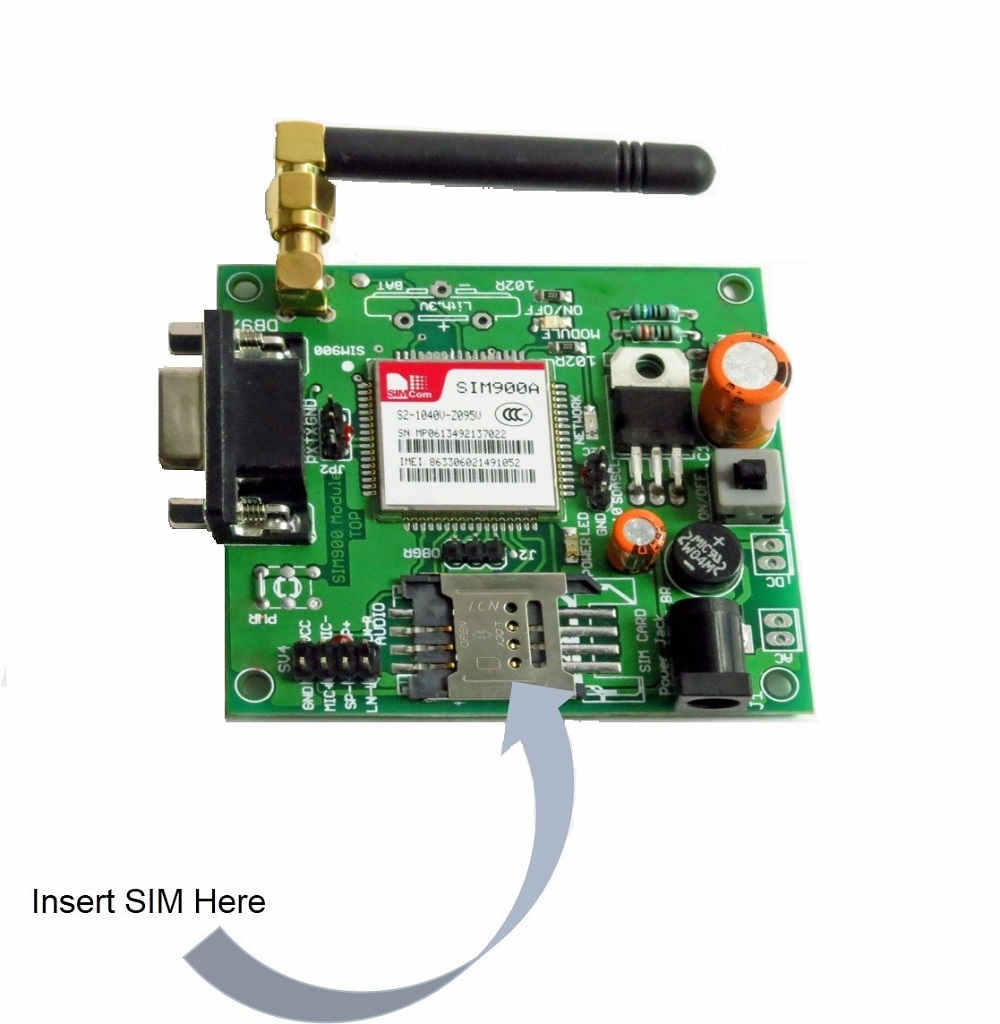
ON: It shows that the Modem is getting powered and is switched on.
NET: This network LED blinks when the modem is communicating with the radio network.
Network LED
When modem is powered up, network LED blink every second and after network registration it will start to blink after every 3 seconds. This shows that the modem is registered with the network.
To test modem, connect board serially to PC and send “ATE0” or “AT” through serial terminal. If “OK” response is received from the modem, then it means all is well.
AT Command Reference
There are many AT commands for SIM900A modem, kindly go through ‘SIM900 AT Command Manual’.
Interfacing GSM with PC/Laptop
- Before interfacing SIM900A GSM module with PIC18F4550 microcontroller, we can check GSM module output for various AT commands on PC/Laptop.
- To do this, connect GSM module to the PC/laptop via USB to Serial converter as shown below.

- Insert SIM Card

- Connect power supply to the SIM900A GSM module.
- Now, there is one Network LED on GSM module which blinks continuously every second on power up. When the SIMregisters in network then this LED blinks after every 3 sec. It takes 10-60 second to register in network.
- Now send AT commands and check the response.
- Every time we have to write command and send it by Enter key<CR>. You will always see the response in form of
<CR><LF><Response><CR><LF>
In following table, only responses are present, <CR><LF> are removed intentionally.
Basic AT Command
There some basic AT commands which are used as follows,
| Command | Description | Response |
| AT | Checking communication | OK |
| ATE0 or ATE1 | Turn off /ON echo | OK |
| ATI | Product Identification | e.g.: SIM900 R11.0 OK |
| AT+GSN | Product serial number identification (IMEI) | IMEI no. |
| AT+GMI | Manufacturer Name | Manufacturer Name E.g. SIMCOM_LTD |
| AT+GMM | Model Identification | Model no. E.g. SIMCOM_900A |
| AT+CSMINS? | SIM Inserted Status Reporting | +CSMINS: <n>, <SIM inserted> 0: not inserted 1: inserted |
| AT+CSPN? | Get Service Provider Name from SIM | Service Provider Name E.g. +CSPN: “!dea”, 1 |
Calling
To use calling service following AT commands are used.
| Command | Description | Response |
| ATD<Mob. No.>; | Dial / call a number | OK (if successful), BUSY (if busy), NO CARRIER (if no connection) |
| ATA | Answer a call | OK |
| ATH | Hang up call | OK |
| ATDL | Redial Last Telephone Number Used | OK (if successful), BUSY (if busy),NO CARRIER (if no connection) |
Message
To use SMS service following AT commands are used.
| Command | Description | Response |
AT+CMGF=<index> index- 0: PDU 1: Text | Select message format | OK
|
| AT+CMGS=”9881xxxxxx” | Send message | > ”Type message here” press ‘ctrl+z’ to end msg or ‘ESC’ to exit without sending OK |
| AT+CMGR=<index> | Read message at that index | +CMGR: “Message Header” Message Body OK |
| AT+CMGD=<index> | Delete message at that index | OK (if present at that index) |
| AT+CMGDA=”DEL ALL” | Delete all SMS | OK |
HTTP (Hypertext Transfer Protocol)
To use HTTP function using SIM900 modem follow below AT commands. Two methods are there namely,
GET: to get data from server.
POST: to post data to server.
First we need to connect to GPRS by configure bearer profile using AT command as,
| Demonstration | Syntax | ExpectedResponse |
| Configure bearer profile 1 | AT+SAPBR=3,1,"Contype","GPRS"
AT+SAPBR=3,1,"APN","internet" | OK
OK |
| To open a GPRS context. | AT+SAPBR =1,1 | OK |
| AT+SAPBR=2,1 | +SAPBR: 1,1,"10.89.193.1" OK | |
| To close a GPRS context. | AT+SAPBR =0,1 | OK |
Note: Enter Access Point Name (APN) of corresponding network service provider. E.g. here we have entered “internet” which is APN of IDEA network.
Now let’s see AT commands for GET method,
HTTP GET method
| Demonstration | Syntax | ExpectedResponse |
| Initiate http service | AT+HTTPINIT | OK |
| Set parameters for HTTP session | AT+HTTPPARA= “CID”,1
AT+HTTPPARA= “URL”,”api.thingspeak.com” | OK
OK |
| GET session start | AT+HTTPACTION=0 | OK |
| GET successfully | AT+SAPBR =0,1 | +HTTPACTION:0,200,1000 |
| Read the data of HTTP server | AT+HTTPREAD | +HTTPREAD: 1000 Read data…. OK |
| Terminate http service | AT+HTTPTERM | OK |
Note: Enter http client URL. e.g. here we have entered “api.thingspeak.com”.
Now let’s see AT commands for POST method,
HTTP POST method
| Demonstration | Syntax | Expected Response |
| Initiate http service | AT+HTTPINIT | OK |
| Set parameters for HTTP session | AT+HTTPPARA= “CID”,1 AT+HTTPPARA= “URL”,” www.google.com” | OK
OK |
| POST the data whose size is 100Bytes and the maximum latency time for inputting is 10000ms. It is recommended to set the latency time long enough to download all the Data in the latency time. | AT+HTTPDATA=100,10000 | DOWNLOAD Enter data of exact size mentioned in syntax OK All data has been received |
| POST session start | AT+HTTPACTION=1 | OK |
| POST successfully | +HTTPACTION:1,200,0 | |
| Terminate http service | AT+HTTPTERM | OK |
TCP (Transmission Control Protocol)
TCP is communication protocol of internet. There are two modes of connection used for SIM900A TCP/IP application,
- Single Connection
- Can establish only one connection. - Multi Connection
- Can establish 8 connections.
There are two TCP/IP application modes,
- Transparent Mode
- Non-Transparent (Normal) Mode
Note, when in multi connection mode SIM900A can work only in Non-transparent mode.
Let’s see TCP Client connection AT commands
| Demonstration | Syntax | Expected Response |
| To select connection mode | AT+CIPMUX=0 | OK |
| Sets apn, username and password | For single connection AT+CSTT=”APN",”USERNAME”,”PASSWORD” | OK |
| Bring up wireless connection | AT+CIICR | OK |
| Get local IP | AT+CIFSR | Local IP e.g.“10.81.14.12” |
| Start-up TCP connection | for single connection, AT+CIPSTART=”TCP”,”api.thingspeak.com”,”80” | CONNECT OK |
| Send data | AT+CIPSEND | > …Enter data and substitute CTRL+Z (0x1A) …. SEND OK |
| Close the connection | For quick close, AT+CIPCLOSE=1 | CLOSE OK |
| Deactivate GPRS | AT+CIPSHUT | SHUT OK |
Examples of Sim900A interfacing
- Sim900A GSM Module Interfacing with PIC18F4550
- Sim900A GSM Module Interfacing with ATmega32
- Sim900A GSM Module Interfacing with Arduino
- Sim900A GSM Module Interfacing with TI Launchpad
- Sim900A GSM Module Interfacing with LPC2148
- Sim900A GPRS Module MQTT Client with ATmega16
- Sim900A GPRS Module HTTP Client with ATmega16
- Sim900A GPRS Module TCP Client with ATmega16
- Sim900A GPRS Module Interfacing with PIC18F4550
- Sim900A GPRS Module Interfacing with Arduino
- Sim900A GPRS Module Interfacing with TI Launchpad
- Sim900A GPRS Module Interfacing with LPC2148
Components Used |
||
|---|---|---|
| SIM900A GSM GPRS Module SIM900A is dual band GSM/GPRS 900/1800MHz module board used to utilize GSM and GPRS services around the globe. It is used to make/receive voice calls, send/receive text messages, connect to and access the internet over GPRS. |
X 1 | |