Description
ESP32 has on-chip Bluetooth and BLE (Bluetooth Low Energy). In this guide, we will see the Bluetooth part.
ESP32 Bluetooth is also referred as classic Bluetooth.
Using Bluetooth is very much simple on ESP32 with BluetoothSerial Library with Arduino IDE.
To start with, open the example in Arduino IDE File > Examples > BluetoothSerial > SerialtoSerialBT.
Code
//This example code is in the Public Domain (or CC0 licensed, at your option.)
//By Evandro Copercini - 2018
//
//This example creates a bridge between Serial and Classical Bluetooth (SPP)
//and also demonstrate that SerialBT have the same functionalities of a normal Serial

#include "BluetoothSerial.h"

#if !defined(CONFIG_BT_ENABLED) || !defined(CONFIG_BLUEDROID_ENABLED)
#error Bluetooth is not enabled! Please run `make menuconfig` to and enable it
#endif

BluetoothSerial SerialBT;

void setup() {
 Serial.begin(115200);
 SerialBT.begin("ESP32test"); //Bluetooth device name
 Serial.println("The device started, now you can pair it with bluetooth!");
}

void loop() {
 if (Serial.available()) {
   SerialBT.write(Serial.read());
 }
 if (SerialBT.available()) {
   Serial.write(SerialBT.read());
 }
 delay(20);
}
How this code works
The code starts with
#include "BluetoothSerial.h"The next three lines check if Bluetooth is properly enabled.
#if !defined(CONFIG_BT_ENABLED) || !defined(CONFIG_BLUEDROID_ENABLED)
#error Bluetooth is not enabled! Please run `make menuconfig` to and enable it
#endif
Now, we have to define the object of the class BluetoothSerial. This object will be used for initializing the Bluetooth Stack on ESP32.
Defining the Object:
BluetoothSerial SerialBT;
setup()
In the setup initialize serial communication at a baud rate of 115200.
Next, we call the begin function of the BluetoothSerial object. This will initialize the Bluetooth Serial. As an input to this function, we pass the name which we want to assign to the Bluetooth. Here is “ESP32test”.
SerialBT.begin("ESP32test"); //Bluetooth device name
loop()
In the loop, we send and receive the data via Bluetooth Serial.
First if statement: we check if bytes are being received in the serial port. In this example, we will send the data from Computer to ESP32 on Serial Communication. If this data is available, then send that information via Bluetooth to the connected device. i.e., Smartphone.
if (Serial.available()) {
  SerialBT.write(Serial.read());
}
SerialBT.write() sends data using Bluetooth serial to the connected device.
Serial.read() returns the data received in the serial port.
The next if statement, checks if there are bytes available to read in the Bluetooth Serial port. If there are, we’ll write those bytes in the Serial Monitor on the computer.
if (SerialBT.available()) {
  Serial.write(SerialBT.read());
}
Testing on ESP32
- First, we need Android Smartphone, where we have to download app on Google Play Store for Bluetooth serial Terminal. There are multiple apps available. You can download any. I will suggest the following, “Bluetooth Terminal” it’s light and simple. Install it.
- Now Upload the code in Your ESP32 Board.
- The code will start executing and Turns ON the ESP32 Bluetooth Stack.
- Now go to your Android Phone Bluetooth Setting >> search for new device
- You will find the Device with the name “ESP32test”.
- Click on it and add it to the pair device.
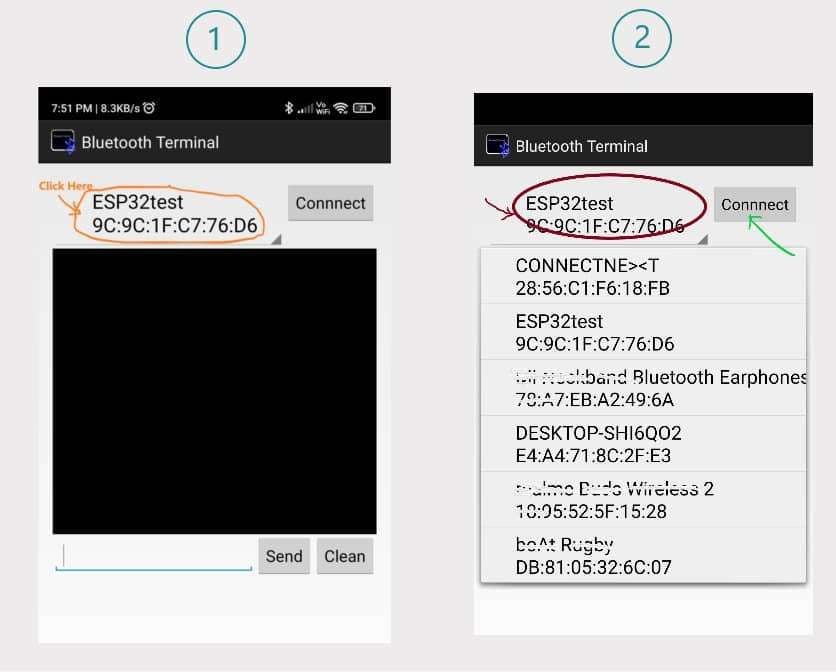
- After successfully paring, Open the “Bluetooth Terminal” Application, and connect to the “ESP32test”. Screenshot as follow:
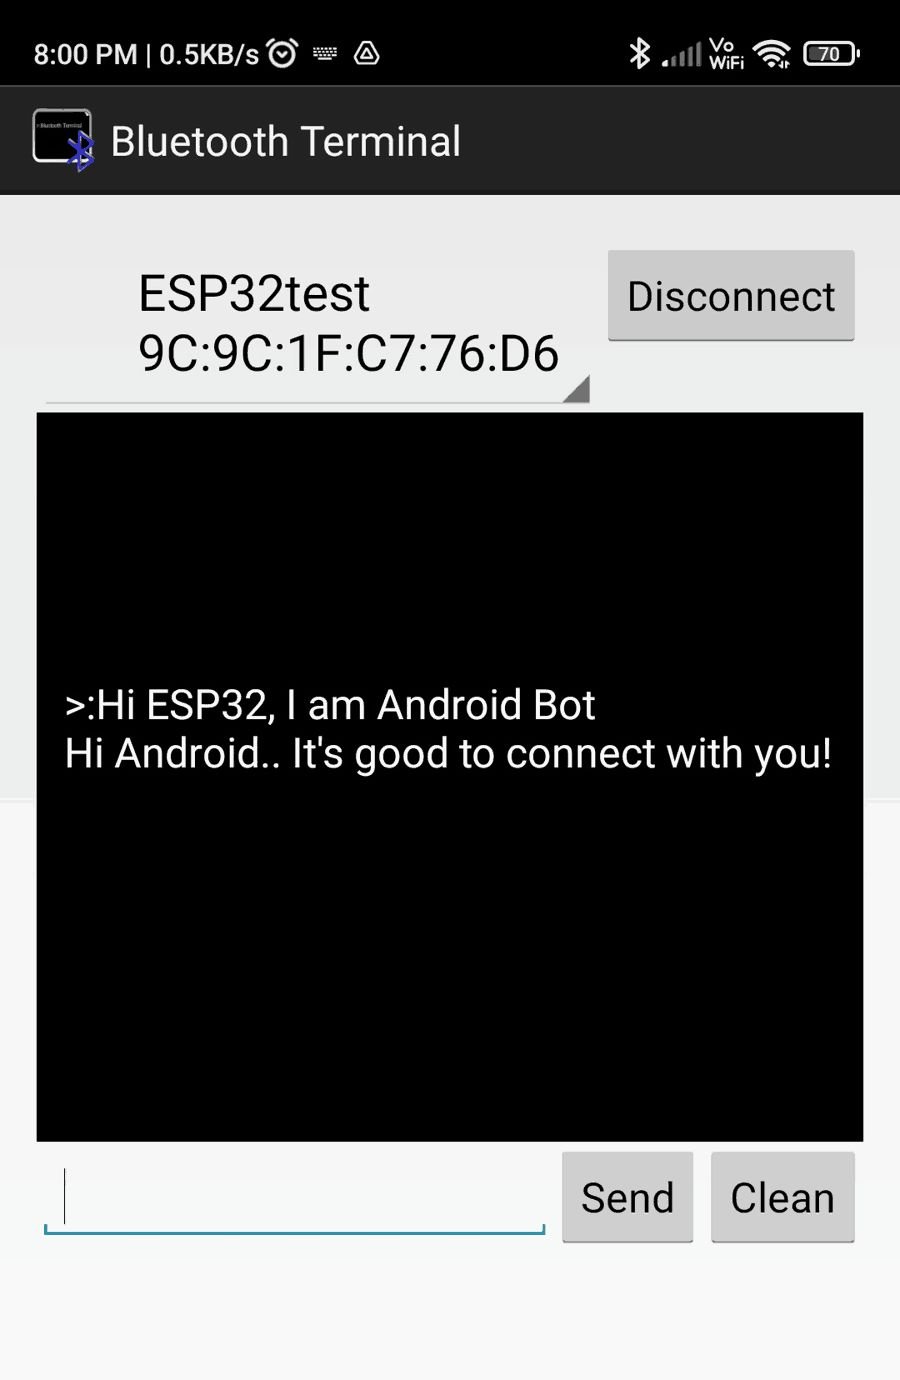
- After connecting with the ESP32test, we can type the string and send it to ESP32. Also, we can send a string to our Smartphone via ESP32 Bluetooth.
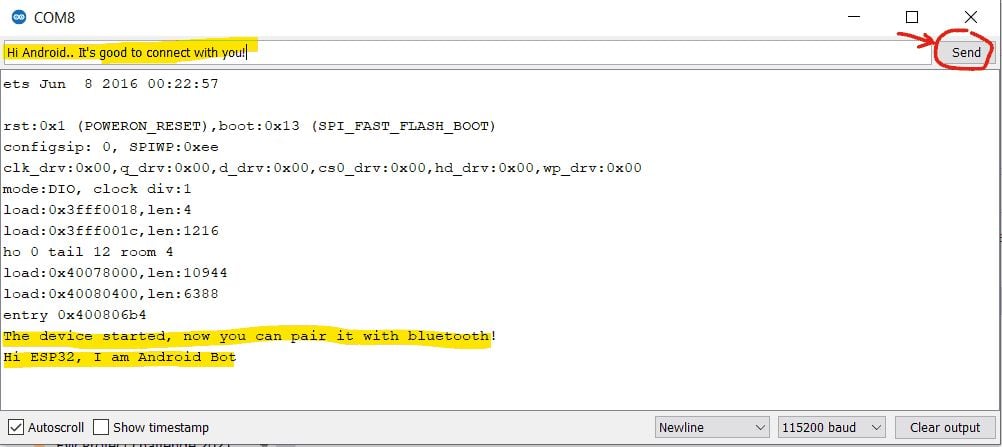
Output on Serial Monitor
Bluetooth Terminal App Output
Control the LED using the ESP32 Bluetooth Application
Turning LED ON and OFF using ESP32 Bluetooth.
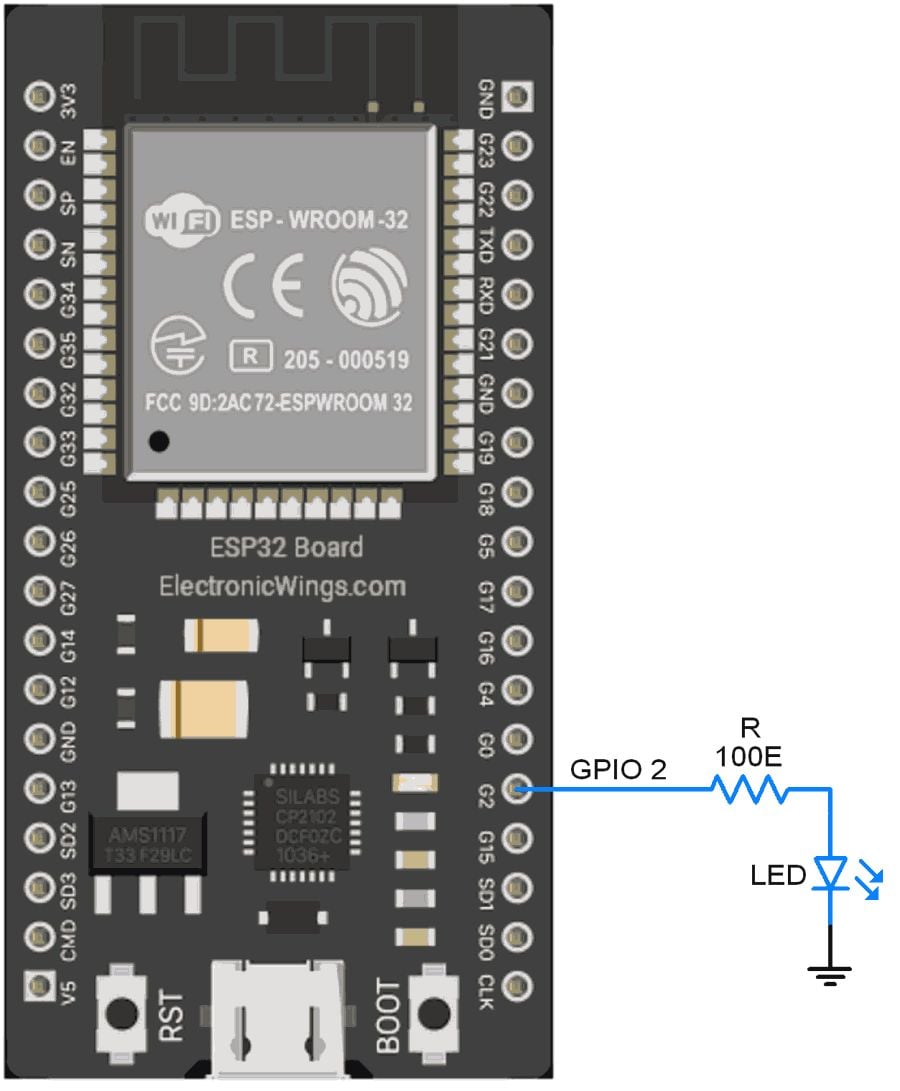
Interfacing diagram
Code
/*
 Controlling LED/GPIO using Bluetooth
 http:://www.electronicwings.com
*/

#include "BluetoothSerial.h"

const char LED= 2;
const char turnON ='a';
const char turnOFF ='b';

#if !defined(CONFIG_BT_ENABLED) || !defined(CONFIG_BLUEDROID_ENABLED)
#error Bluetooth is not enabled! Please run `make menuconfig` to and enable it
#endif

BluetoothSerial SerialBT;

void setup() {
 Serial.begin(115200);
 pinMode(LED, OUTPUT);
 SerialBT.begin("ESP32test"); //Bluetooth device name
 Serial.println("The device started, now you can pair it with bluetooth!");
 Serial.println("Now You can TURN ON LED by sending 'a' and TURN OFF by 'b'");
}

void loop() {
 char message;

 if (SerialBT.available()) {
   message=SerialBT.read();
   Serial.write(message);

   if(message==turnON){
     digitalWrite(LED, HIGH);      //Turn LED ON
     Serial.println(" :LED Turned ON");
     SerialBT.println("LED Turned ON");
   }

   else if(message==turnOFF){
     digitalWrite(LED, LOW);        //Turn LED Off
     Serial.println(" :LED Turned OFF");
     SerialBT.println("LED Turned OFF");
   }

   else{
     Serial.println(" :Invalid Input");
     SerialBT.println("Invalid Input");
   }
 }
 delay(20);
}
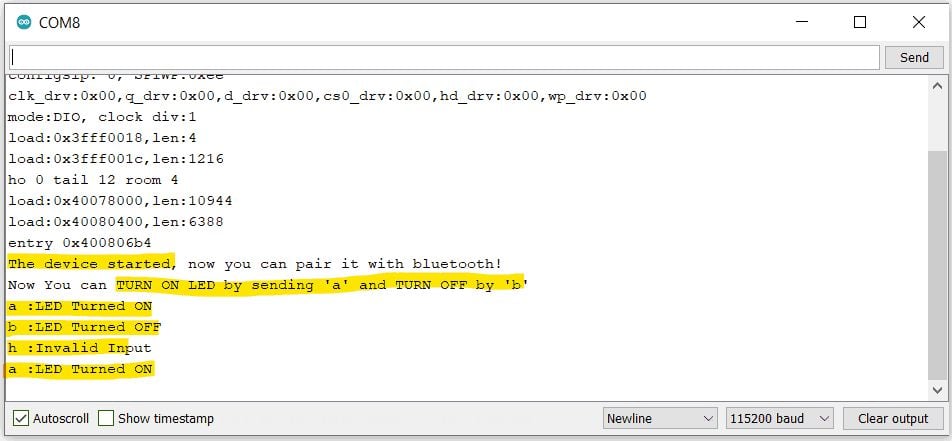
Output on Serial Monitor
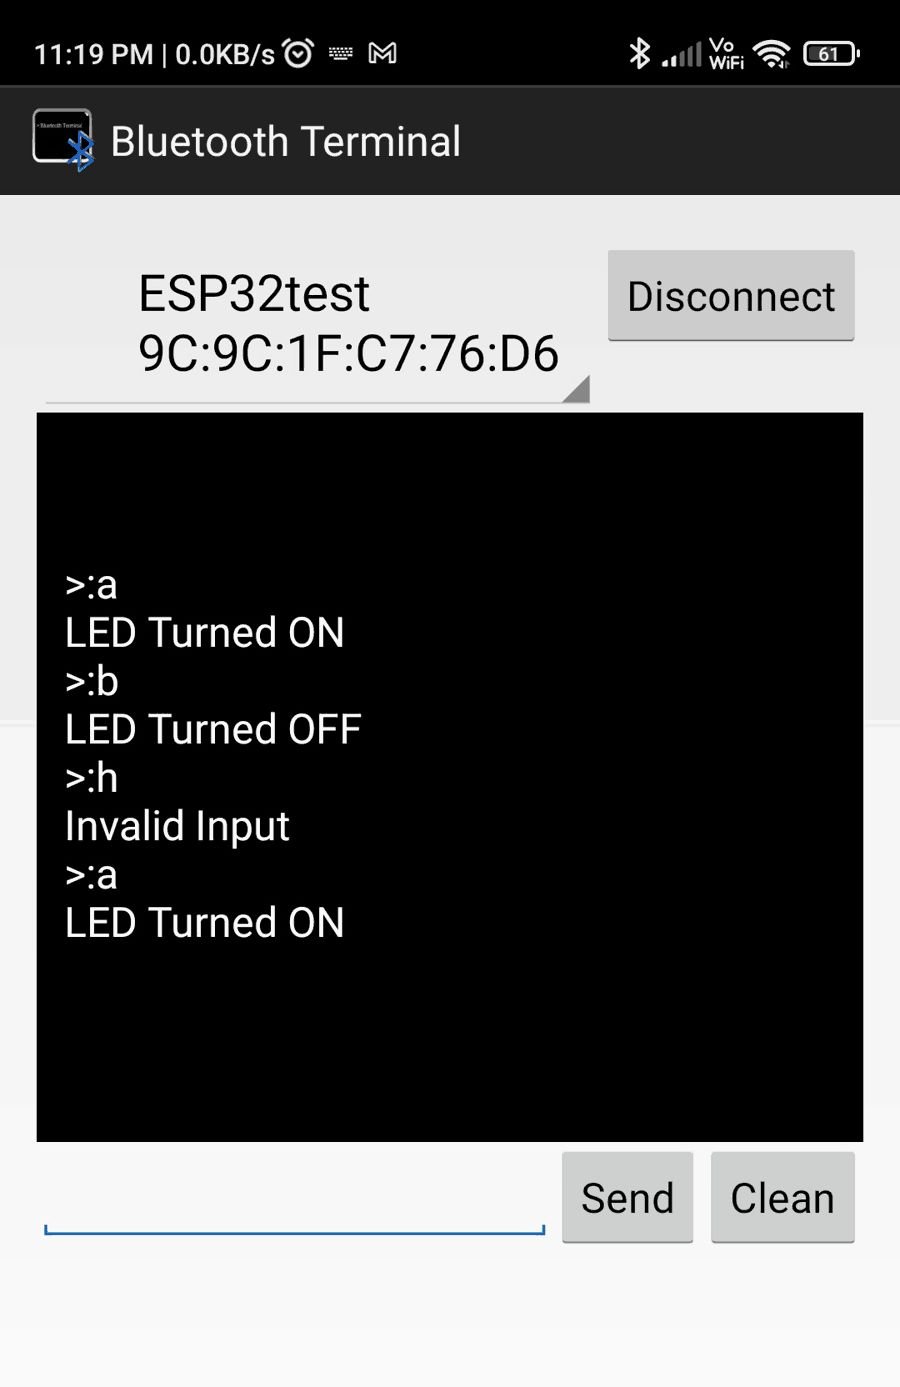
Bluetooth Terminal App Output
How this code Works
- Once we turn ON the Bluetooth, the code scans for any data available on the Bluetooth serial.
if (SerialBT.available()) - Then simply, if the character received is ‘
a’, the Code will Turn ON the LED. Also, it will send the action “LED Turned ON” to the Bluetooth device and computer terminal as well. - If the Character received is ‘
b’, the Code will Turn OFF the LED. - If any other character is received, it will be considered invalid.