Introduction
A touch sensor is an input device that detects physical touch by the human body. This technique can replace mechanical buttons and switches to eliminate mechanical wear and tear.
Types of Touch Sensor:
- Resistive Touch Sensor
- Capacitive Touch Sensor
Resistive Touch:
Resistive touchscreens require pressure as input. A resistive touchscreen is made up of several layers, when we press the touchscreen the top layer contacts the bottom layer and gives the changed resistance at the output.
It is Inexpensive, has better immunity to EMI, has good durability, works with any type of pressure, etc.
Capacitive Touch:
The capacitive touchscreen is mostly preferred over the resistive touchscreen because it is made up of only two layers and works with the only human body because the human body has an electric charge itself.
It is expensive, has a higher touch sensitivity, Dual or multi-touch support, Good visibility in sunlight, Durability better than a resistive touchscreen, etc.
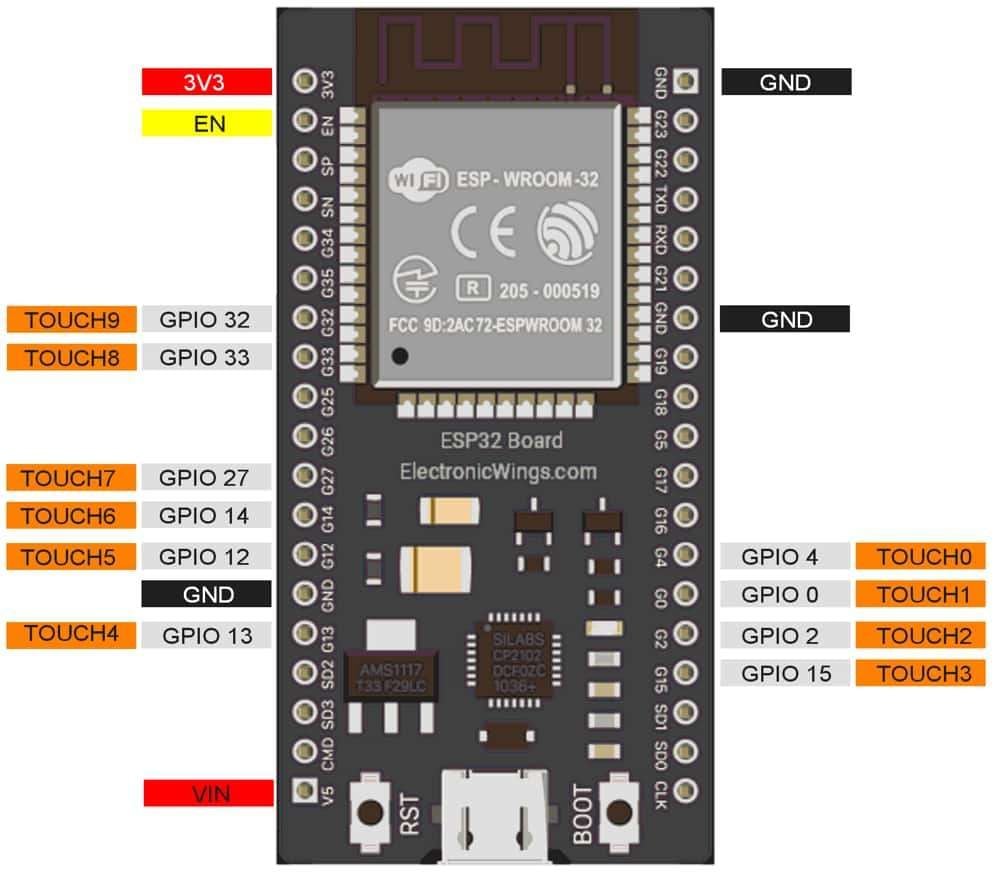
ESP32 supports 10 touch sense pads that support capacitive touch because the touch sensor works with an electric charge of the human body. When a user touches the surface, then it detects its electrical changes on the respective GPIO Pin.
The ESP32 supported touch pins are shown in the below diagram.
Touch Sensor Pins of ESP32
Function to read Touch- sensor Pin
touchRead(touch_sensor_pin_number)
The function reads the value of the defined touch sensor pin, passed to the function.
If we want to read the pin zero, we simply need to use the below example
e.g., touchRead(T0)
Detect Touch Sense of ESP32
Let’s write a code of Touch Sense for ESP32 using Arduino IDE.
Interfacing Diagram
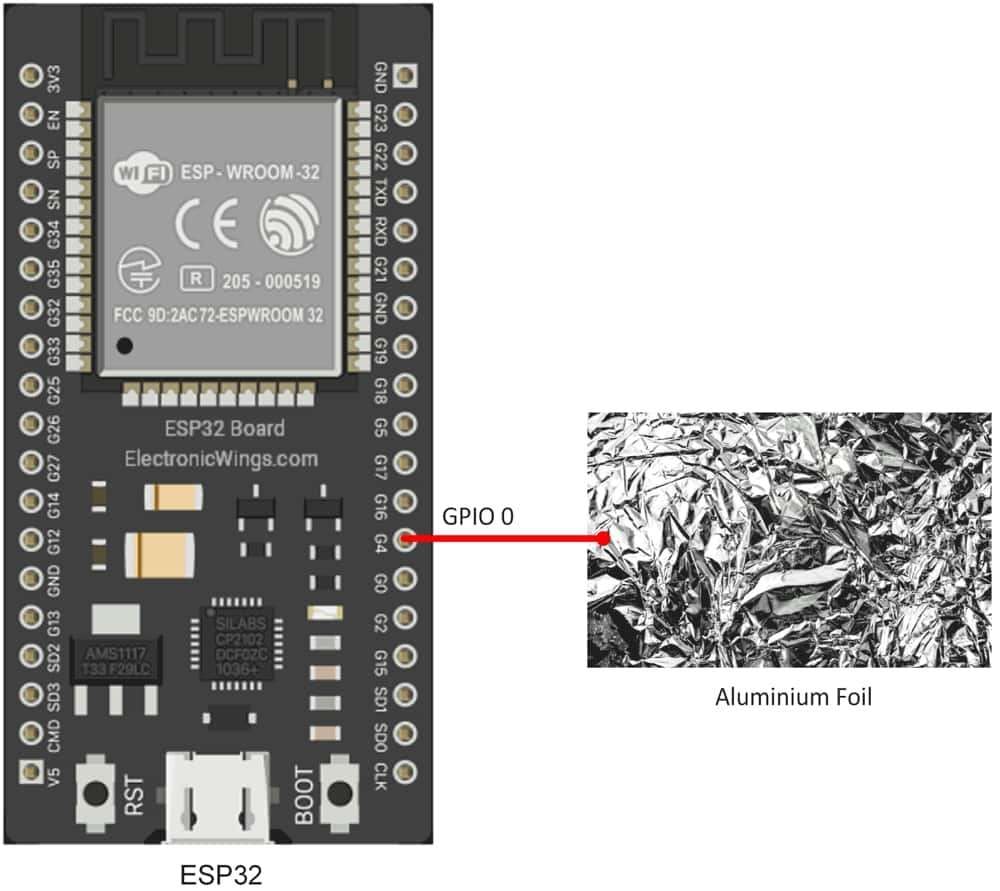
How to test
a. Using aluminium foil as a Touch plate

As we know aluminium is a good conductor, So you can use aluminium foil as a touch plate.
b. Male to female wire or connector
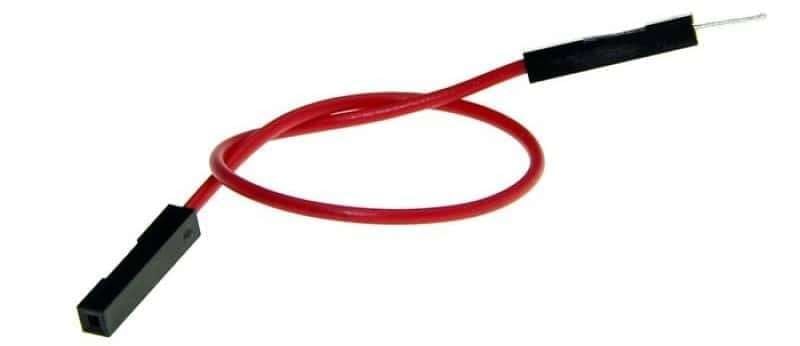
You can use the male-to-female wire/connector for touch sense, one end connected to the ESP32 GPIO pin and another end can use as a touch sense.
c. Copper PCB as a touch plate

We all know the PCB and it purpose, so it is also good conductor we can use as a touch plate.
Sketch for Touch Sensor Using ESP32
/* www.ElectronicWings.com

 Touch Pin with GPIO Pin details of ESP32

 * Touch0 is T0 - GPIO 4
 * Touch1 is T1 - GPIO 0
 * Touch2 is T2 - GPIO 2
 * Touch3 is T3 - GPIO 15
 * Touch4 is T4 - GPIO 13
 * Touch5 is T5 - GPIO 12
 * Touch6 is T6 - GPIO 14
 * Touch7 is T7 - GPIO 27
 * Touch8 is T8 - GPIO 33
 * Touch9 is T9 - GPIO 32
*/

void setup() {
 Serial.begin(9600); /* Set the baudrate to 9600 */
 delay(500);        /* wait for 0.5 Second */
}

void loop() {
 Serial.println(touchRead(4));  /* get value of Touch 0 pin = GPIO 4 and print on serial monitor */
 delay(1000);                   /* wait for 1 Second */
}
Touch reading
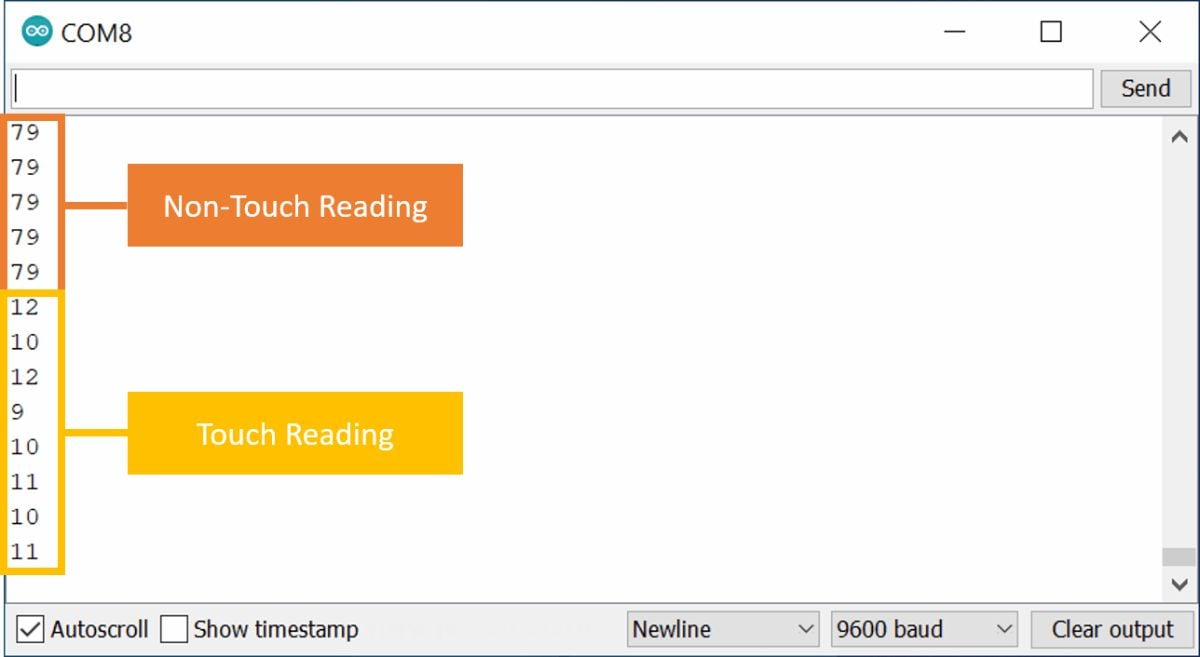
When we touch the touch plate then readings come in between the 0 to 20 range otherwise it shows between 50 to 100
In below output image shows the non-touch reading is 79 and when we touch it shows between 0 to 20
Output
LED Control using Touch Sense of ESP32
Let’s take another example, here we are controlling the led using touch sense input
Interfacing diagram
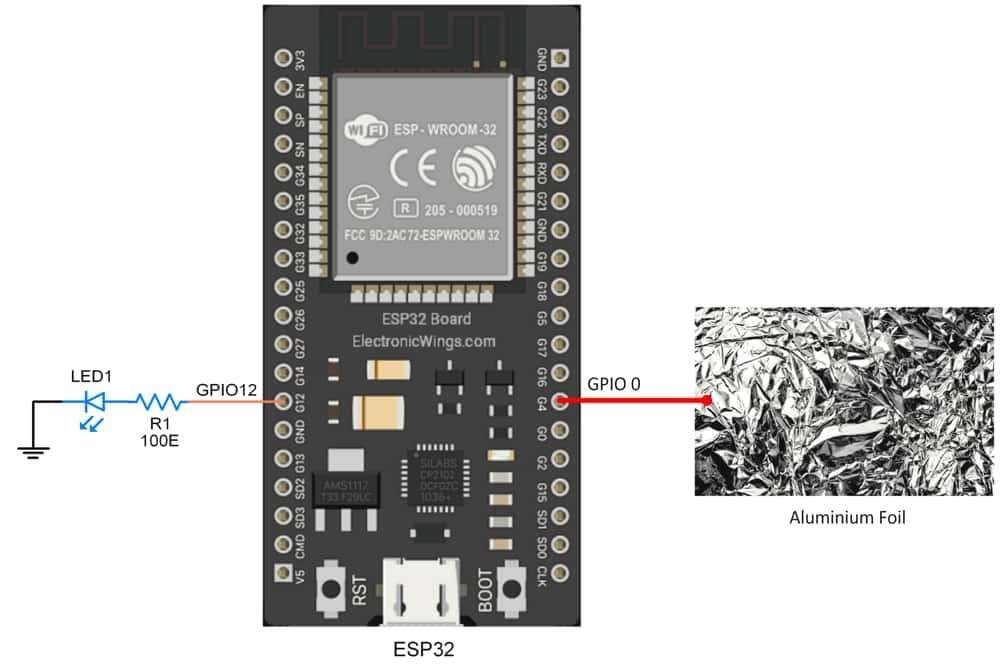
Sketch for LED control using Touch Sensor of ESP32
/* www.ElectronicWings.com

 Touch Pin with GPIO Pin details of ESP32

 * Touch0 is T0 - GPIO 4
 * Touch1 is T1 - GPIO 0
 * Touch2 is T2 - GPIO 2
 * Touch3 is T3 - GPIO 15
 * Touch4 is T4 - GPIO 13
 * Touch5 is T5 - GPIO 12
 * Touch6 is T6 - GPIO 14
 * Touch7 is T7 - GPIO 27
 * Touch8 is T8 - GPIO 33
 * Touch9 is T9 - GPIO 32
*/

/*
LED Controlled by Touch Sensor of ESP32
*/

const int Touch = 4;    /* Define Touch Input Pin to T0 (GPIO 4)*/
const int led  = 12;    /* Define led Pin to GPIO 12 */
int TouchVal, TouchThreshold = 50;

void setup() {
 Serial.begin(9600);   /* Set the baudrate to 9600 */
 pinMode(led, OUTPUT); /* Define led pin as a output */
 delay(500);           /* Wait for 0.5 Second */
}

void loop() {
 TouchVal = touchRead(Touch);
 Serial.println(TouchVal);       /* Get value of Touch 0 pin = GPIO 4 and print on serial monitor*/
 if (TouchVal < TouchThreshold)  /* Check the touch status  */
   digitalWrite(led, HIGH);      /* Turn ON led */

 else
   digitalWrite(led, LOW);       /* Turn OFF led */

 delay(100);                     /* Wait for 100 Mili Second */
}